For this module, we were tasked with creating 3 separate animations of either our own ZBrush characters, or one provided on Canvas. We would have to rig the characters before animating them. I broke down the steps of how I achieved this.
Why am I using a character provided on the Canvas page?
I was considering bringing my zBrush character into Maya to animate, but then I had some trouble in actually getting the mesh to be imported correctly with all of the textures intact. It was a race against time having my character ready for a certain date, but didn’t meet that. Thankfully, having one of the provided characters by the lecturers was an option and not a requirement.
Rigging:
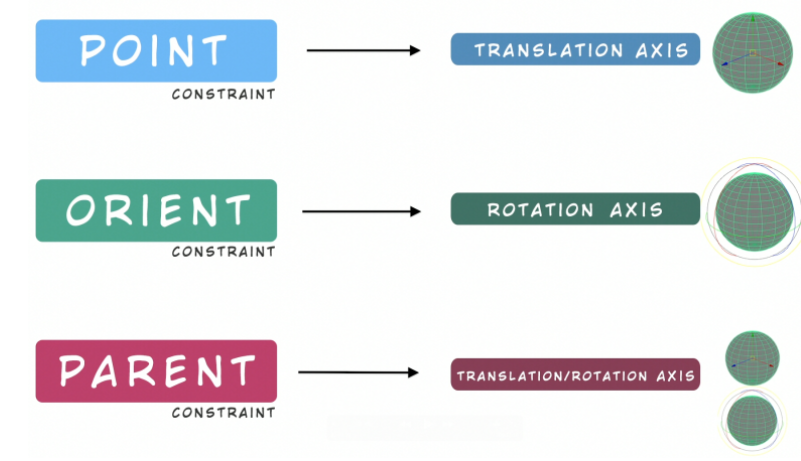
Before starting with the rig, I had to look at the different types of rig constraints for me to implement later when I apply them to the Jerry character. i_want_to_be_an_animator (2018) has listed many different rigging constraints and translations that belong to them. For example, the orient constraint is exclusive to the rotate transform which is handy to apply on the arm and leg joints.
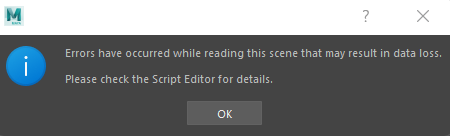
There was one major issue when trying to import the character. This error message was displayed every time the file was opened. The issue was down to opening up the file in a different version of Maya that still had mental ray nodes.
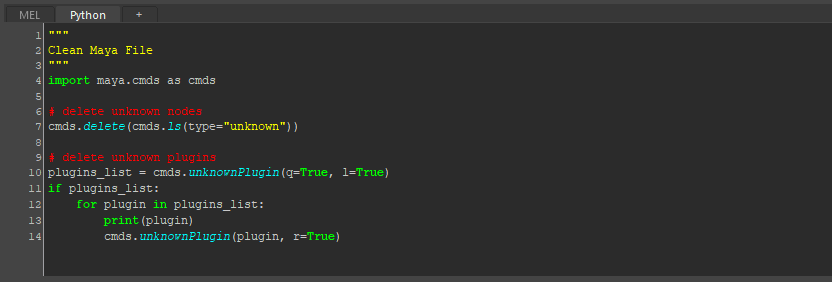
Luckily, there was a fix, and that involved deleting the plug-ins by writing a little bit of code (VFX Pipeline, 2020).
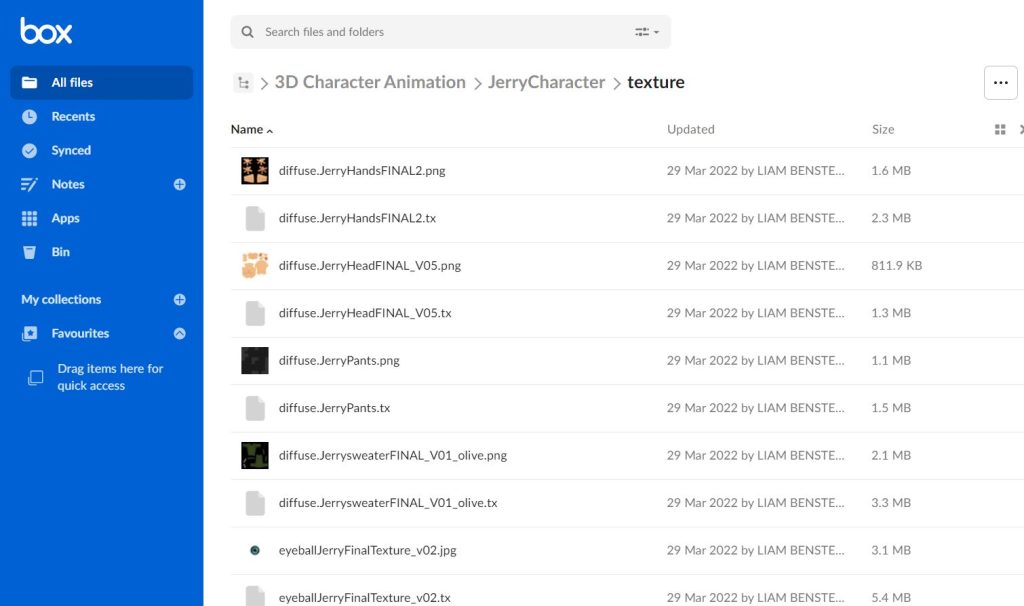
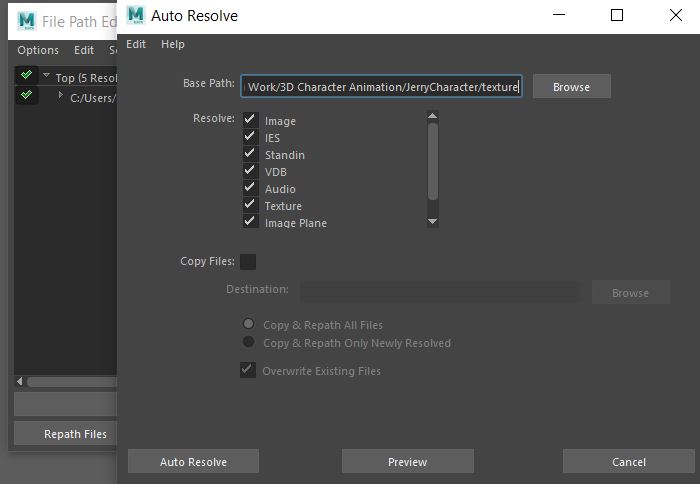
Since I was alternating between different machines to work on these animations, I also had to learn how to reconnect every texture in the scene. I placed the texture files on Box to locate them easily to download on a University PC with the texture folder.
Then once in Maya, I opened the File Path Editor to Auto Resolve the missing texture files (Digital Creator School, 2021).
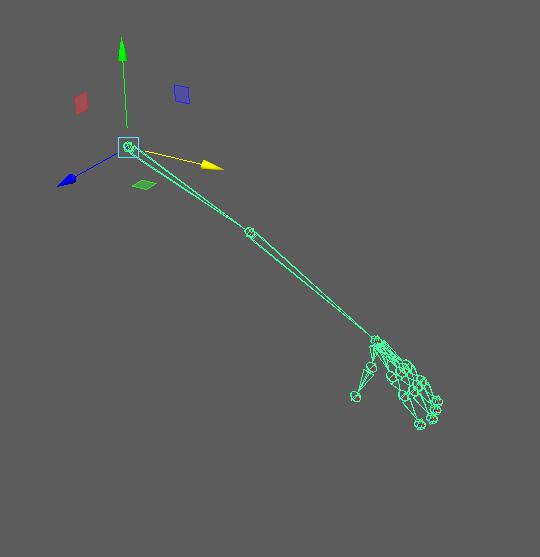
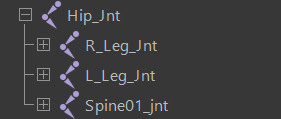
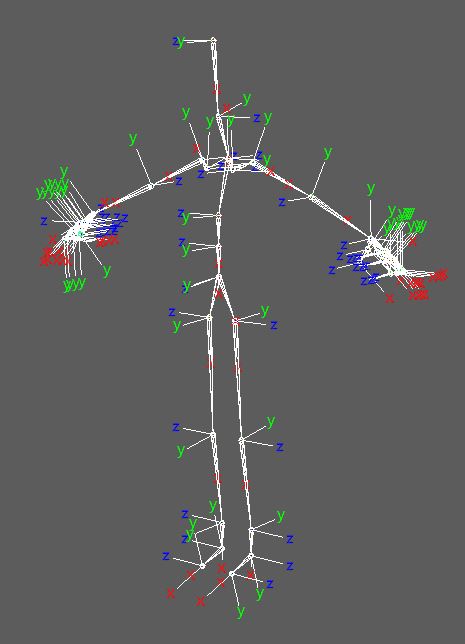
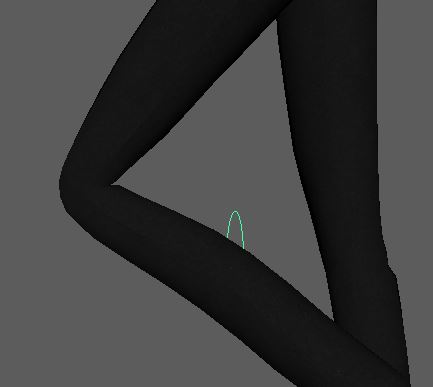
Now with that out of the way, I turned on wireframe mode, ensuring I make the Hip Joint first since that is going to be the parent. Then, I worked my way down to create the leg joint.
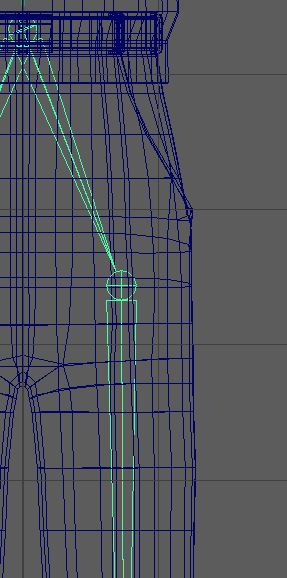
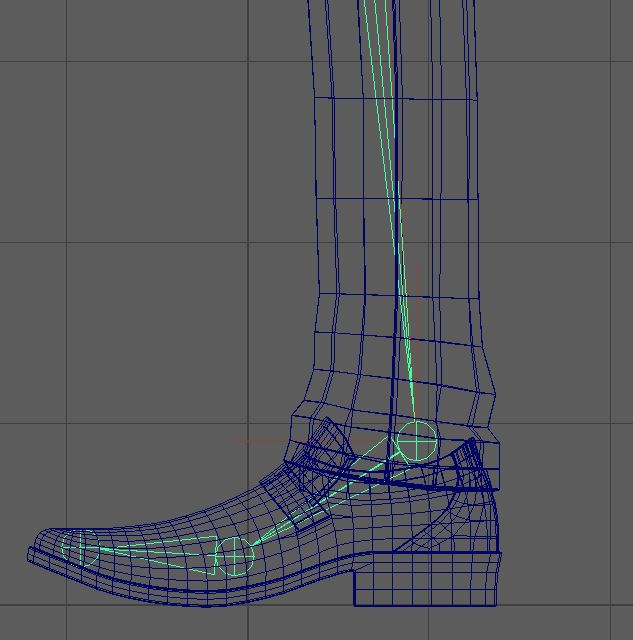
I switched to the side orthographic view to create the knee, ankle, foot and toe joints and aligned them to be inside of the mesh.
Naming the joints were super important to easily identify each joint.
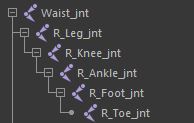
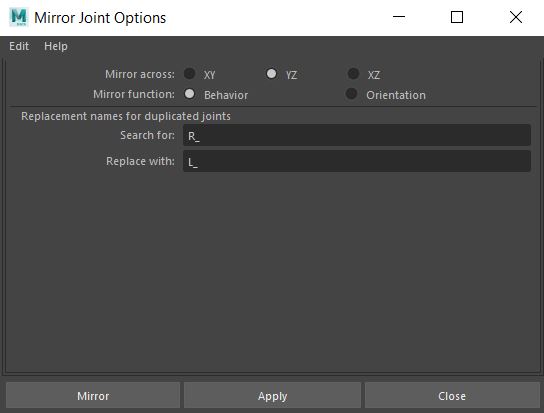
I also mirrored the full leg joint, ensuring I set the prefix from R_ to L_.

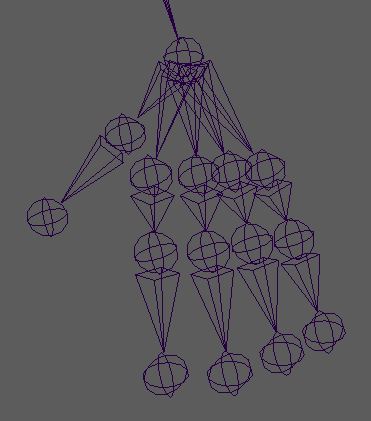
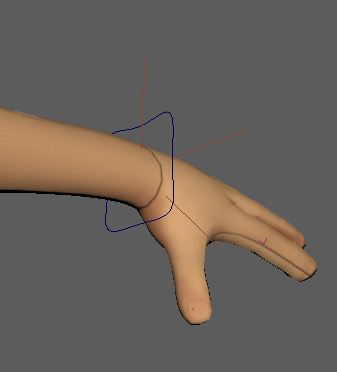
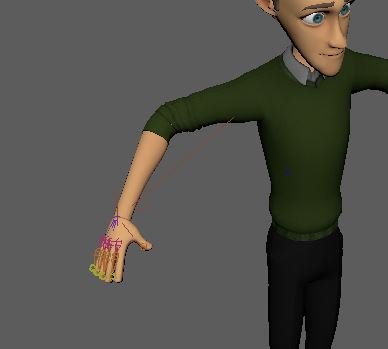
I made sure to create the joints for the arm, hand, and fingers shown below.
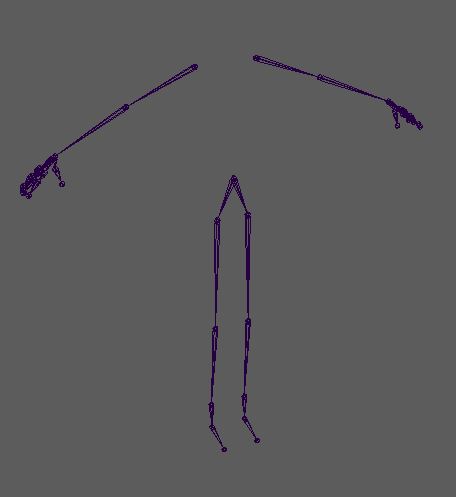
Then I applied the same mirror method to the arms to make something like this.
Next were the spine to head joints. I ensured myself to create a clavicle joint on both sides of the arms and named them to their corresponding joints.

Then I created the neck and head joints to something like this.
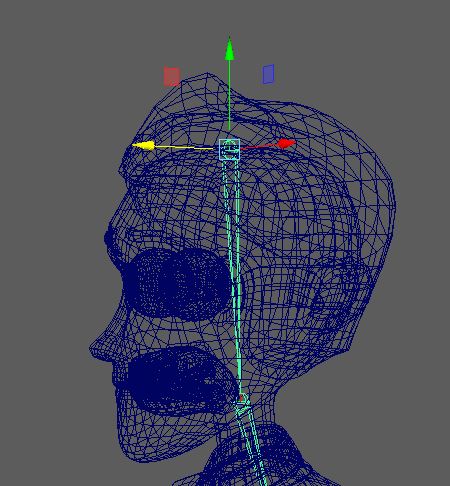
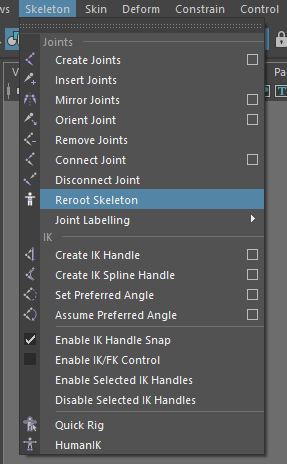
I realized that the head joint was the parent to the entire skeleton, so I had to re-root the hip joint to become the parent so that the mesh and skeleton would move as intended (askNK, 2018).
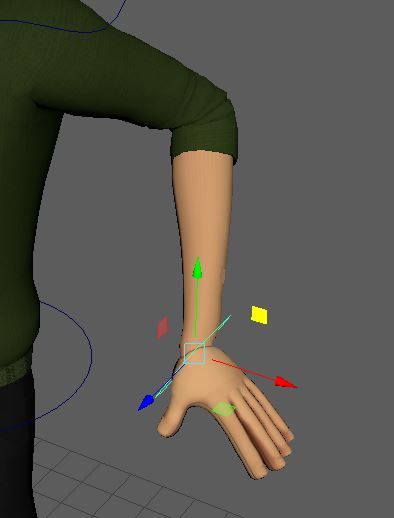
The next thing I had to do was orient each joint correctly so that the character would move naturally. The X axis should always point in the direction of the joint, with the Y axis up and Z axis forward.
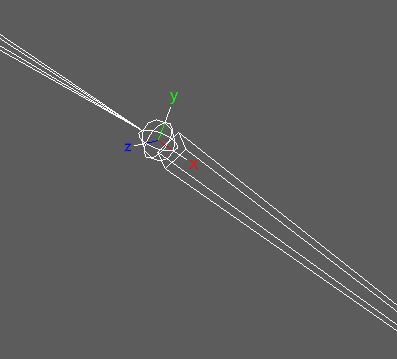
The fingers were in the right axis by default, now this should be okay to apply on the other arm.
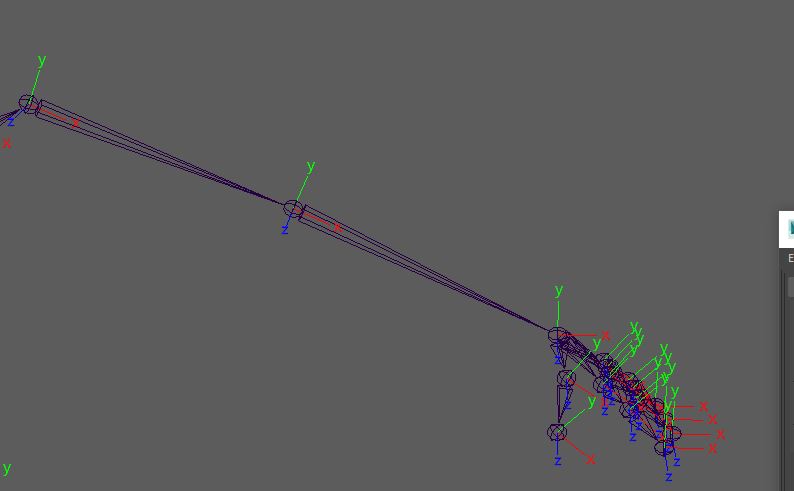
By checking the parent option for the lower half of the mesh to correct the joint orientation, I was able to get it to something like this which should be enough to start constraining the joints to the IK and Control handles.
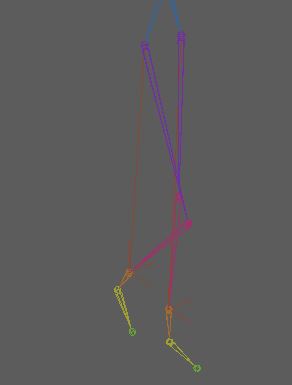
The next thing to do were applying the IK constraints onto the limbs, starting with the legs. I achieved this by selecting the foot joint first, then the hip joint and creating an IK Spline so that the whole leg would move when I moved the spline.
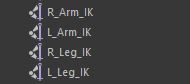
And I also made sure to name all of the IK handles to their corresponding location.
The next thing were making the control handles for each of the limbs that were going to be movable with the IK handles, so the legs and arm joints were attached with the IK movement to avoid having to manually move each joint when it came to animating. I have also changed the shape of the NURBS control handles to differentiate from the leg and arm IK points.
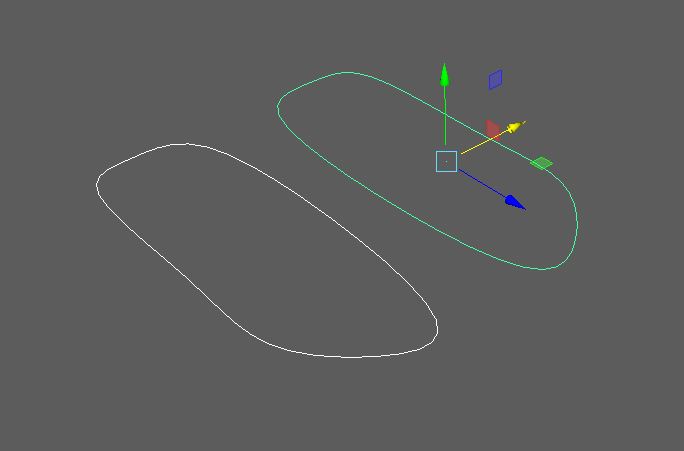
It was also very important that I froze the transformations on the handles so that a new location of 0,0,0 is where I want them to be.
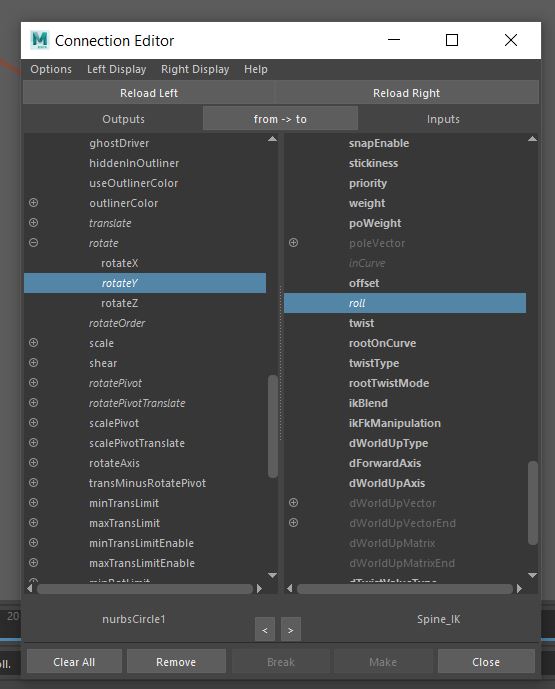
I also had to connect each control handle to the joints and IK Handles for them to move correctly. I ensured myself to repeat the same process for the foot handles as well to get the rig to work as intended.
Binding everything to the skin would allow the body to move depending on the joints and handles. I had to get around an error stating the skin was bound at a different pose. I basically had to delete the bind pose node in the DAG objects of the outliner to get everything to be bound to the skin for it to move properly (niccwhite, 2009).
Weight Painting:
In order for any animation to be started, I had to paint the appropriate influences on each joint to ensure no deformities occur when moving the other joints. I also delved a bit into the inside-out method on the head for instance to ensure that no other part of the body would move with it (Arata, 2017).
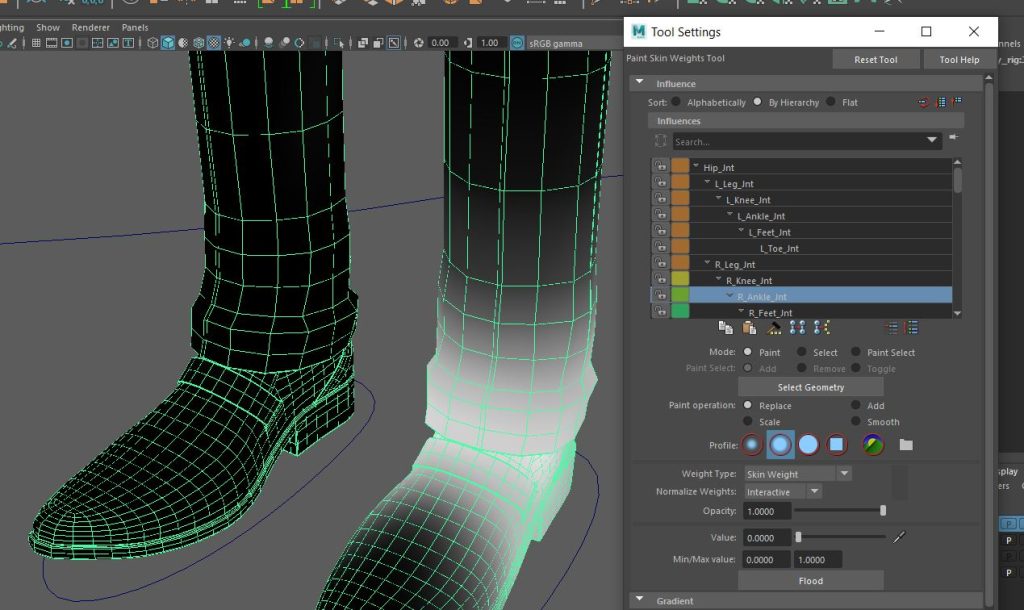
The legs were a bit challenging for me but I added some influence to make the leg appear more muscles-y and made it more natural (Academic Phoenix Plus, 2019b).
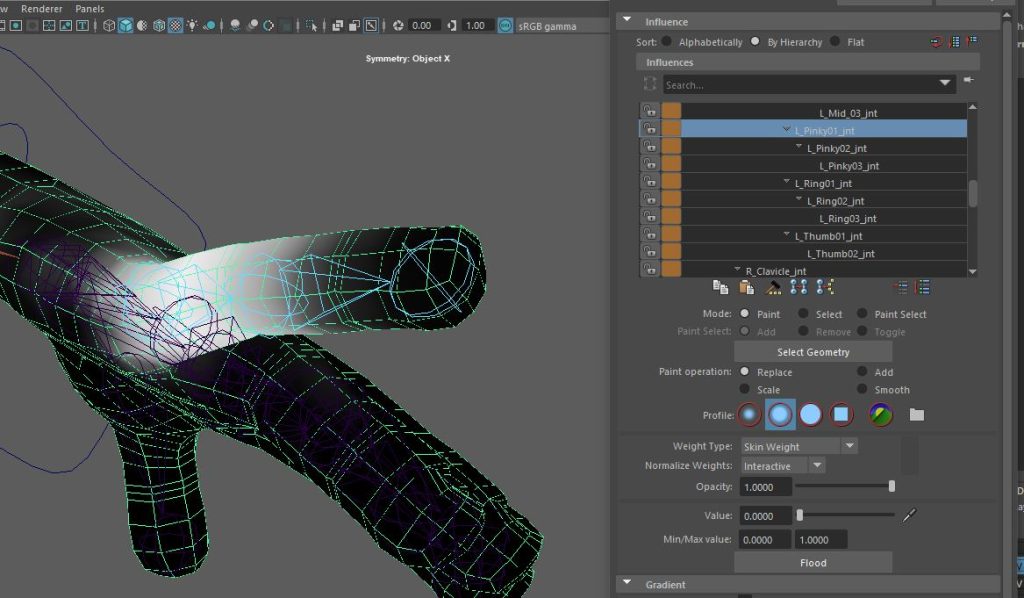
The arms were a little easier since I could check for any deformities whilst moving the joints around to see what had to be fixed.
I also wanted to skin each individual finger on each hand so that I can apply a technique afterwards (Autodesk, 2016). The thumbs were perhaps the hardest part to skin perfectly as they were not on the same angle as the rest of the fingers. This is where I applied the inside-out method adapted from Arata (2017) mentioned previously.
And the same inside-out method would apply to the feet too so that nothing else moves with the specific joint moved or rotated.
Blendshapes:
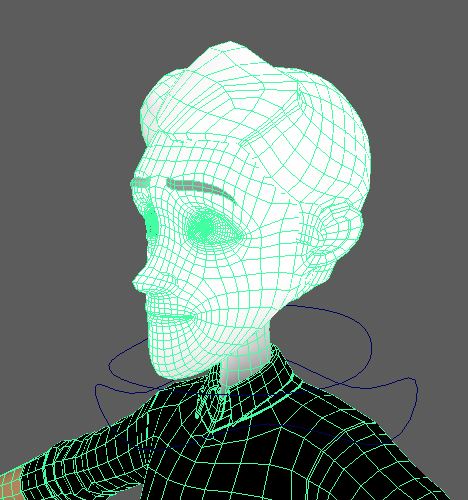
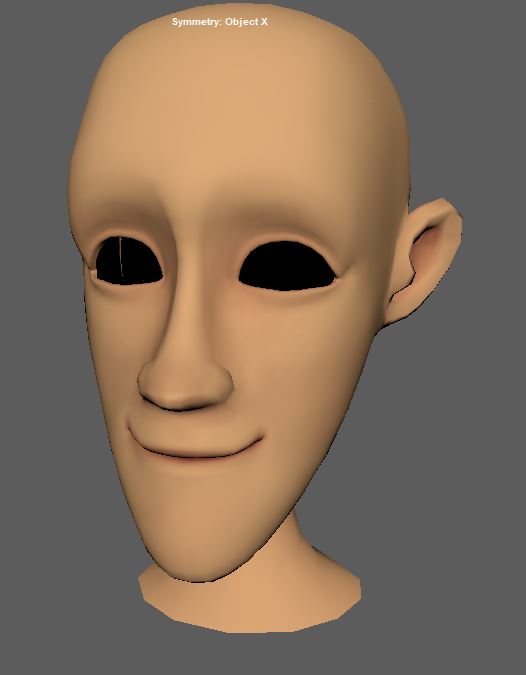
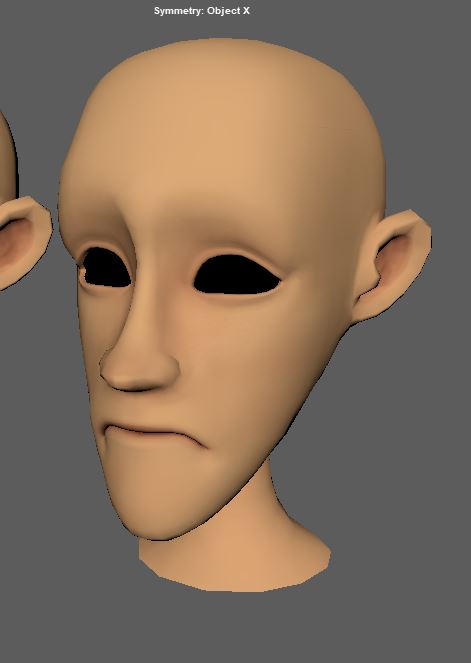
Now it was time to add facial emotions to the character to add more flare into the animation. I duplicate the head mesh a few times, with each head occupying a different expression. These two emotions are just a few examples.
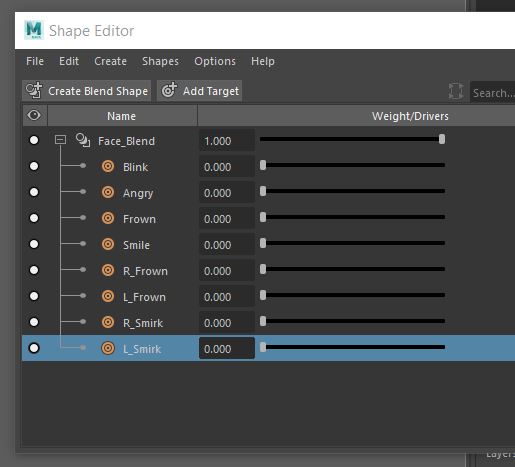
I’ve decided to add 4 more blendshapes to the blendshape node by selecting both the face and the main mesh to specify the Face_Blend node (Autodesk Inc, 2022a). The image below was before I redid the blink blendshape since checking the slider makes the head pop out of its position which made it look broken and unrealistic.
And double checking the outcome yielded some great results from all of the blendshapes.
Set Driven Keys:
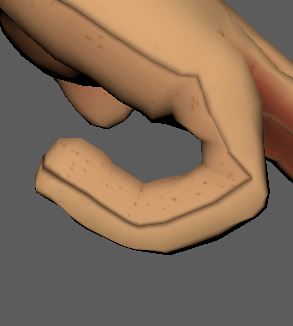
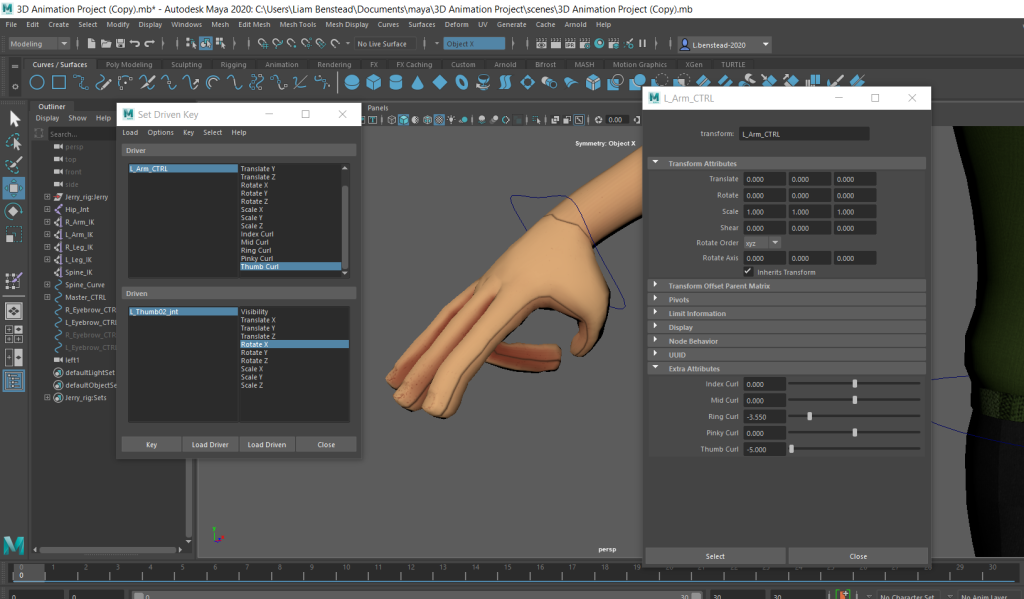
The last thing I needed to do before animating were setting up the finger curls for each hand for when the character wants to transition between hand to fist position. I achieved this by setting driven keys to each finger joint one by one from the arm control (3D Splanchnic, 2018).
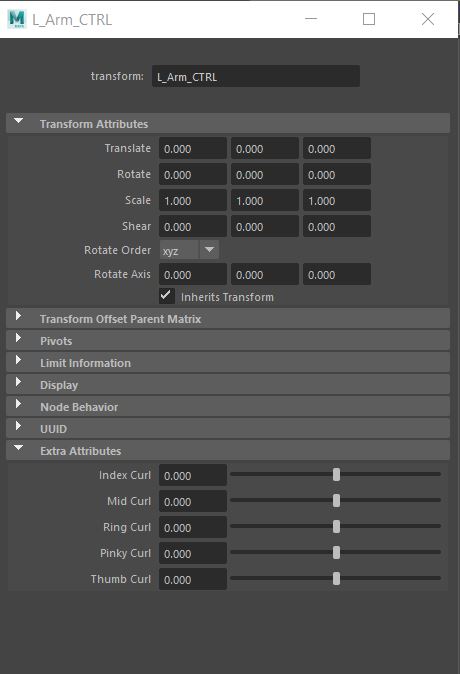
By keying each end point of the finger’s attributes, I was able to let it bend in the way that is satisfying. Of course, I had to adjust the finger’s vertex points by checking for any spiky deformations and fixing it with the weight hammer (Autodesk Inc, 2022b) or painting it back to its original position.
Animation:
Now it was time to animate the three action sequences. Within all of these, I had to apply some of the 12 principles of animation to make these sequences more fluid and natural (AlanBeckerTutorials, 2017).
[Walk Cycle]
My first animation is a basic walk cycle using the style sheet below and a reference video of me walking with my head turning left and right.
And I also took some inspiration from a standard athletic male walk cycle to further aid in the development of how I would go about approaching my own walk cycle animation (endlessreference, 2010).
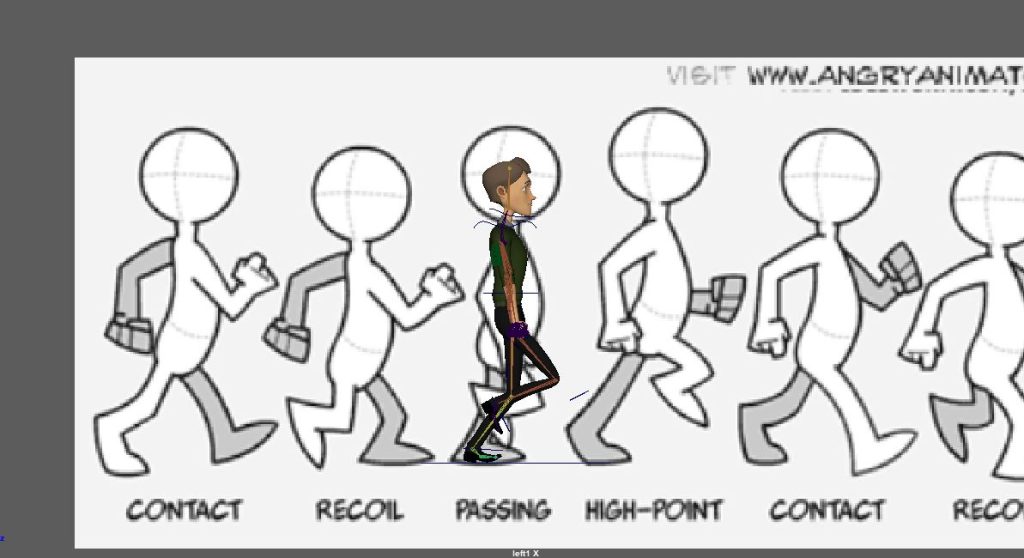
The first thing I did was import the walking style sheet as an image plane as a reference for the animation (Host-Madsen, 2017).
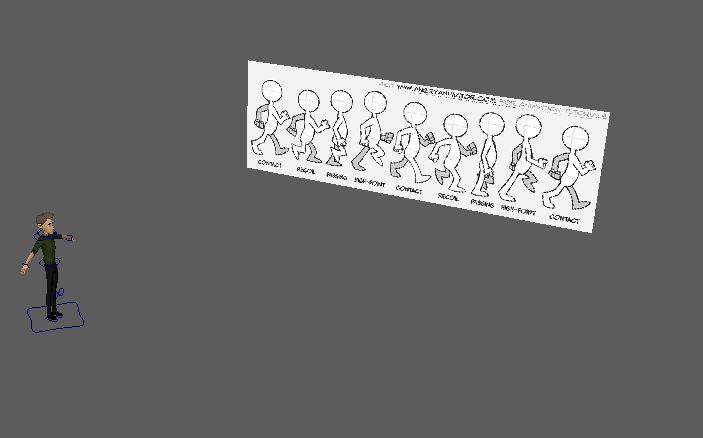
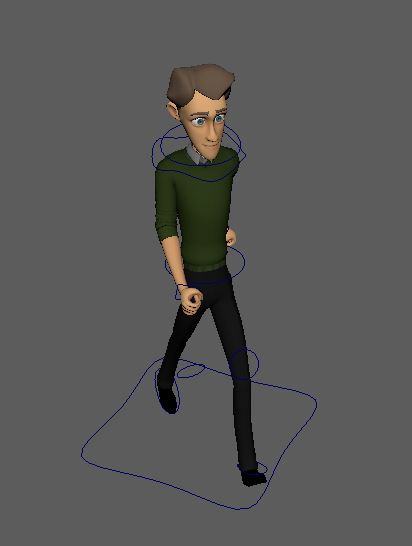
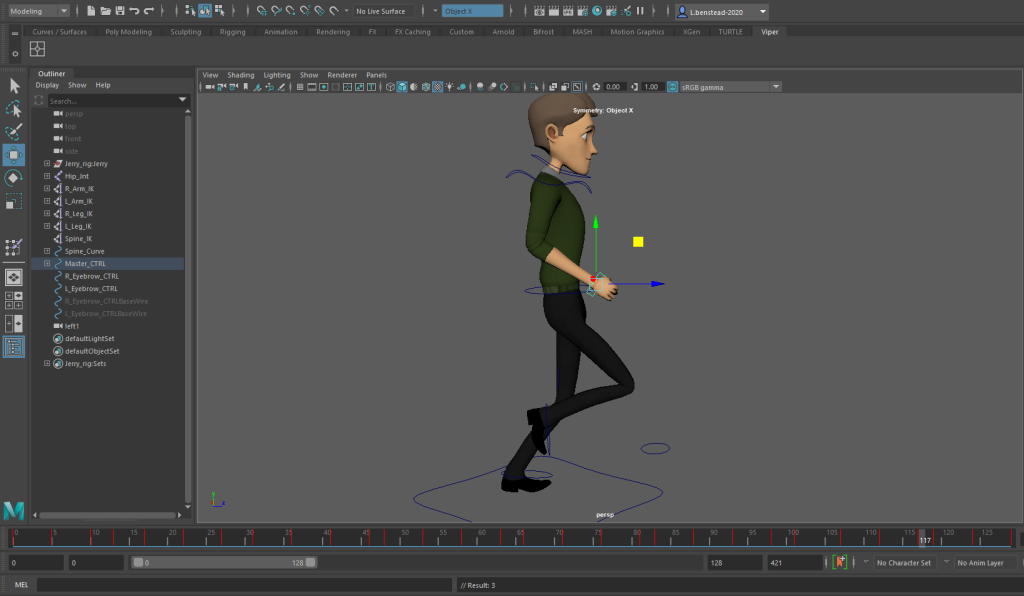
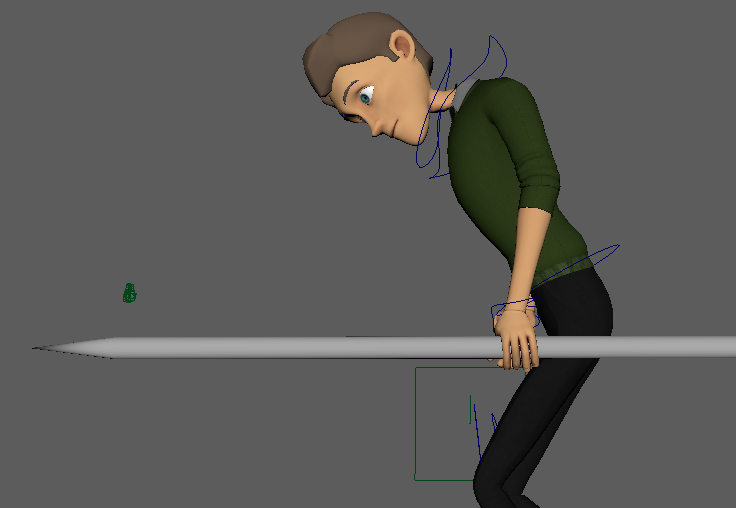
I also posed the character appropriately to match the first key frame and worked on from there.
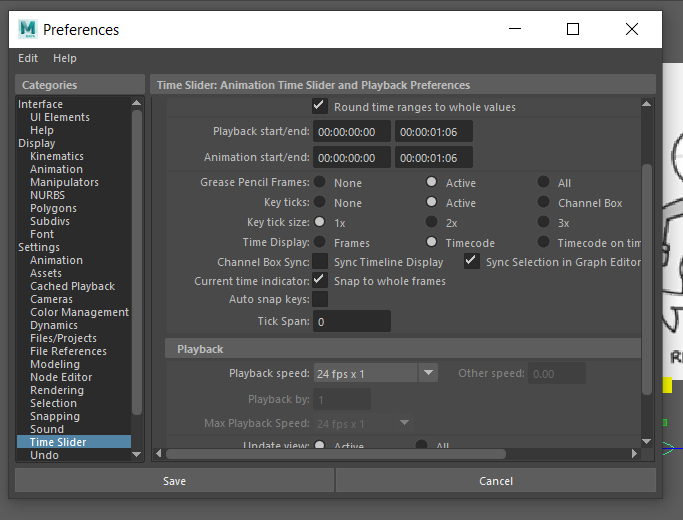
I also set the time display to the timecode to estimate and check how many seconds I have done (Autodesk Inc, 2022c). I would be using this tactic on the other two animations to check if they are over the 10 second mark.
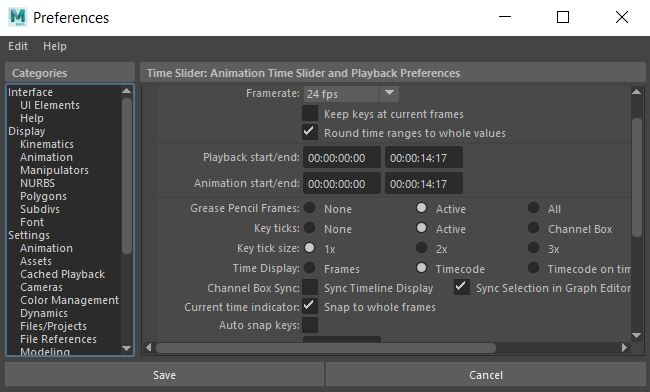
The resulting animation so far was too fast, so I changed the playback speed to a more suitable speed (Autodesk Inc, 2022c).
After blocking out the key frames, I scrubbed back to the start and began adding some little details, such as adapting the head movement from the reference video to make it more natural.
By importing my reference video as an image plane and having it play by scrubbing the timelines allowed me to go back and add in the head movement to match my own, making it more realistic and smoother (Mure, 2018).

After blocking out the initial poses, I checked the timeline to notice that the animation was slower than I hoped, so I sped up the animation by scaling the keyframes further in and snapping them, and also moving a few of them until I was happy with the final result (Jen Education, 2017; raidfire, 2016). I applied this method to the other animations too.


I have also used the animation editor to clean out the walk cycle (Skitty Animates, 2019; Sir Wade Neistadt, 2020). I ensured myself to make a curve around any axis that abruptly banks to apply to ease in and ease out technique (3Dcoach, 2021; Animation tutorial, 2016), and I also ensured myself to apply this to the other animations too.
To really get the animation as smooth as possible, I used splines to make a nice curve as I can possible can without breaking the flow of the walk cycle (Newman, 2021). I applied this to the run cycle and javelin throw animations too to keep a consistent approach.
To finish off the animation, I have applied a physical sky as lighting so that the rendered background isn’t all white and has some substance to the animation (Academic Phoenix Plus, 2019a). I’ve also applied this method to the other animations for consistency.
The zBrush character would adopt the same walk cycle, as the character would be building up the energy by walking.
Output:
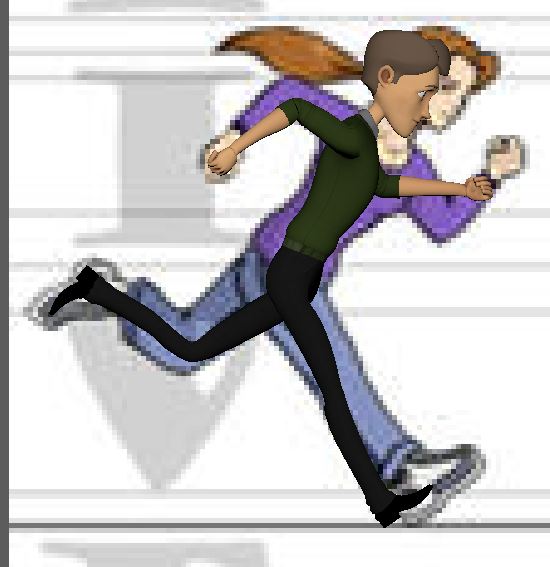
[Run Cycle]
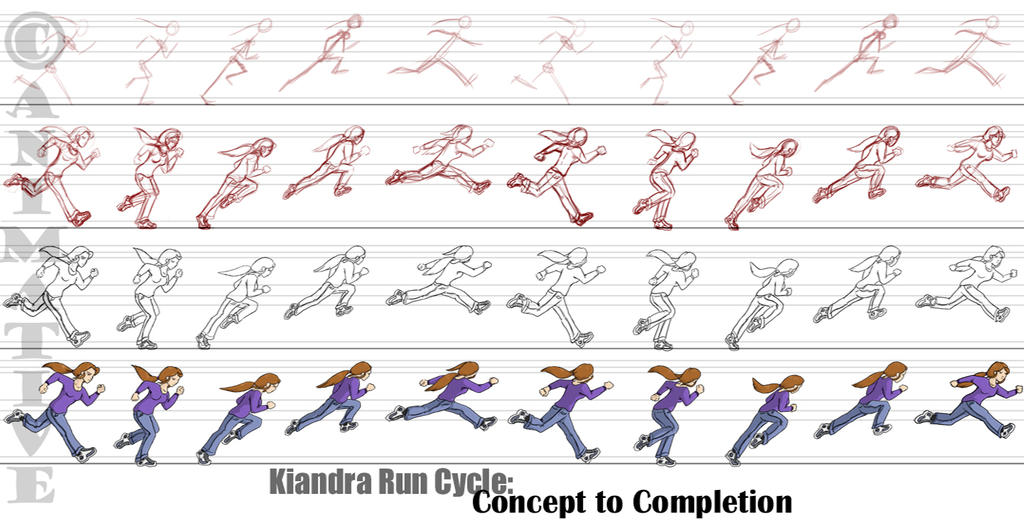
The primary influences for the run cycle animation stem from Crash Bandicoot’s run animation in the N.Sane Trilogy (Iron Galaxy & Vicarious Visions, 2018), a reference video (Mungekar, 2011), and the style sheet below to get a good idea of the key frames for the pose to pose method I would be using.
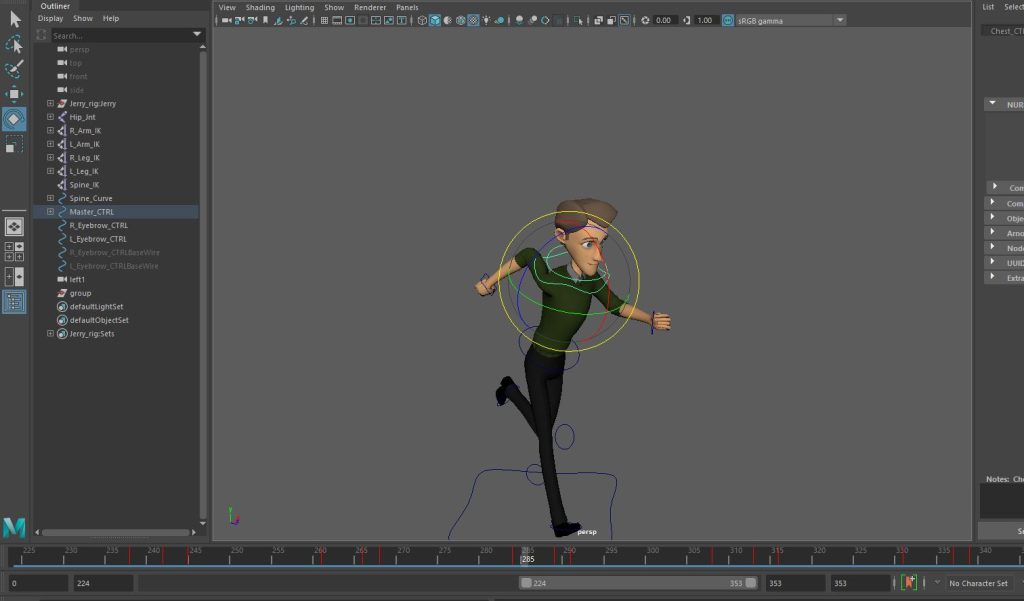
I started by looking at each key poses of a run cycle and figured out the best approach. Both feet would be simultaneously “off the ground for 1, 2, or 3 positions” (matthewhamill706, 2015), so there were times where I had to lift them more than once to capture a true run cycle. The arms also needed to sway to achieve the secondary action too, like with the walk cycle.
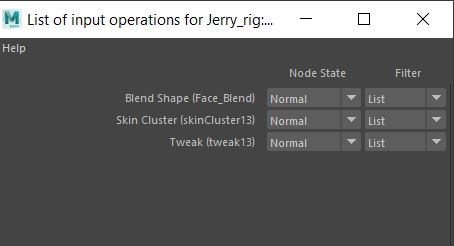
Since I’ve copied the initial file from the walk cycle with the broken blinking blendshape present, there would be another, more limited option for me to overcome the issue, and that is by re-ordering the inputs of the mesh (antCGi, 2020).
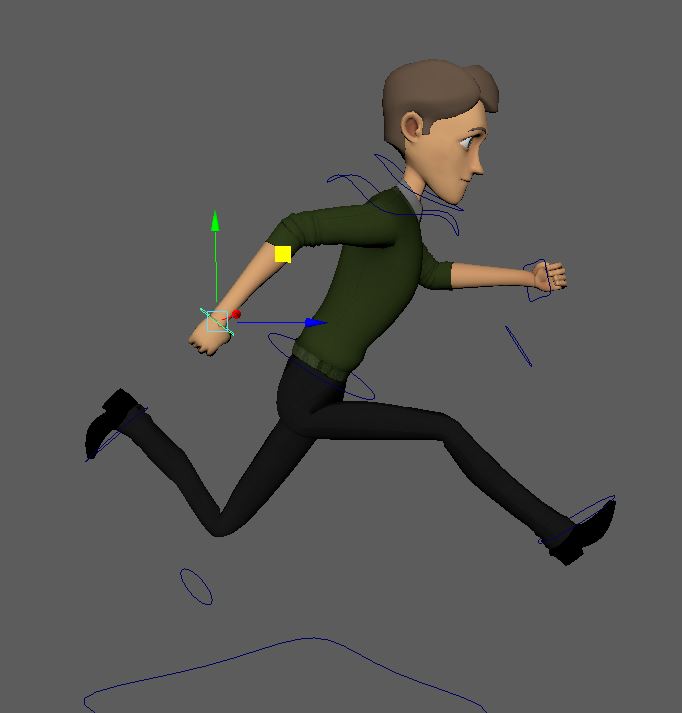
Then I started blocking out the run frames specified in the reference sheet.
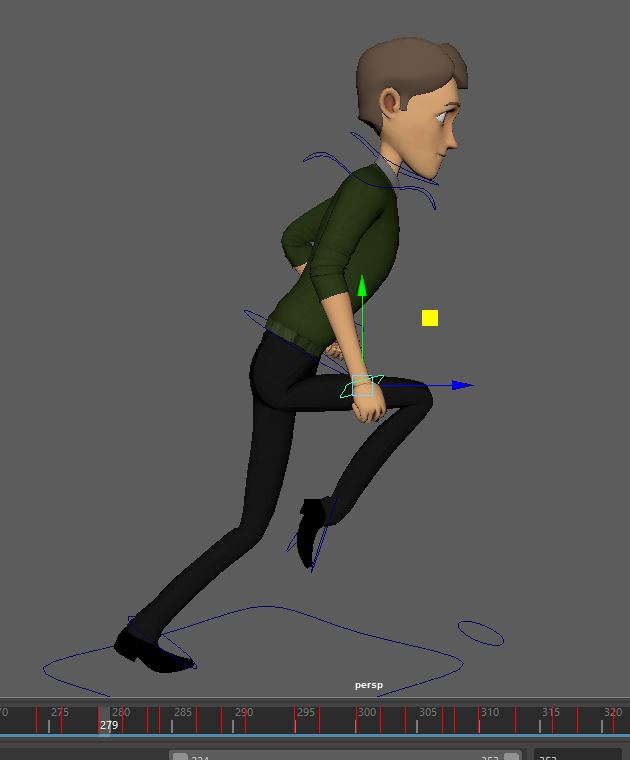
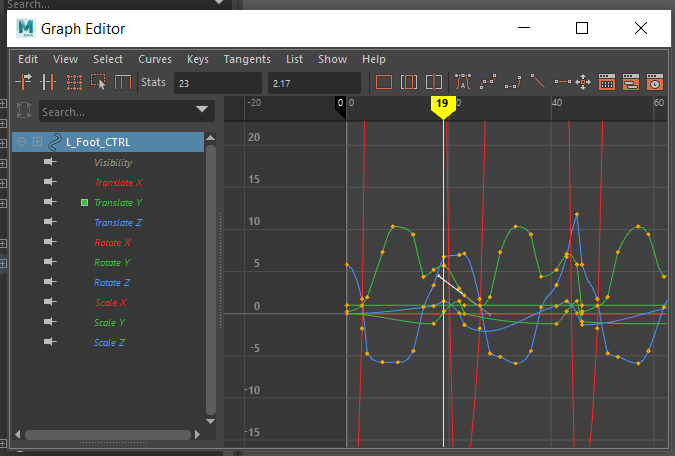
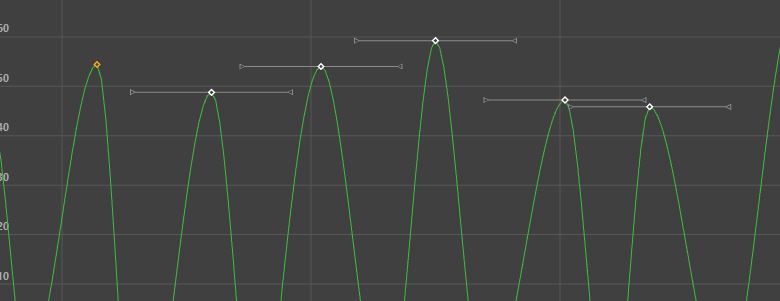
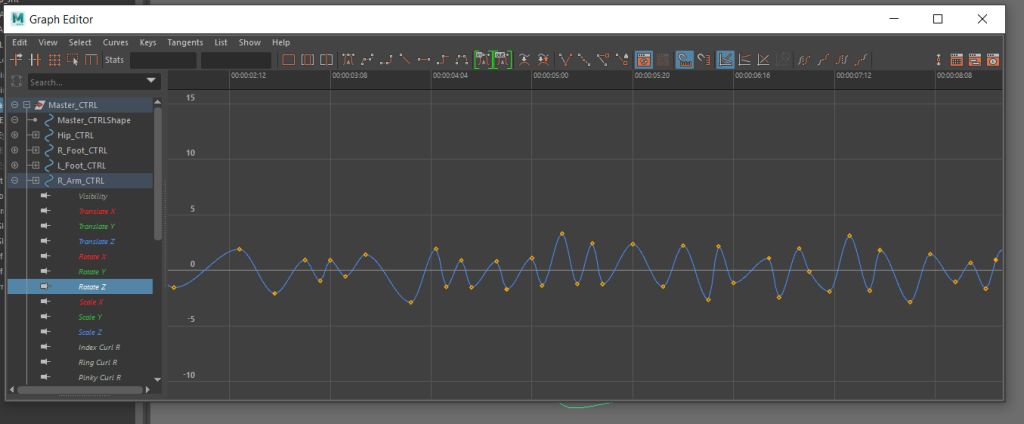
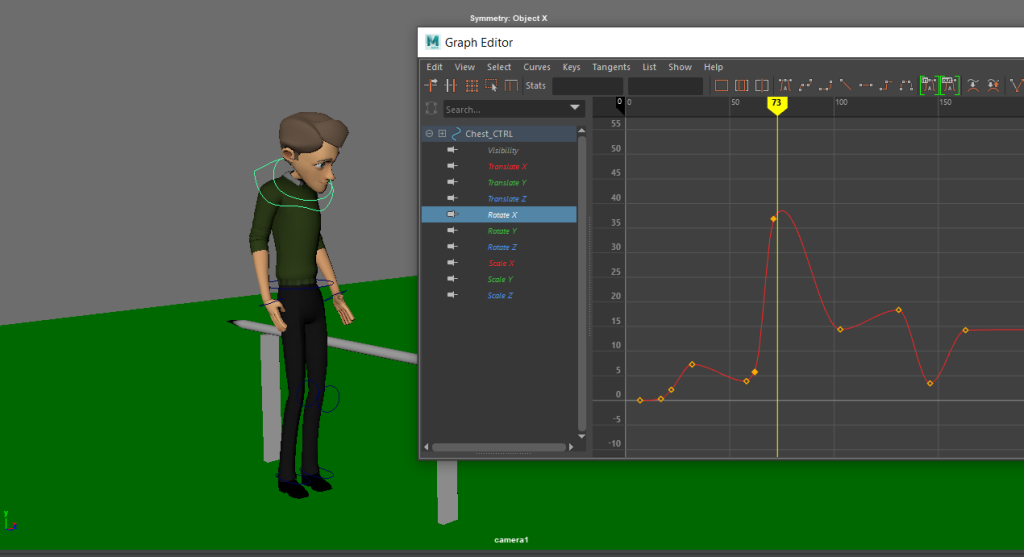
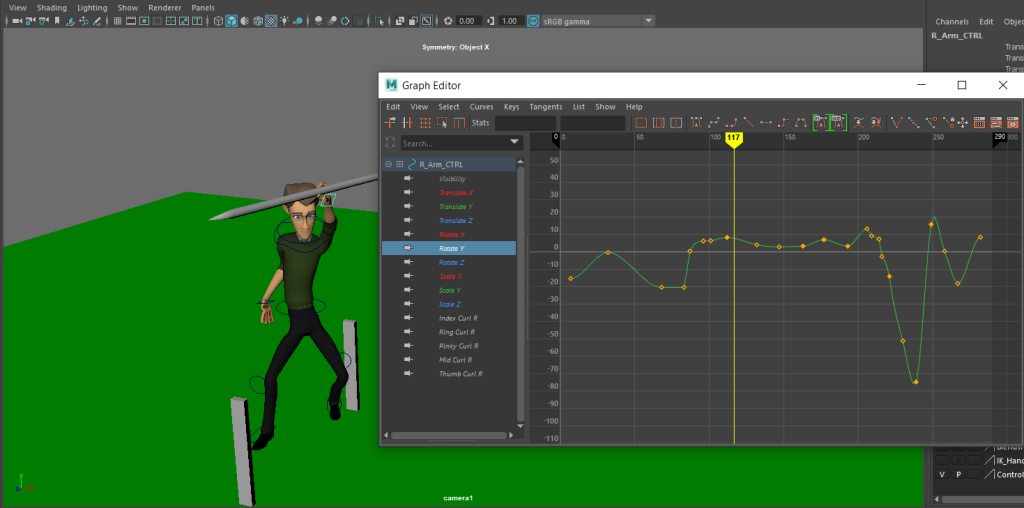
And after blocking out the animation and keyframing the arms and legs to how I want the character to move, I jumped into the graph editor again to smooth out the cycle by correcting the flow of the graph lines. (3Dcoach, 2021). This tactic was reused for the other animations.
Relating this back to my original zBrush sculpt would use the same process, but with more detail to make it unique.
Output:
[Javelin Throw]
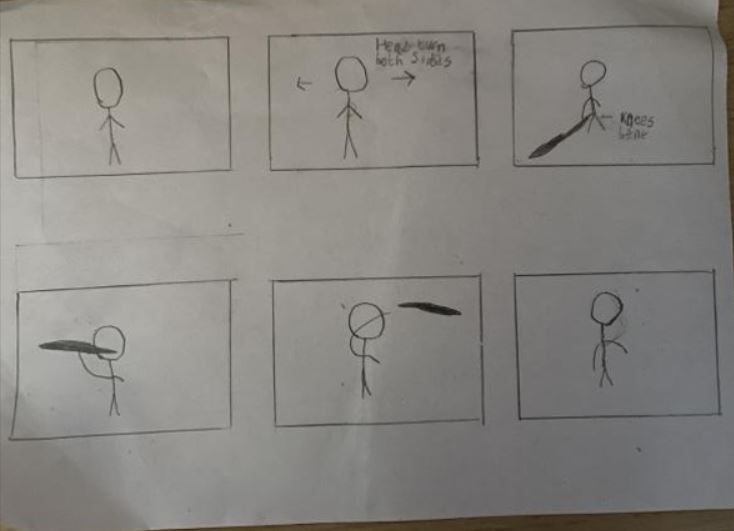
For the last action sequence, I settled on having the character pick up a javelin and launching it in the air after running. The head turn before the sequence would be inspired by the idle animation in the Roblox R15 package (Refitz, 2018; Roblox Corporation, 2022), with the actual javelin sequence being influenced by the javelin event from Mario & Sonic at the Olympic Games Tokyo 2020 (Sega, 2019). I also added my own video reference and animatic to demonstrate how the character will be animated.
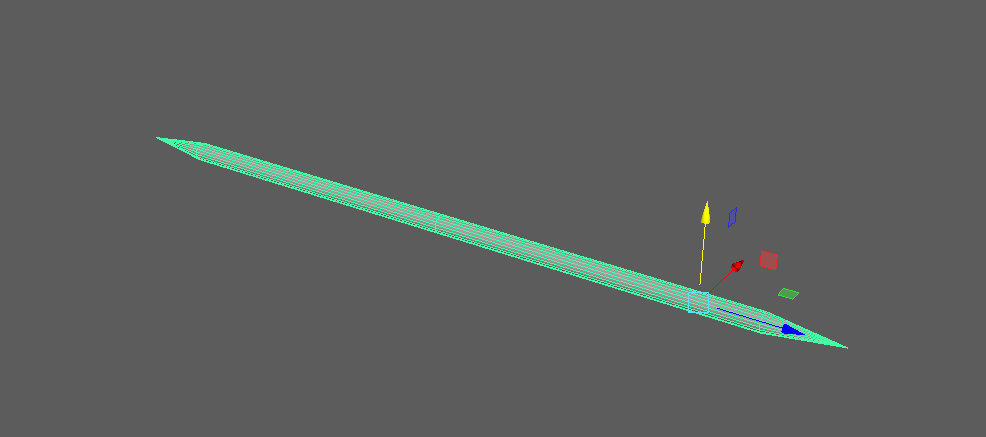
To do this, I had to create a normal looking javelin using the modelling tools within Maya.
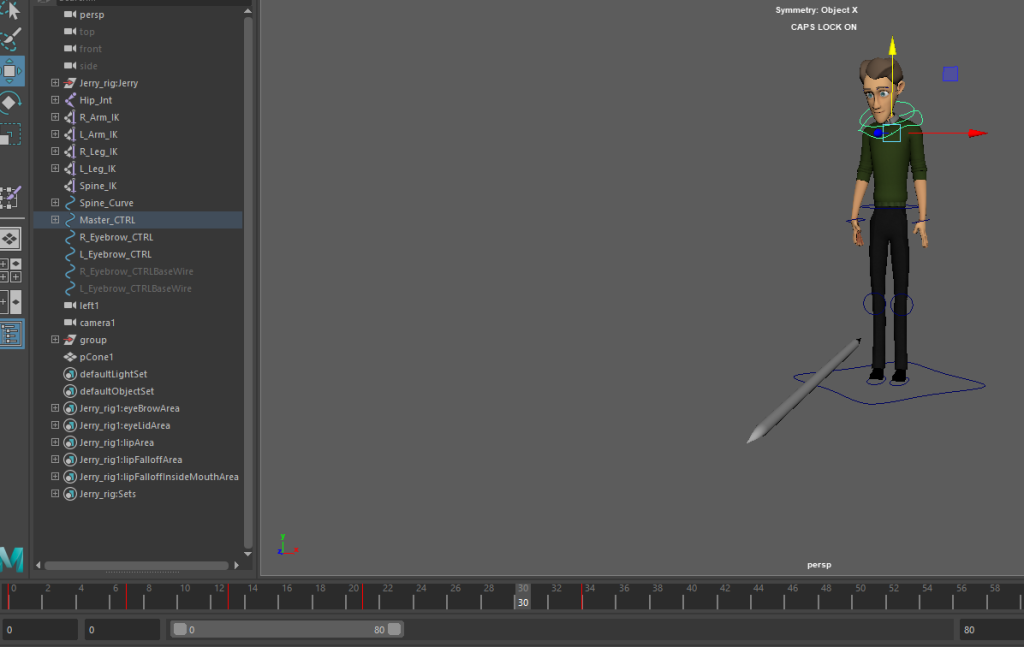
To start off the animation, I had to determine the key frames using my reference video above and block out the individual poses from start to finish. Notice the javelin is on the other side as a placeholder to test how I was going to attach it to the hand.
I also needed to know how to make it so that the character interacts with the object at certain frames by carefully scrubbing through the timelines and parenting the javelin to the character and vice versa for the object to be influenced by the character’s hand (MBC, 2014).
I didn’t want the character to stay in one place while running, so I keyframed the master controller to the point where both feet are in the air to make the animation more seamless and realistic.

I needed to animate the camera to focus on the character running from the javelin stand. I did so by setting a keyframe up every time the character’s feet leave the ground, as I had done with the master control frames.

Now all I had to do was smooth out the animation in the graph editor like before.
If I had rigged my original character, this would definitely be what the character would do since he was an athlete.
Output:
Lighting the video outputs:
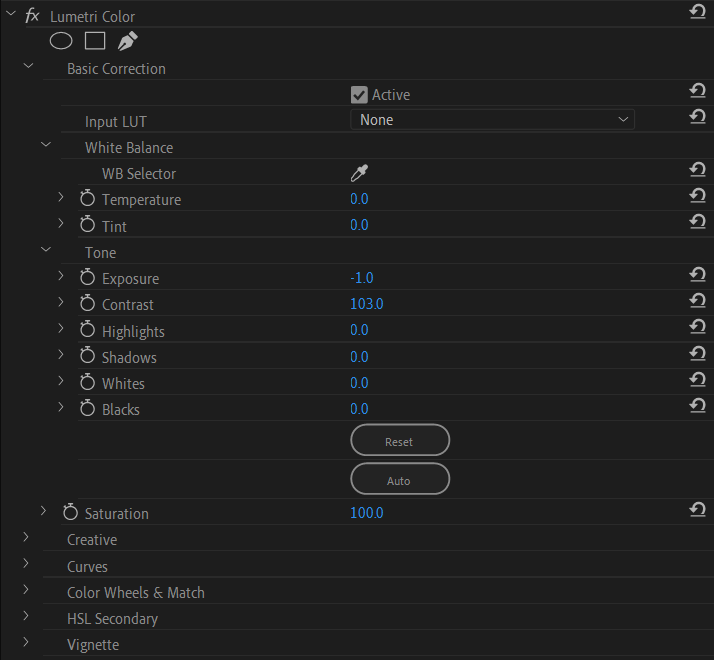
I noticed that the rendered outputs looked a little too bright which I fixed by going into Premiere Pro and applying a Lumetri Colour effect to the clip to darken them (VideoMontage Guide, 2021).
Evaluation:
Overall, I think the animations look fairly great and it shows how much effort I put into them. There are some glaring issues, primarily with how the rig limits me to do certain poses, such as having his arms crossed and bending the elbow joint since I’ve animated this entirely within IK. For next time, I should switch from IK to FK on the arms primarily to give me more options to animate the character as I was hoping it would go. I could also improve the curves in the graph editor as some of them flatline a little, giving the animations stiff movements at parts. Other than that, I feel like this is a sufficient set of animations and would try and expand more in the future.
References:
3Dcoach (2021) Fix Bad Animation (in Maya) [Video] Available online: https://www.youtube.com/watch?v=2Mm-OfVJhJU&t=53s [Accessed 11th May 2021]
3D Splanchnic (2018) Using Set Driven Keys in Maya [Video] Available online: https://www.youtube.com/watch?v=WsFbhpiVIXk&t=12s [Accessed 4th April 2022]
Academic Phoenix Plus (2019a) Maya 2018 – Exterior Lighting using Physical Sky in Arnold [Video] Available online: https://www.youtube.com/watch?v=qpa6fzVGdHs [Accessed 17th May 2022]
Academic Phoenix Plus (2019b) Rigging for Beginners: Painting Weights in Maya [Video] Available online: https://www.youtube.com/watch?v=lA5gVcLEZWk&t=1493s [Accessed 27th March 2022]
AlanBeckerTutorials (2017) 12 Principles of Animation (Official Full Series) [Video] Available online: https://www.youtube.com/watch?v=uDqjIdI4bF4 [Accessed 17th May 2022]
Animation tutorial (2016) EASE IN & EASE OUT TUTORIAL #tutorial#animation#learning#3d animation [Video] Available online: https://www.youtube.com/watch?v=fHOOmYeyQOw [Accessed 17th May 2022]
Animative (2007) Kiandra Run Cycle Frames [Artwork] 11 July. Available online: https://www.deviantart.com/animative/art/Kiandra-Run-Cycle-Frames-59554456 [Accessed 19th April 2022]
antCGi (2020) #CGTip | How Do I Fix My Broken Blendshapes? [Video] Available online: https://www.youtube.com/watch?v=HsjKXZKrF7I&t=206s [Accessed 2nd May 2022]
Arata, D. (2017) Maya Weight Painting Tutorial (The Inside-out method) [Video] Available online: https://www.youtube.com/watch?v=xu73Yqgju14&t=1s [Accessed 4th April 2022]
askNK (2018) Re-Rooting Maya Joint in a Minute [Video] Available online: https://www.youtube.com/watch?v=v0fyxYT15r0 [Accessed 21st March 2022]
Autodesk (2016) Rooster Teeth ‘RWBY’ Tutorial #4: Skin Fingers Evenly in Maya [Video] Available online: https://www.youtube.com/watch?v=PReIZsIXPiM [Accessed 5th April 2022]
Autodesk Inc (2022a) Add target shapes. Available online: https://knowledge.autodesk.com/support/maya/learn-explore/caas/CloudHelp/cloudhelp/2018/ENU/Maya-CharacterAnimation/files/GUID-E980D990-53FC-47C9-B9B8-C8451E933665-htm.html [Accessed 11th April 2022]
Autodesk Inc (2022b) Fix smooth weights. Available online: https://knowledge.autodesk.com/support/maya/learn-explore/caas/CloudHelp/cloudhelp/2015/ENU/Maya/files/GUID-E2091D85-86D6-479A-B793-61B933E6CECF-htm.html#GUID-E2091D85-86D6-479A-B793-61B933E6CECF [Accessed 6th April 2022]
Autodesk Inc (2022c) Time Slider preferences. Available online: https://knowledge.autodesk.com/support/maya/learn-explore/caas/CloudHelp/cloudhelp/2022/ENU/Maya-Customizing/files/GUID-51A80586-9EEA-43A4-AA1F-BF1370C24A64-htm.html [Accessed 13th April 2022]
dermot (2010) tutorial-2 : walk cycle. angry animator. 26 November. Available online: https://www.angryanimator.com/word/2010/11/26/tutorial-2-walk-cycle/ [Accessed 12th April 2022]
Digital Creator School (2021) Reconnect Missing Texture Files in Maya [Video] Available online: https://www.youtube.com/watch?v=UwdJgddxEpw [Accessed 29th March 2022]
endlessreference (2010) Athletic Male Standard Walk. Animation Reference Body Mechanics [Video] Available online: https://www.youtube.com/watch?v=vq9A5FD8G5w [Accessed 10th May 2022]
Host-Madsen, H. (2017) Autodesk Maya – Importing Image Planes [Video] Available online: https://www.youtube.com/watch?v=zcH1TCnXBP8 [Accessed 12th April 2022]
i_want_to_be_an_animator (2018) TUTORIAL 11 – MAYA CONSTRAINT RECAP. I WANT TO BE…AN ANIMATOR. 25 January. Available online: https://iwanttobeananimator.wordpress.com/2018/01/25/tutorial-11-maya-constraint-recap/ [Accessed 12th March 2022]
Iron Galaxy & Vicarious Visions (2018) Crash Bandicoot™ N. Sane Trilogy [Video Game] Activision. Available online: https://store.steampowered.com/app/731490/Crash_Bandicoot_N_Sane_Trilogy/ [Accessed 10th May 2022]
Jen Education (2017) Moving frames on the Timeline [Video] Available online: https://www.youtube.com/watch?v=4GYiGAuYvJY [Accessed 17th April 2022]
matthewhamill706 (2015) RUN CYCLE. MATTHEW’S ANIMATION ANTICS. 8 December. Available online: https://matthewhamill706.wordpress.com/2015/12/08/run-cycle/ [Accessed 11th March 2022]
MBC (2014) Maya 3D Animation – Animating a character to pick up objects(Parent/Constraint) [Video] Available online: https://www.youtube.com/watch?v=sRETjE5smyo [Accessed 11th May 2022]
Mungekar, S. (2011) Run Cycle – Animation Reference [Video] Available online: https://www.youtube.com/watch?v=lCpotGr0TB4 [Accessed 25th May 2022]
Mure, V. (2018) How to import video in Maya – MAYA 2018 [Video] Available online: https://www.youtube.com/watch?v=pLFEOipdDyY [Accessed 2nd May 2022]
Newman, H. (2021) When to go from BLOCKING to SPLINE – EP 04 – Season 02 [Video] Available online: https://www.youtube.com/watch?v=TIBzcsOt2FU&t=1036s [Accessed 11th May 2022]
niccwhite (2009) “Skin was bound at a different pose”?. Autodesk Forums. 19 September. Available online: https://forums.autodesk.com/t5/maya-animation-and-rigging/quot-skin-was-bound-at-a-different-pose-quot/td-p/4114965 [Accessed 31st March 2022]
raidfire (2016) Perform Transform on all keyframes. Autodesk Maya Forums. 15 October. Available online: https://forums.autodesk.com/t5/maya-animation-and-rigging/perform-transform-on-all-keyframes/td-p/6624981 [Accessed 1st May 2022]
Refitz (2018) R6 & R15 & Rthro Animations In 1 Minute | ROBLOX [Video] Available online: https://www.youtube.com/watch?v=IP9hrQw2O1s&t=18s [Accessed 14th May 2022]
Roblox Corporation (2022) Roblox [Online Game/Platform] Available online: https://www.roblox.com/ [Accessed 14th May 2022]
Sega (2019) Mario & Sonic at the Olympic Games Tokyo 2020 [Video Game] Sega.
Sir Wade Neistadt (2020) The Secret Animation Workflow You Should Be Using [Video] Available online: https://www.youtube.com/watch?v=7dAzk2oeQoA&t=826s [Accessed 20th May 2022]
Skitty Animates (2019) HOW TO USE MAYA’S GRAPH EDITOR – 3D Animation Tutorial [Video] Available online: https://www.youtube.com/watch?v=3QdGbuR1tQQ&t=236s [Accessed 11th May 2022]
VFX Pipeline (2020) How to delete old unwanted Missing Maya Plug ins [Video] Available online: https://www.youtube.com/watch?v=Sl8QYWm0O2k&t=356s [Accessed 4th March 2022]
VideoMontage Guide (2021) How to Darken Video in Adobe Premiere Pro? (make video darker) [Video] Available online: https://www.youtube.com/watch?v=q8TVo7SYuwc [Accessed 17th May 2022]