For the 2nd Level Design assignment, I have to go beyond just a simple blockout and attempt to make the level complete with lighting, asset packs, audio, blueprints and more. I have come up with a good amount of reference images of what the castle is going to look like inside and outside, with the addition of some castles from existing video games. Here they are.
Reference Images
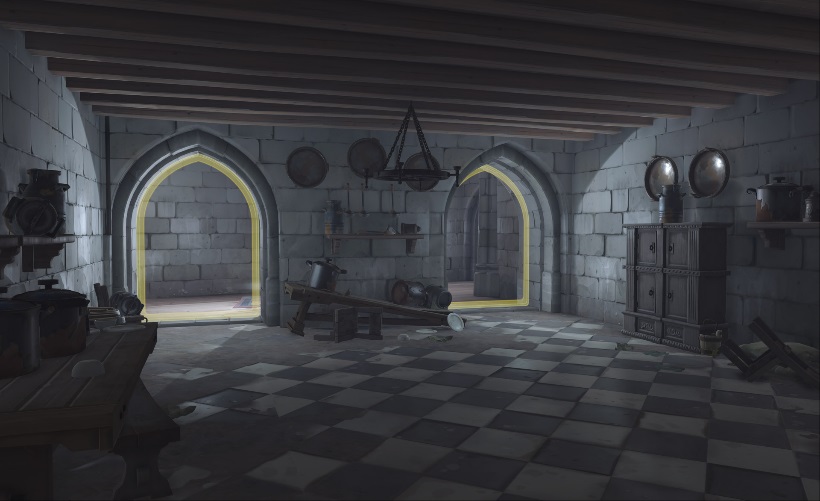
I’m probably going to take some inspirations from how the walls of the castle are constructed from this image along with some of the assets that may immerse the player and feel like they are actually there.
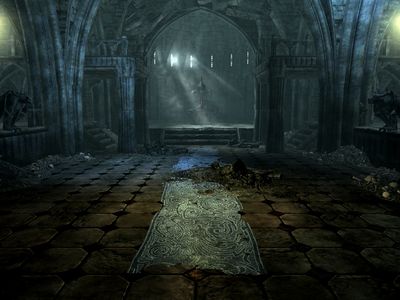
The castle from the Dawnguard add-on for the 2011 Skyrim game is another excellent example of how moody I want my castle to be. The rug on the floor is a nice touch, and hopefully I will be able to implement something like that in my version.
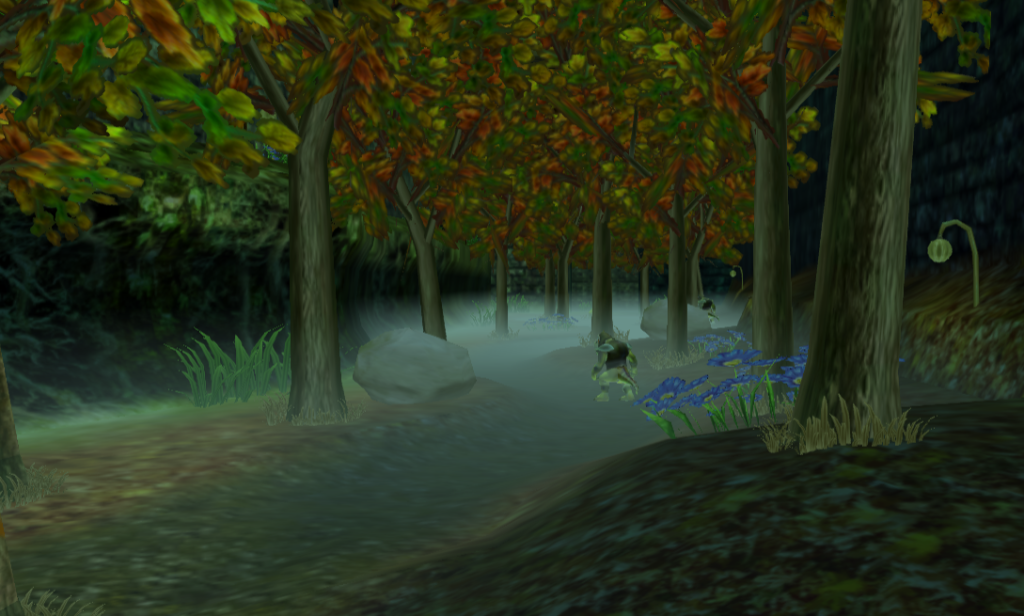
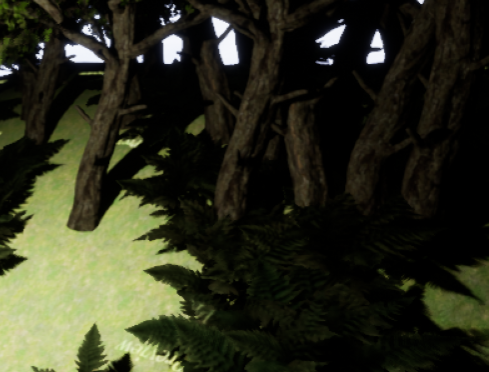
The outskirts of Lightfoot Village from Star Fox Adventures (Nintendo, 2002) is a great inspiration for me when it comes to adding in some of the elements surrounding the castle’s landscape, including the low fog on the ground and the trees.

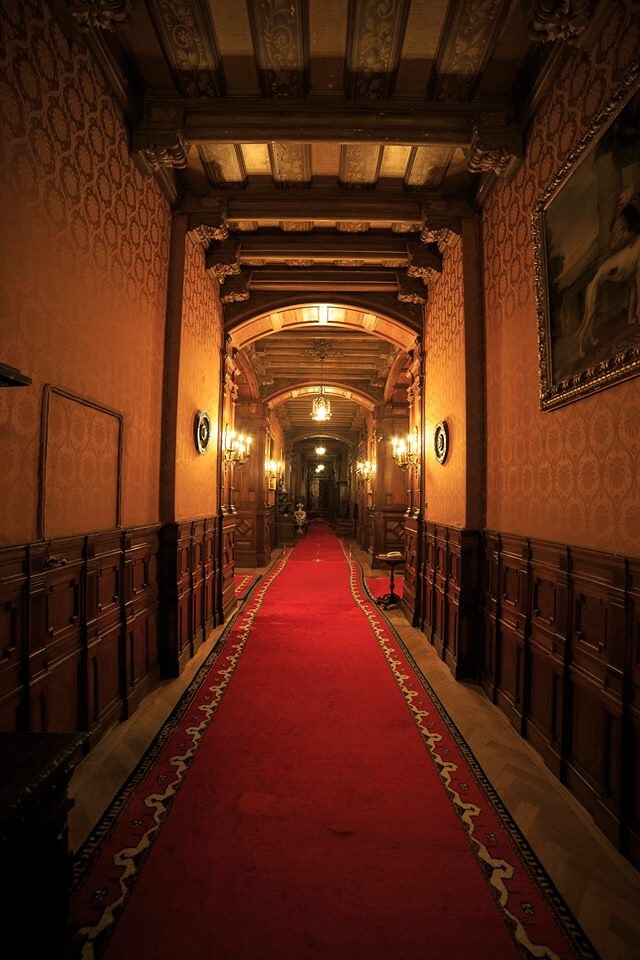
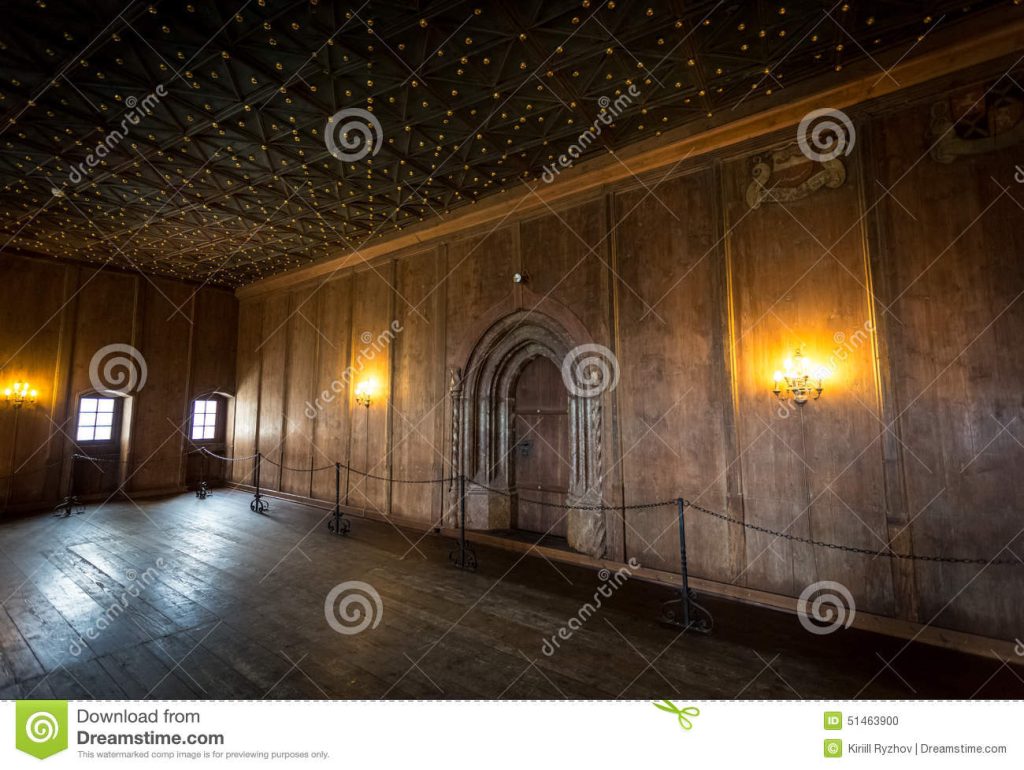
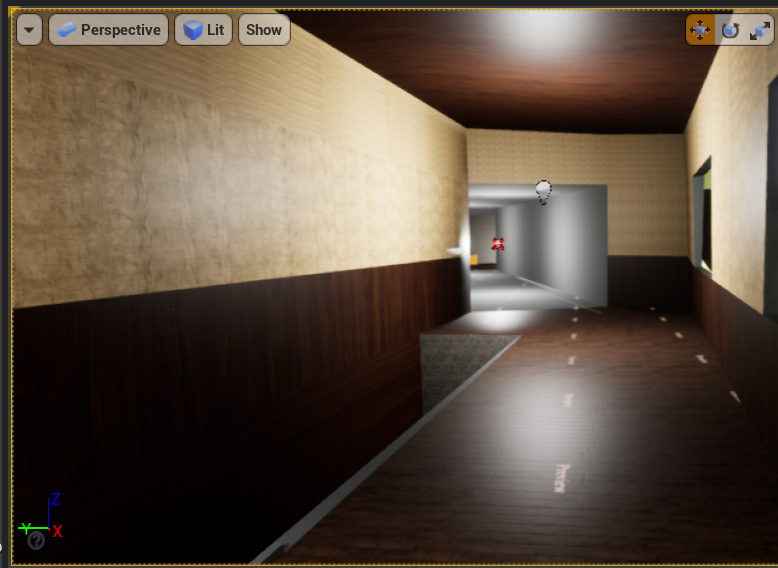
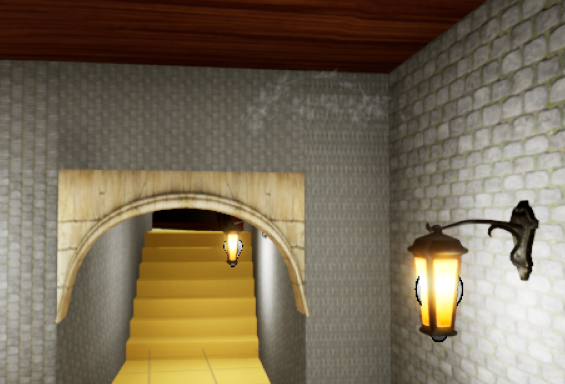
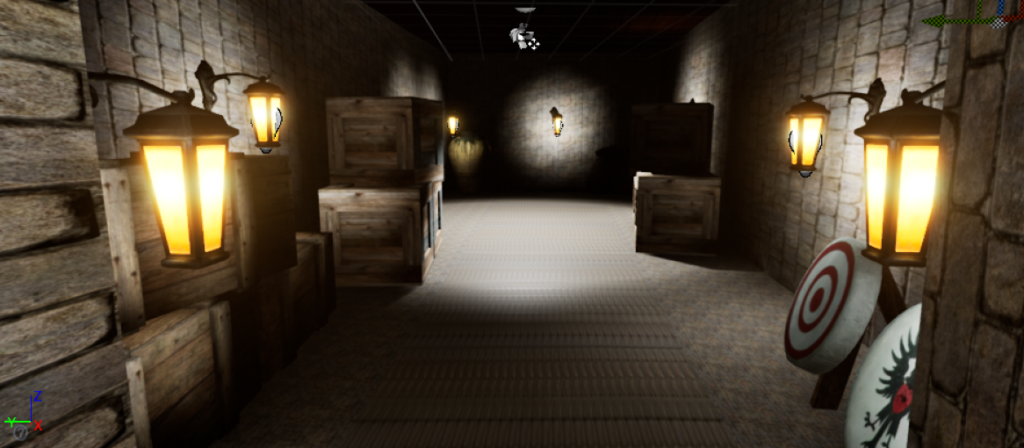
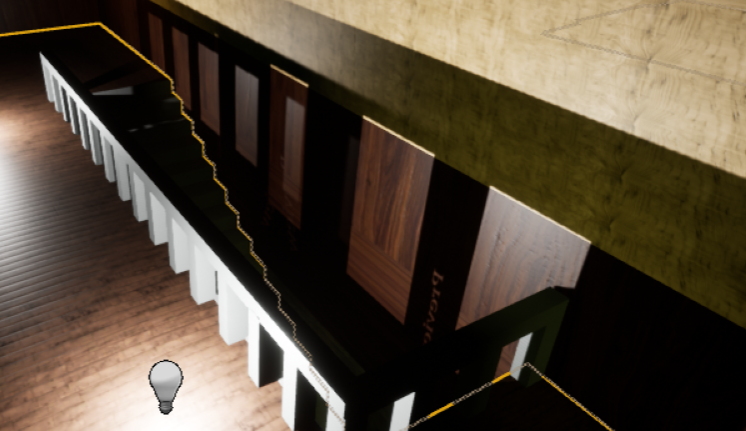
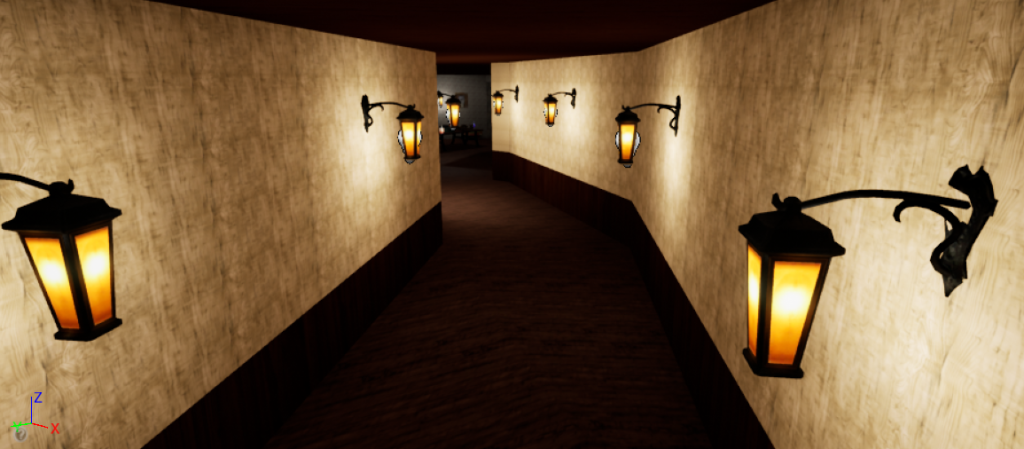
I plan to have some of the hallway floor stone and concrete to give off a realistic castle feel for the level. The hanging lights are also an option for me to undertake in terms of how I will handle spot lights in Unreal.
The type of floor within my castle would vary from concrete to a wooden floor as a way to make this more immersive. I will use a range of wood materials made in the engine and apply them to the floor.
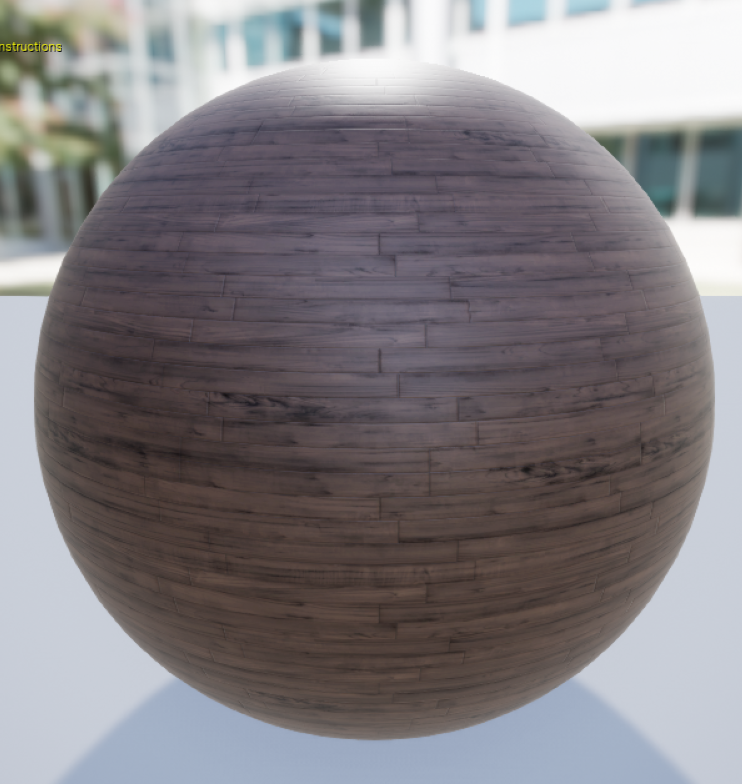
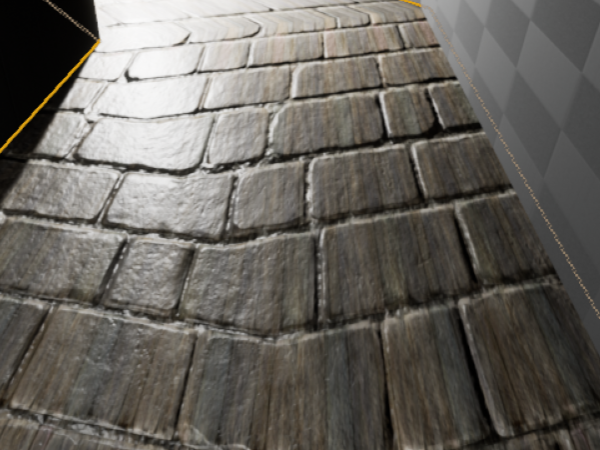
Notice how the wood flooring in the above image is different to the other one. This texture exposes the floorboards of a typical medieval castle and this is how I’m hoping to capitalize on it.

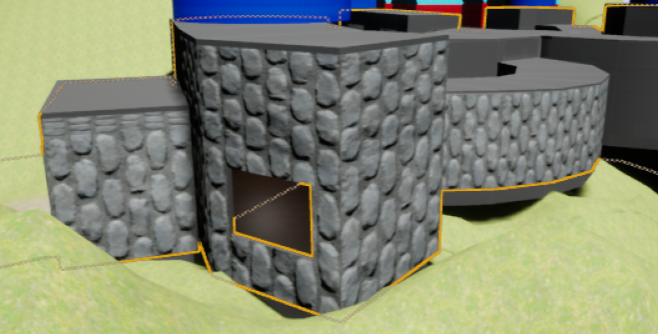
The image above is how I will influence the design from, seeing how the walls and floors are made of stone. This will be a great idea for me to take notes from.
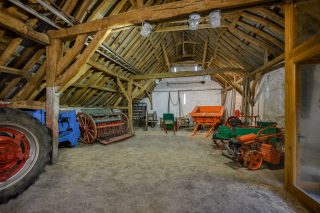
I plan that the hut near the end of the level will some grassy textures and stone textures on the wall. The ceiling will be made of wood, taking some inspiration from the stone barn shown in the image above.

To also show how the player will enter certain rooms, I have put together a standard castle door as a sort of influence for the one I will import into Unreal, regardless of whether I make it myself or import a 3D Model from somewhere else.
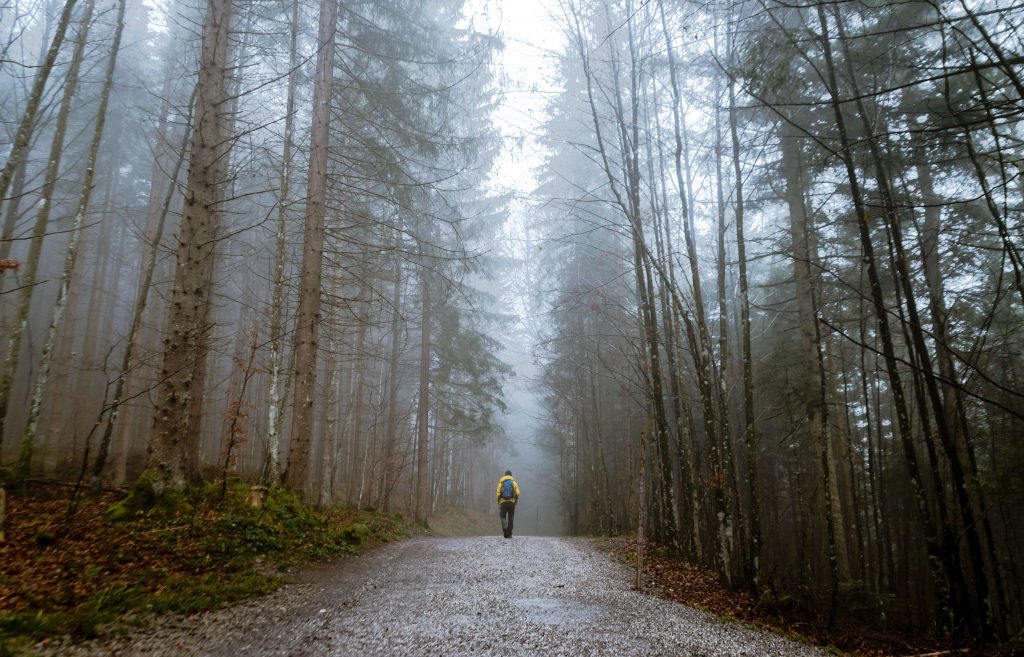
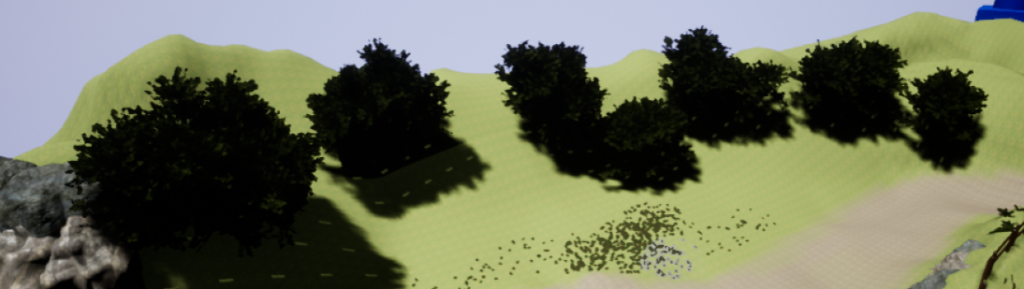
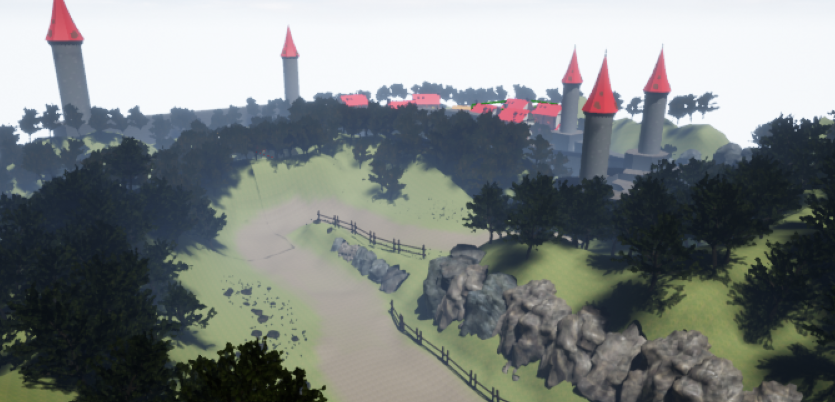
Finally, this is what I should be aiming for in terms of the landscape, which is pretty simple to do with the height fog and foliage within the Unreal Editor. I also want the path to be dirt to act as a guiding point for the player to enter the castle and emerge onto later in the level.
Planning
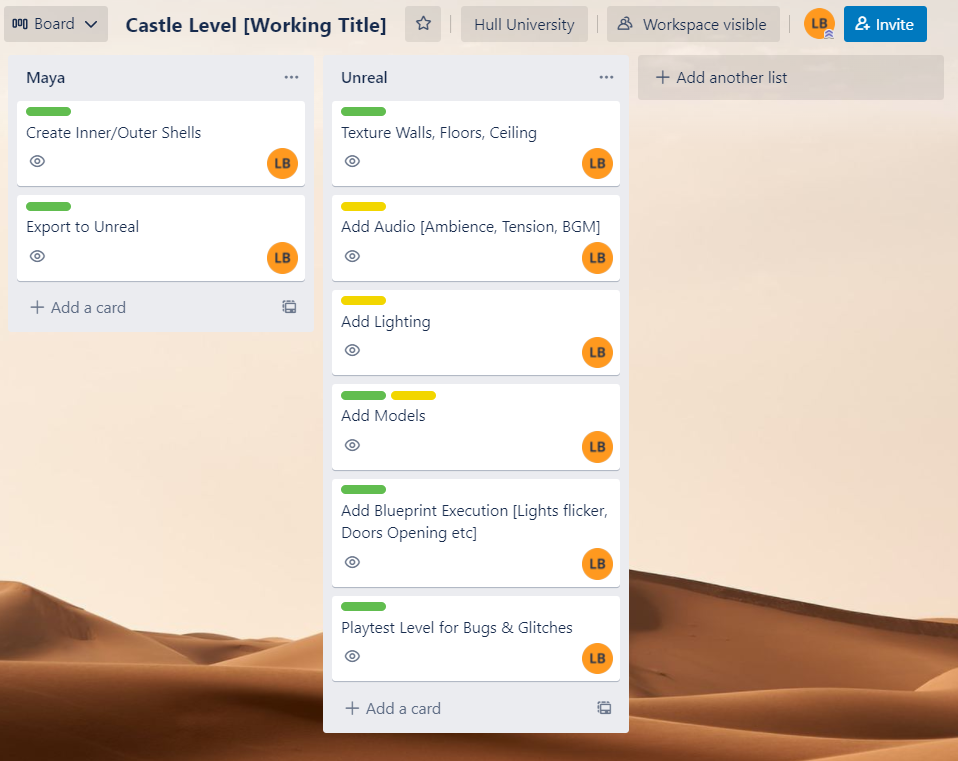
I jumped into Trello and quickly made a to-do list on what I need to add into the level as this is sort of a rough idea of what needs to be done in order to achieve a good result.
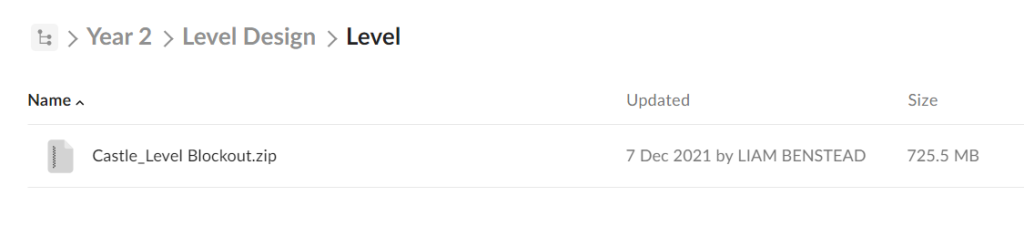
I’ve also backed up the blockout level in Box so that in the case of the file getting corrupted or I lose everything, I can revert back to this file and start over.
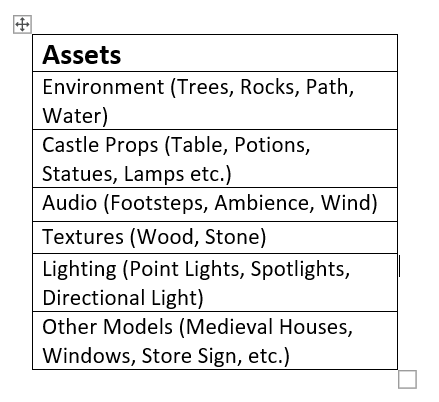
I have also put together a quick asset list of the specific assets and models I will need to add into my level. Everything from the lighting down to the textures is all there for me to look at again just to make sure.
Maya Shells
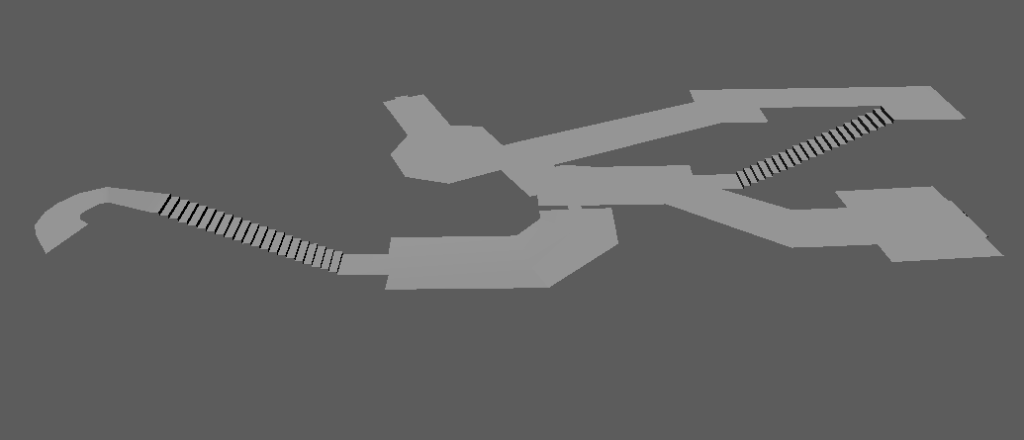
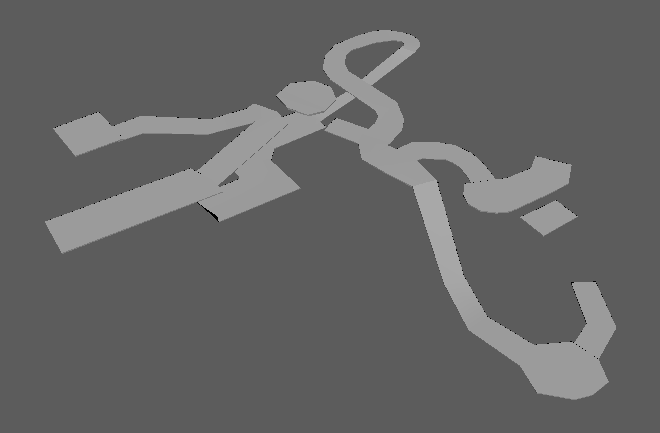
The first thing that I had to do was import the blockout into Maya and basically rebuild the geometry, including the castle and the hut near the end of the level. Using the Snap to Vertices mode at the top of the toolbar is super useful for this, as I don’t have to spend alot of time trying to manually put the geometry together.

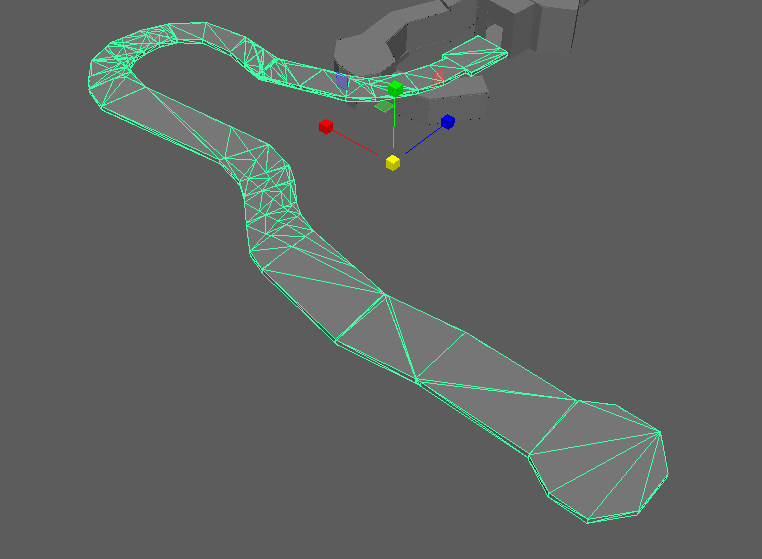
For example, I broke up the starting path as its own group, as a way to demonstrate how I will be doing this, although I don’t actually need the landscape BSP brushes for this.
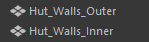
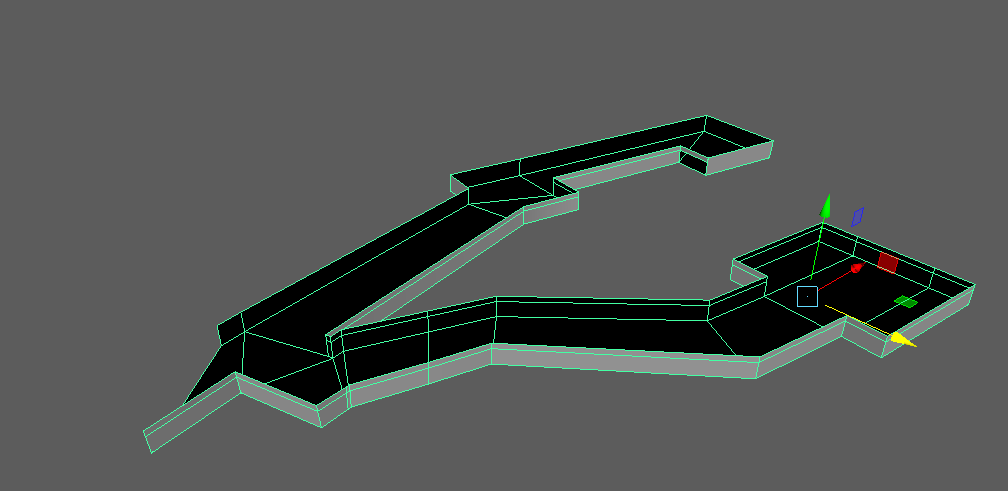
I got started by constructing the hut shells into six different groups across three different geometry areas (Walls, Floor, Roof) and separated them into Inner and Outer shells to ensure that light doesn’t pass through the walls of the hut. I also achieved the same thing for the castle. As you can see, I rebuilt the hut’s floor using the outer shell first, then I expanded from there to make the inner shell.

The walls were next, so I ensured that Snap to Vertices was still enabled and repeated the steps to make the shells connect nicely. Here is the inner shell when isolated.
And here is the isolated outer shell.
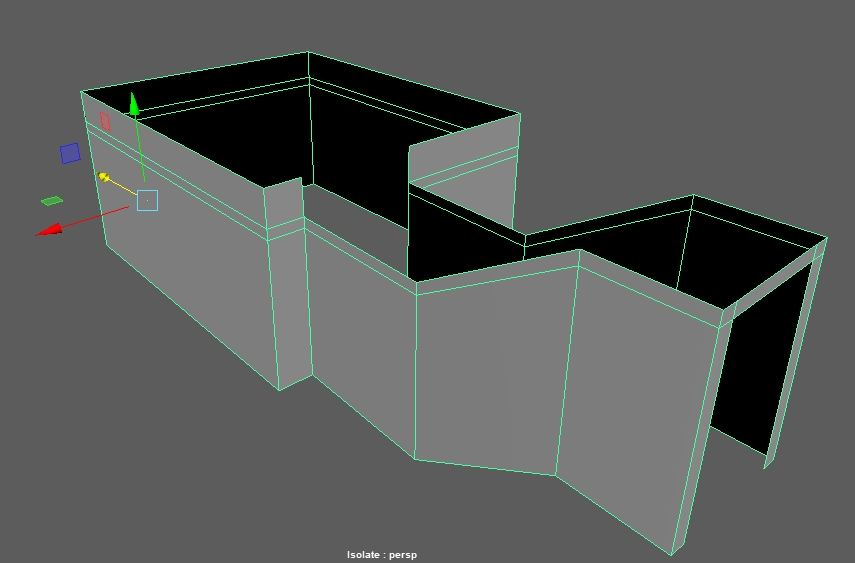
You can see the two walled shells are its own separate groups so I don’t have to tweak both of them when fixing things later down the line. I also named these as what they are, which is hugely important to know which shell is which.
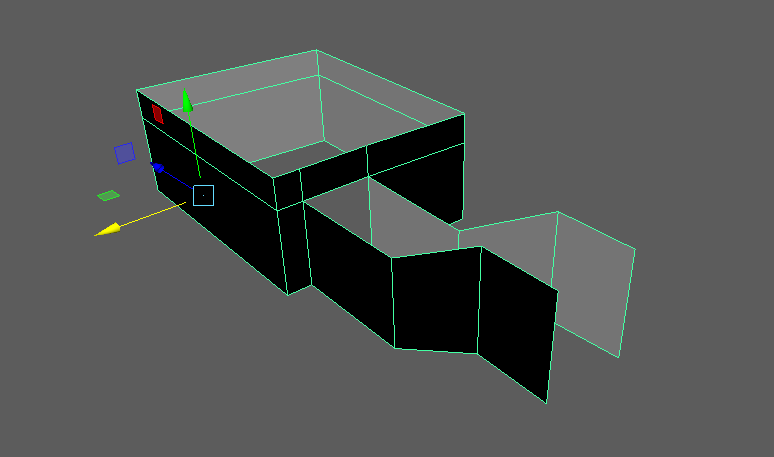
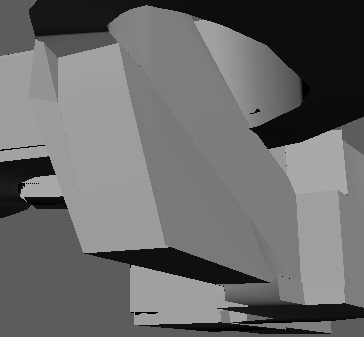
Now it was time for the roof shells. I started rebuilding the inner part first as that was pretty easy to do. The only problem was that the shell was upside down, with the back face facing towards the level. I had to select the faces and reverse the polygon normals so that the back was facing up. This image was taken before I discovered this trick.
Rebuilding the outer shell meant that isolating all of the hut shells, I was able to create the little hut from the blockout that could be used at the end of the level.
Now it was time to make the castle shells. I repeated the process as with the hut so that any light wouldn’t sneak through, starting with the inner shell of the floor. I ensured to carefully follow the route of my blockout and came up with something like this.

Working on the shell a little while later and you can already see the progress, making the sure I rebuild the geometry for the basement areas too.
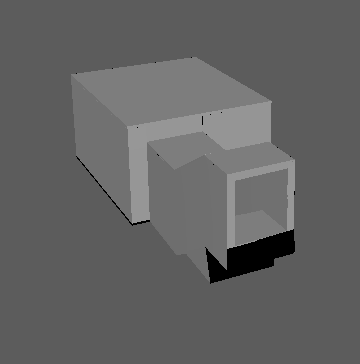
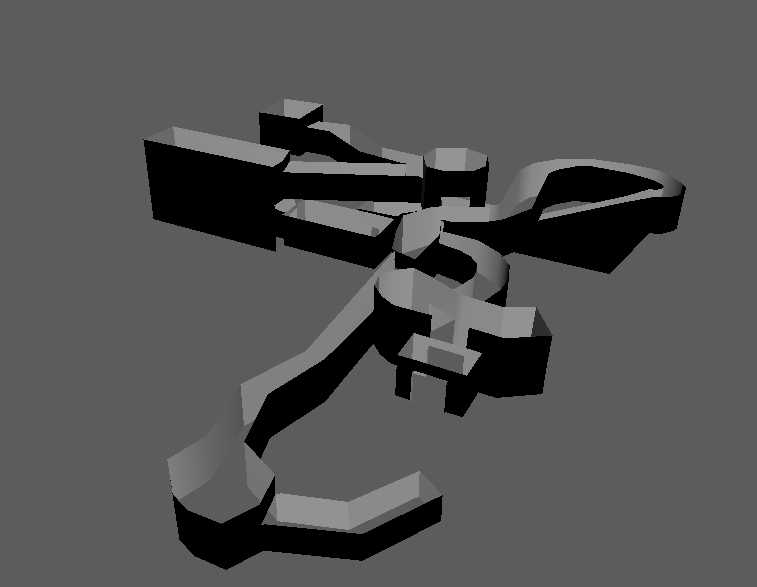
This should be the finished shell. Notice how big it can get. I would have to rebuild the other 5 shells for this same castle and it’s going to take some time with Snap to Vertices enabled.

It was time to make the outer shell of the floor. I made sure that the back face of the floor was facing up so there wouldn’t be light passing through the floor.
When finished, it should look a little something like this.

Then I ensured to rebuild the inner shell of the castle floor. Here is the fully finished polygon shell isolated to give you a view of how this is constructed.
Hiding all of those exposed back faces of the polygons by creating the outer shell of the walls would eliminate the problem.

And finally, it was time to make the roof shells of the castle by applying the same technique used from making the other shells. Here is the isolated roof outer shell.
And then I hid all of those exposed faces with the outer shell.
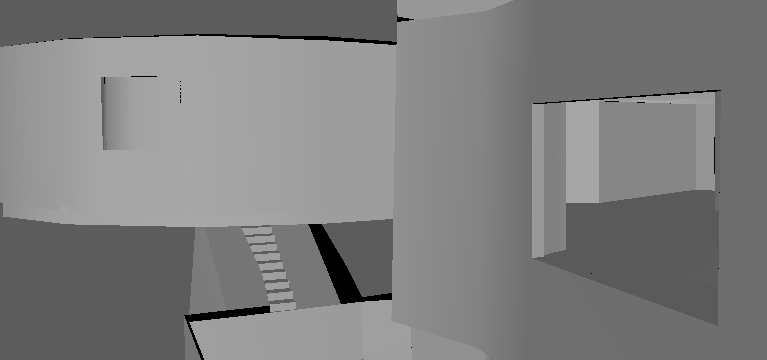
Before exporting the individual shells out of Maya, there were some areas I needed to clean up to avoid any kind of light sneaking through the final model. This area below the hallways staircase was one of them, as I promptly fixed up the geometry by snapping each vertices to one another.
I also wanted to add some windows to the walls by modifying both wall shells so that the sides of the windows didn’t let light through. I made sure to do this to every window that I add.
And finally, I wanted the floor to not be all one texture, as there will be different materials you can walk on within the castle. I selected the faces I want the wood texture to be splashed onto and assigned a lambert material to them, colouring them brown so I would know where to apply the textures to. I also repeated this process for the underground sections, colouring them dark grey for the concrete floor I would be planning to use. I would later use this method to separate the materials for the castle’s walls and roof’s inner shells for variety.

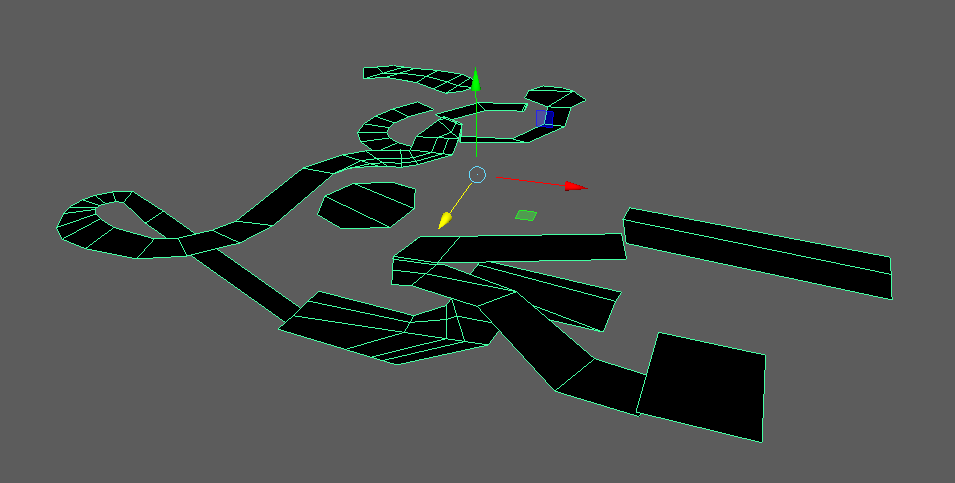
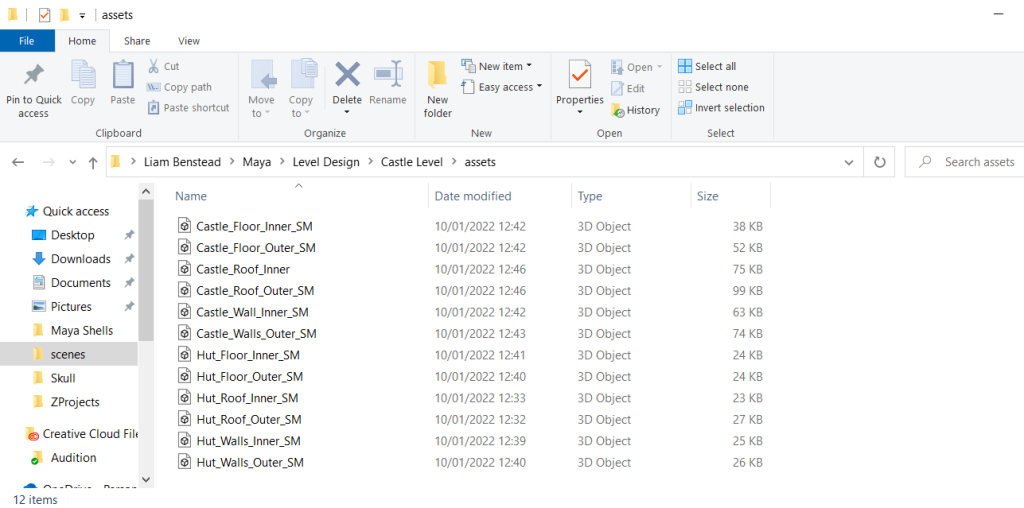
I checked every shell individually to inspect any anomalies in the vertices not aligned correctly before exporting each shell and setting the project up to store all of the shells required for this to work.
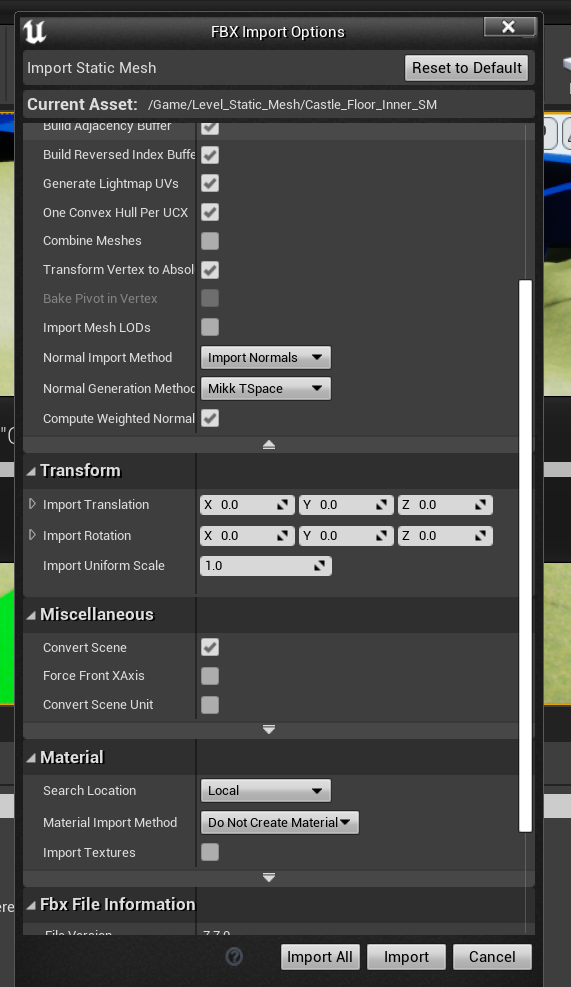
Upon importing all of the shells into Unreal, I had to make sure all of the relevant boxes were ticked, as that could cause some problems. I also didn’t want to make any materials from the shells, as I would be doing that later with the materials inside of the engine. Once I was happy with everything, I imported all of the shells into the map.
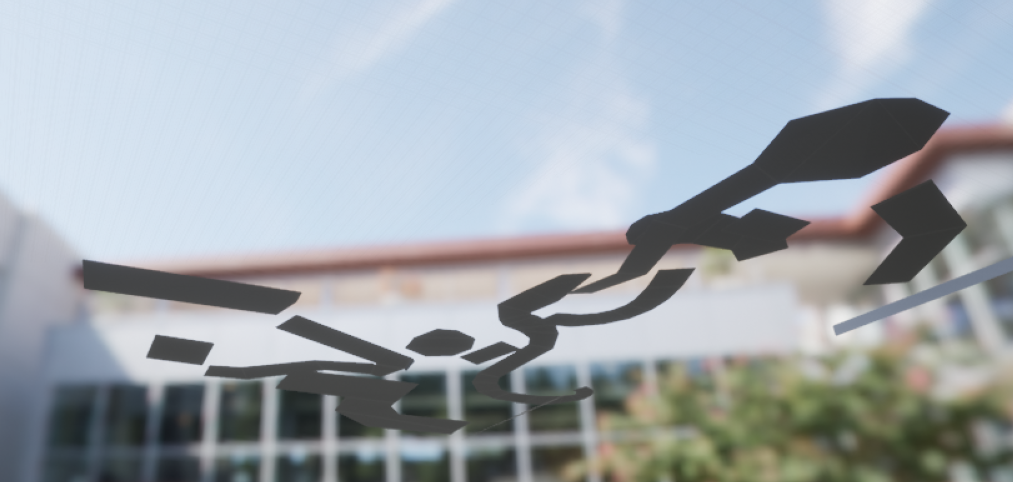
There was also the issue of the roof shells of the castle not being combined, so I quickly had to do that in order for the shells to be connected to the castle walls.

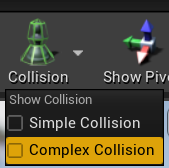
I attempted to test out the newly placed static meshes, but couldn’t get inside for some reason due to an invisible wall being placed directly on the line, so I had to go into each shell of the castle and the hut and ensured I remove collisions, have Simple and Complex Collisions ticked and used the Complex Collision as Simple so that it would work as intended upon testing it again.
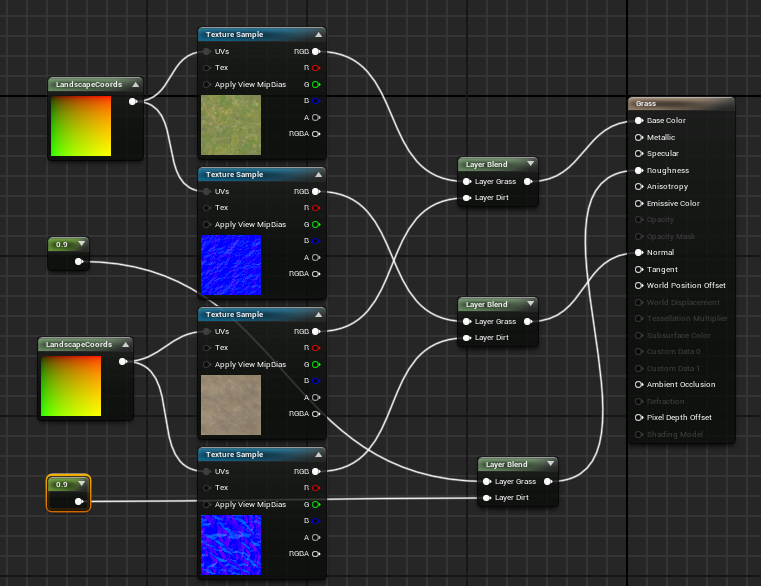
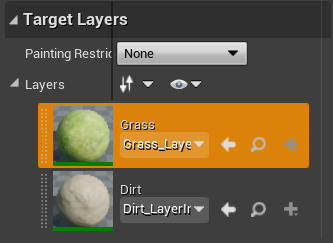
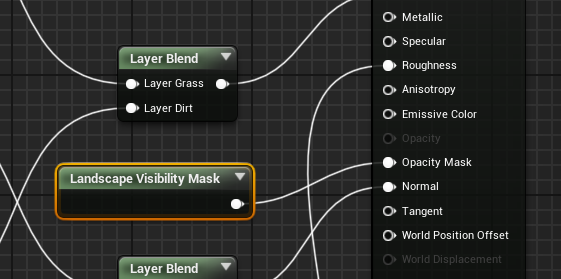
It was time for me to make the landscape materials. I selected the grass and dirt textures along with their normal maps and dragged them into the material editor. I created three layer blend nodes for the two materials, blending the two texture and normal maps into two of them while I used a Constant value for the other node. I also created LandscapeCoords for the textures as well so that it would come out cleaner and nicer. Plugging them into the right nodes yielded some pretty nice results.
Now as you can see when I jumped back into Unreal and select the landscape paint option, the materials are shown below as intended. I also selected them to be weight blend like what I seen in the details panel within the editor.
When I attempt to paint the landscape with the dirt path, you can see the results and where I have constructed the path, which looks pretty good.
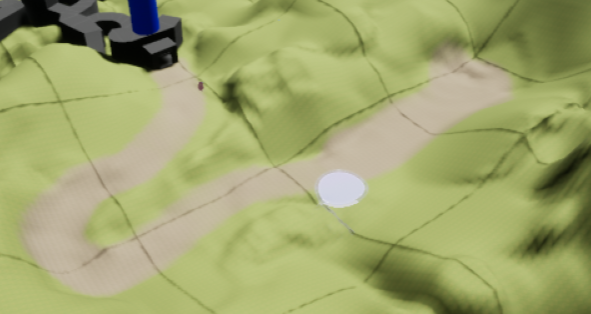
I also plugged in a Landscape Visibility Mask to get rid of some terrain I’m not using for both gameplay and scenery. This is required for me to mask out where the castle will go underground so that the player will not see the landscape clipping through the geometry.
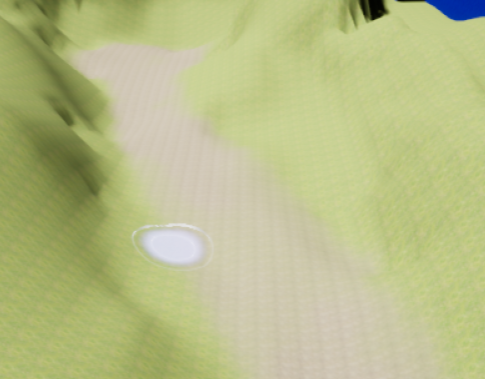
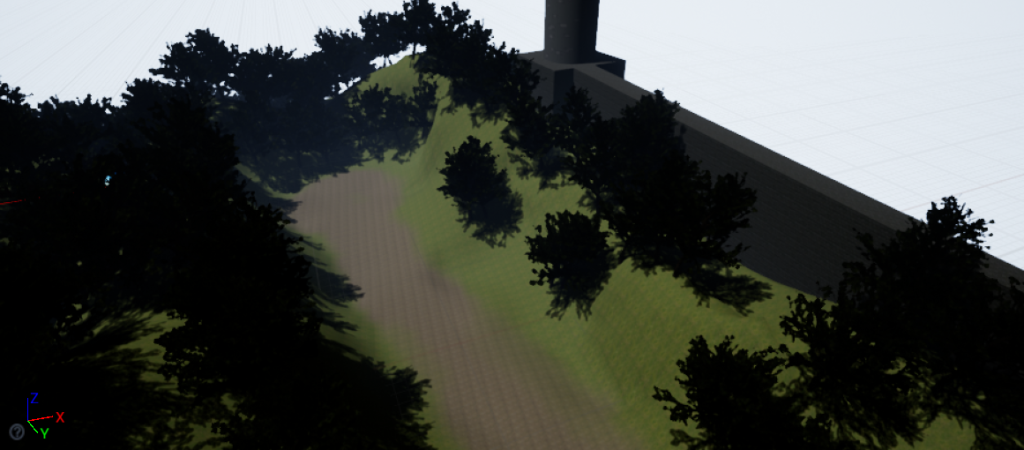
I’ve also painted where the player should go in order for the game to end. Notice how the path stops as you go further away from the castle. This level is part of a bigger level, which means the hills and foliage beyond the end path would be gone had I continue the length of the level. The scenery could continue past the hills in a scenario would I have continued to expand upon the level and you would find some more houses or something similar along the path.
Assets
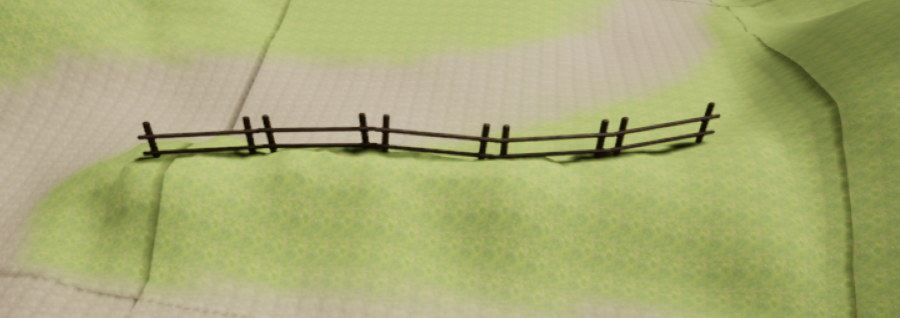
I think it’s time to start adding in some models for the landscaping. I started to think of how the player will keep on the path towards the castle, so I downloaded a fence mesh online and imported it into Unreal, at the expense of it not keeping the textures in which I had to reapply to.
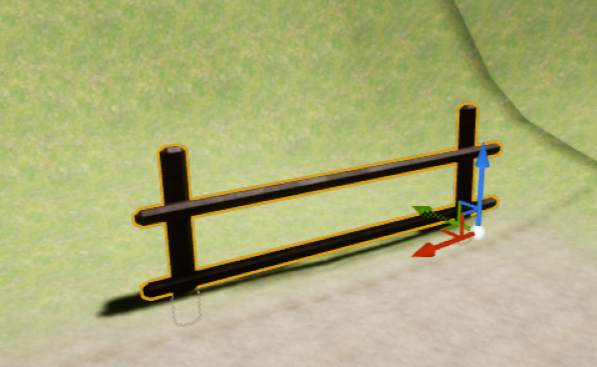
You can see by connecting each end of the fence, I was able to make a sturdy start to adding models into the scene.
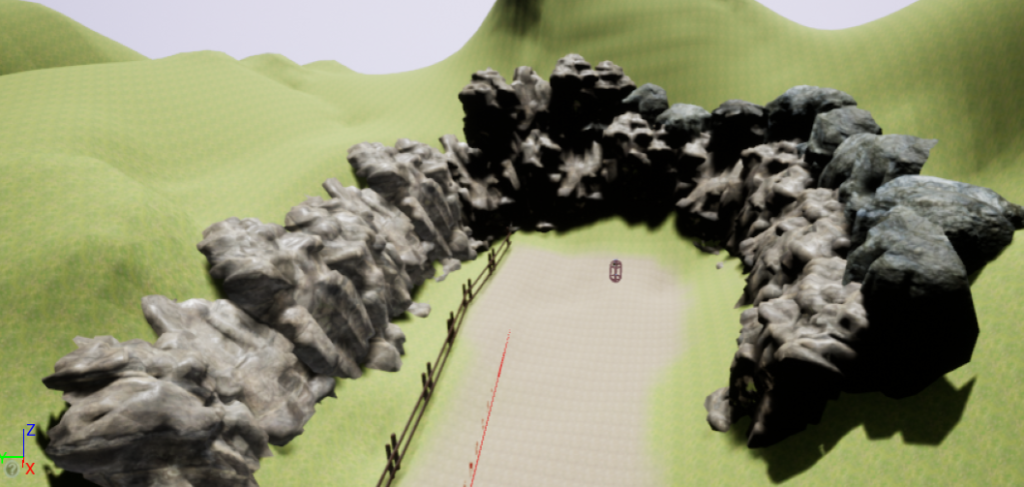
I downloaded an asset pack from the Unreal Marketplace which has a variety of different castle props that I can use, including statues, rocks, bottles, flags and more.

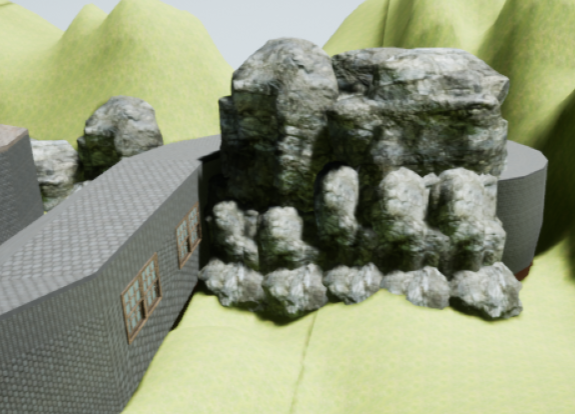
You can see how well I position the rocks next to the hill slope to make it look like it has a drop. This also acts as a boundary hazard, as the player can’t climb up on top to get out of the map. The image below details more rock placements and rotation to create a great spawn area for the player.
Next was the foliage of the exterior portions of the level. I downloaded another asset pack from the Unreal Marketplace but this time for foliage generation.

Selecting some different foliage types of dropping them into the hierarchy allowed me to paint some foliage into the scene.

I also had to change brush sizes to add in some bushes between the fences and the rocks.

I also had to ensure that the tree stems weren’t facing in the direction of the terrain it had been placed on, so I aligned to normal to make the placements more natural to the environment.
I’ll add more trees later, but the start of the level should look something like this now.
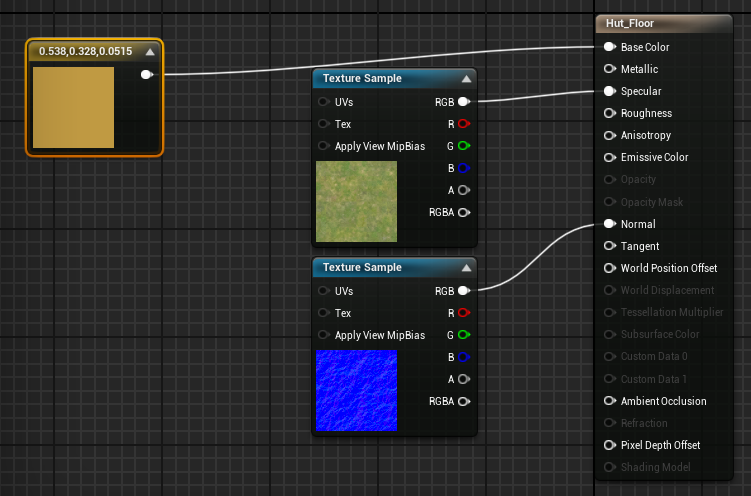
Now it’s time to make some materials and material instance for the shells of the castle. I jumped into the material editor and selected the wood textures maps as well as its normal map to blend the layers into. This time however, I had an idea about how to scale the textures without hurting the quality of the material, so I applied a Texture Coordinate node and multiplied it by the scale so that when I compile this, there would be an option to scale the textures like so. I made sure to do this to any other materials that I wished to scale down.
I also made some exteriors material instances to texture the outer shells of the castle.

You can see that the Material wraps around the outside of the castle, which is a good result. I would apply the same thing to the roof but with a different stone material.

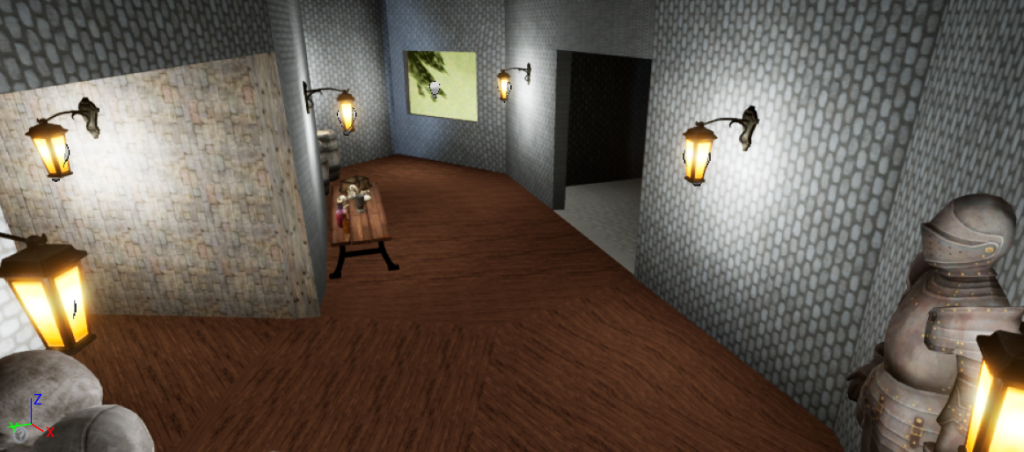
You can see how I have used different wood materials for the hallways of the castle, trying to follow through with one of the reference images I have. I’ve used the scaled down stone textures for the walls of where the staircase should be to have variety. I’ve also applied the same wood texture to the ceiling of the castle.
You can see the wood texture here too, as I plan to texture the walls around it.

I previously had an issue where the exterior wall texture around this part of the castle didn’t line up correctly. This is due to not grouping this portion of the walls with the outer shell, instead mistakenly grouping it with the inner shell. I had rectified this by going into Maya and assigning the same material I had used for the rest of the outer shell so that it would blend it correctly with the rest of the shell. I would scale the material down on this half of the castle to make it more natural too.
I created another material for the concrete floor for when the player goes into the basement of the castle, like this. I made sure to create a material instance and scale it down so that it isn’t jarring to see.
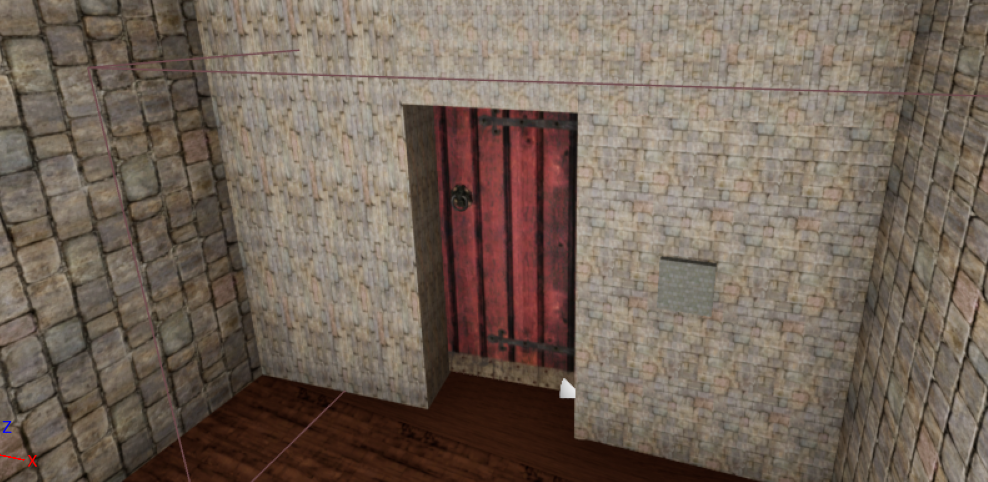
So something like this is what I’m achieving for. I’ve also applied the same texture to the larger basement where you are projected to open a locked door later in the level.

I’ve also applied them to the exterior walls behind the houses outside of the castle, like so.
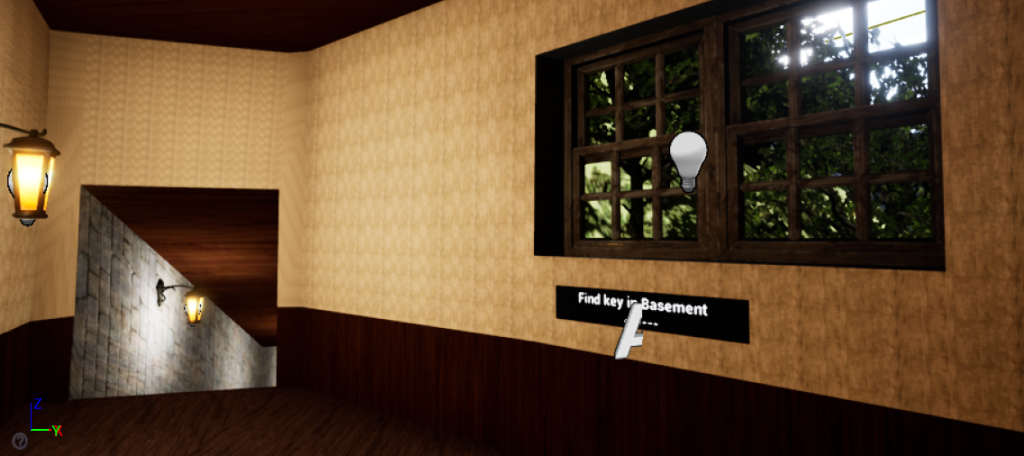
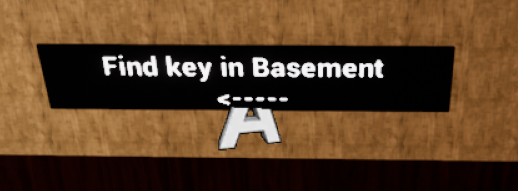
Now it’s time for me to start adding in more of the Infinity assets in the interior, starting with the basement leading up to grabbing the key. I let another one of of my coursemates playtest through this level (Jak Foster) and he states that I need to add some assets in rooms so that they can be recognized by the player and when they come back to that room to say that you’ve been here before.
I’ve ensured to place them accordingly and without any of them clipping through the walls, which I textured it with stone. Later on, I would change this to a hewn brick texture. These materials are all from the starter content by the way.

You can see now that I have developed more of the hallway with some of the same wood textures like so.
The hut near the end of the level still needed texturing, so I got to work on adding in the grass textures on a new material and applying a Constant3 Value to change the colour of the material.
Applying it to the floor of the hut yields good results. I’ve also textured the walls in stone and it has a wood ceiling, which looks fine.
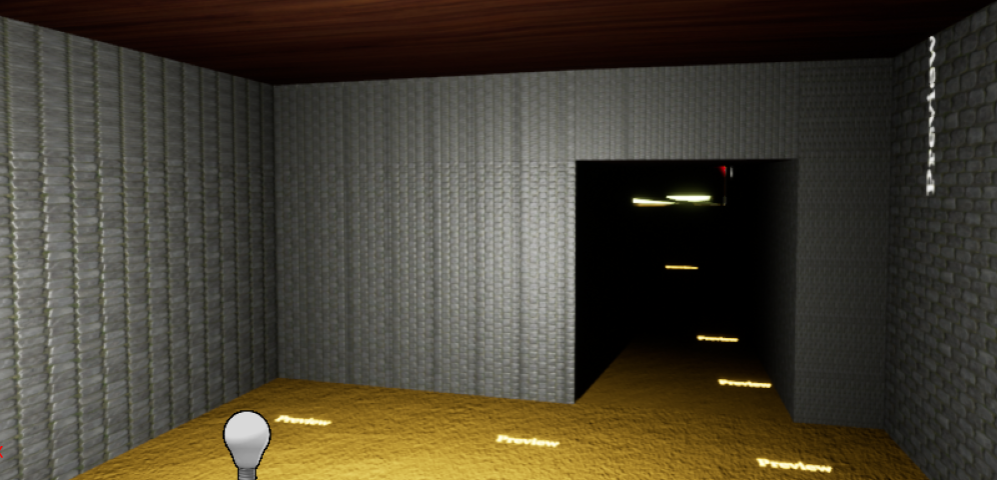
I also went ahead and added some Infinity assets inside the hut to give it some story and character. You can see the vast difference here compared to it being just a bare room.
I’ve included the addition of a crossbeam to act as an arch, making sure to decorated the top part of the castle entrances with the same beam, and some cobwebs in the corner of the room to give a sense that this hut hasn’t been used for some time.
To me, having the default skybox that comes with the Unreal Engine wouldn’t quite work out for me, so I downloaded an asset containing some custom skyboxes to mess around with and see what works well for the type of level I’m going for.

I placed the sky asset into the level and ensured I tweak these global settings to what fits the level best, like so.
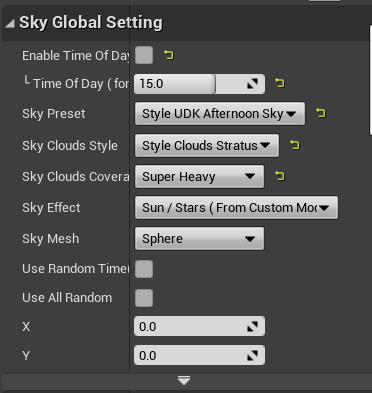
You can see the result in the viewport as I change some of these settings. I will go back to the global settings later down the line to change the skybox as a way to finalize the level when I get there.


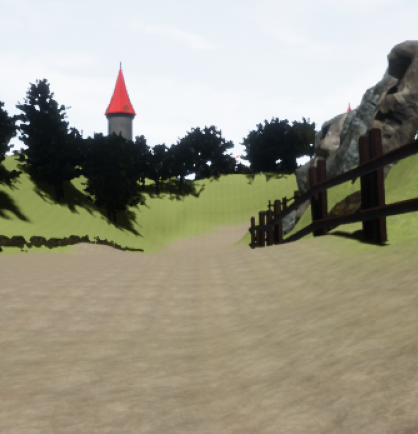
I’ve also changed the towers from BSP brushes to a custom castle tower I got online for free and placed it where it should be. This can also be used as a weenie, as Totten (2014:138) goes on to quote “landmarks not only call attention to themselves, but also allow players to orient themselves by observing their relationship to the landmark in space.” Having the castle tower placed in the direction players will be seeing when starting up a level gives them some indication of where they should be heading.

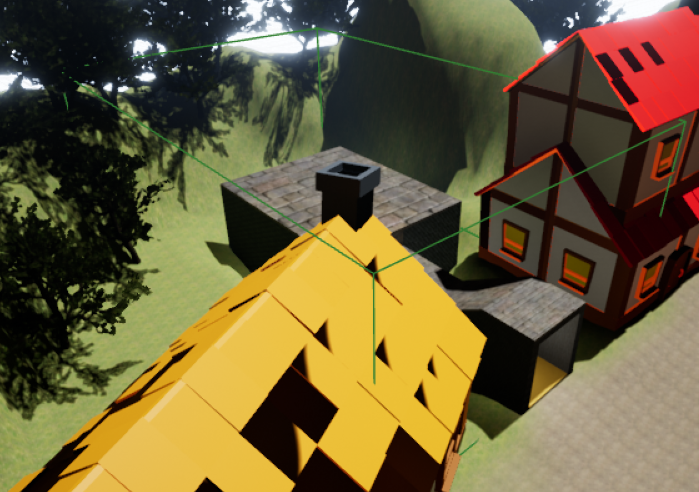
I’ve also developed the street area of the level by adding in some houses downloaded from Turbosquid and placed them accordingly, not before I had to reapply the textures in Maya using multiple lambert materials.

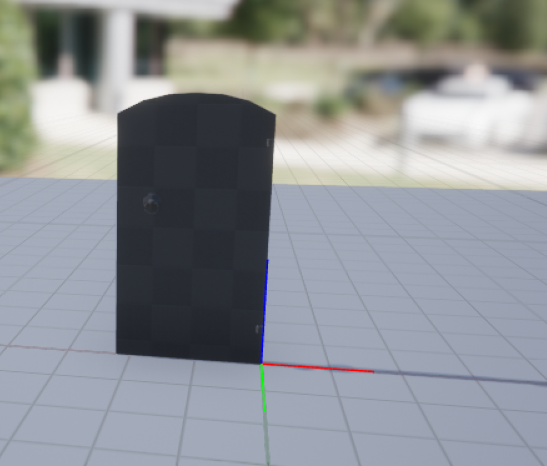
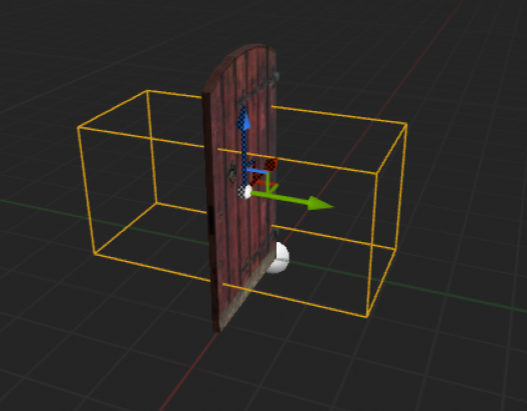
I replaced the starter door with a custom, more traditional castle door and placed it at the start of the level to test the asset and to see if it works as I was going to make this open when interacted later. When it worked, I placed it in its appropriate place in the level. I also added some textures that came along with the model.
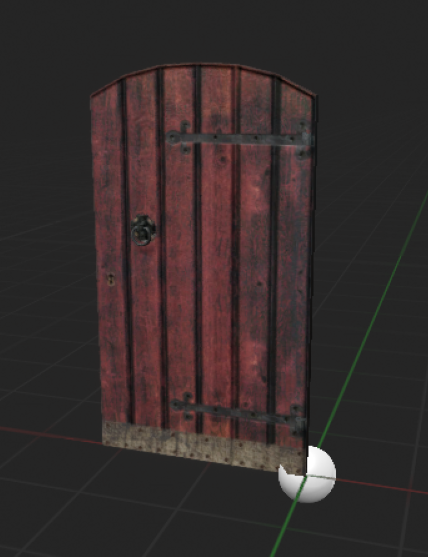
I also changed the pivot to permanently be set on the bottom corner of the door so that when I import it again, the pivot would be in the right place. This is very important because I plan to rotate this door for the player to walk through.
I achieved this through the Import Translation in the Import Settings for the static mesh.
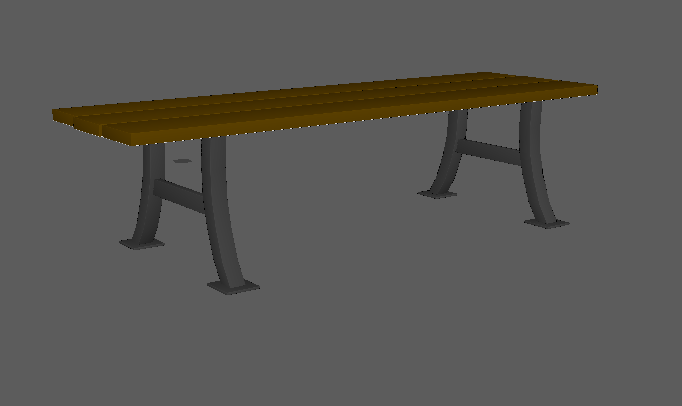
I’ve also downloaded a standard table asset and imported it into Unreal only to have its textures missing again, so I jumped into Maya this time and selected each individual material associated with the table and assigned them to a lambert, now it was just the case of reimporting the mesh back into Unreal and applying the textures.
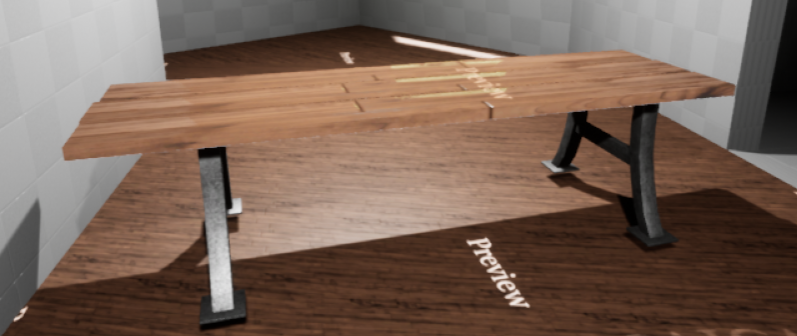
I placed the table asset down in the first room in the castle and started adding in some more Infinity assets for decoration.

I’ve also placed some barrels in the corner of the room so that the space doesn’t feel empty, like so.

The first big room of the castle is looking good so I’ll focus on the other rooms and add some assets in them.
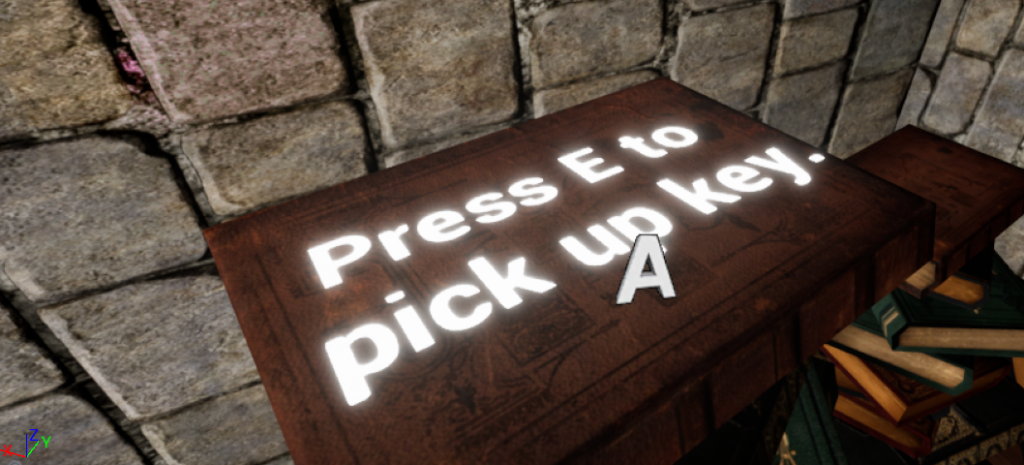
I placed a downloaded key asset and positioned it in the blueprint editor so that it’s centered.
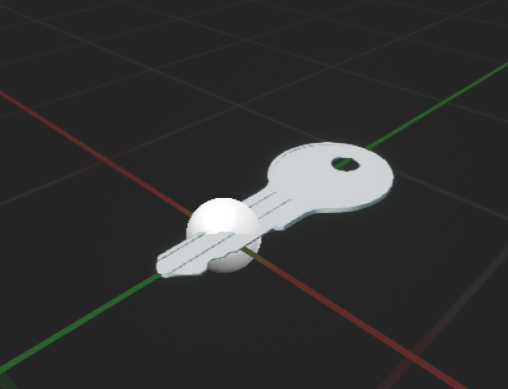
This is the blueprint that will allow me to grab the key to a locked door in the basement down the hallway. I had to create one for the key too so that it properly references the door that it’s supposed to open.


To make sure this blueprint works as intended, I’ve added some events to this Box Collision that I have added so when the player enters it, they can interact with the door and when they’re out of it, they can’t.
I’ve included some text on how to interact with the key and placed it on the book pile next to the object so the player would only have to turn slightly to read it. This is more interesting approach to how the text will just appear when the player walks up the key. Elise Foskett (3rd Year) playtested the level and she pointed up the text not being interesting, which inspired me to make the change.
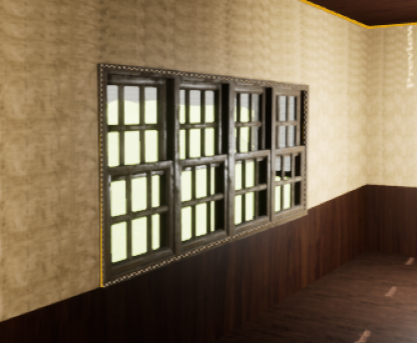
I’ve downloaded a window asset purely for decoration and placed them where I made the holes in the wall shells for them to look nicer. I made sure to place the exterior window side of the asset on the outside, so that the player can look out of the window while they are in the castle and see everything from that direction.
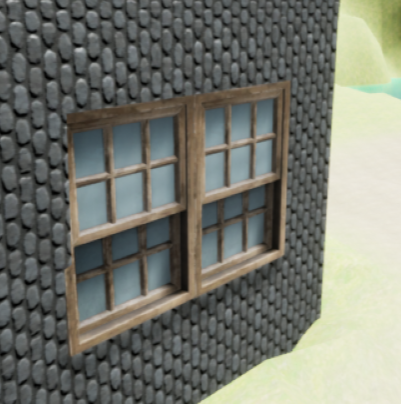
Here’s what the other side of the window asset would look like in a different part of the castle. You can see how transparent the glass is.
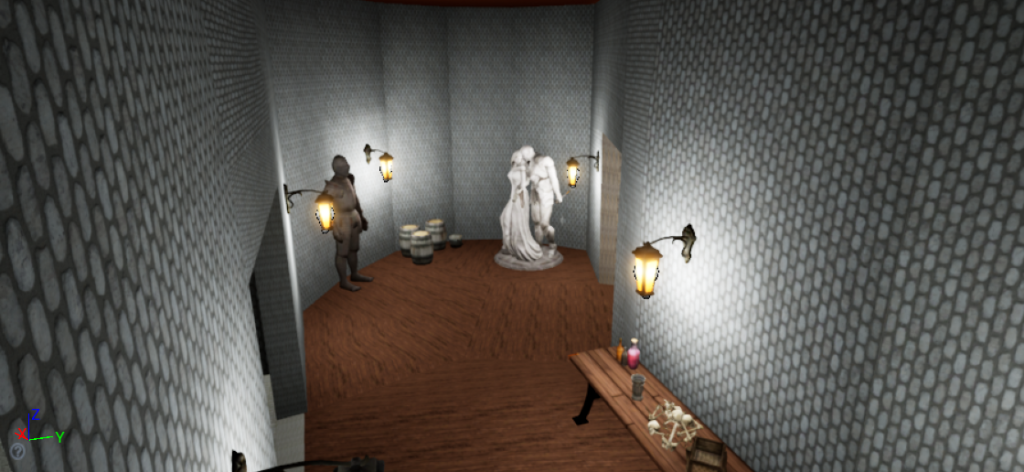
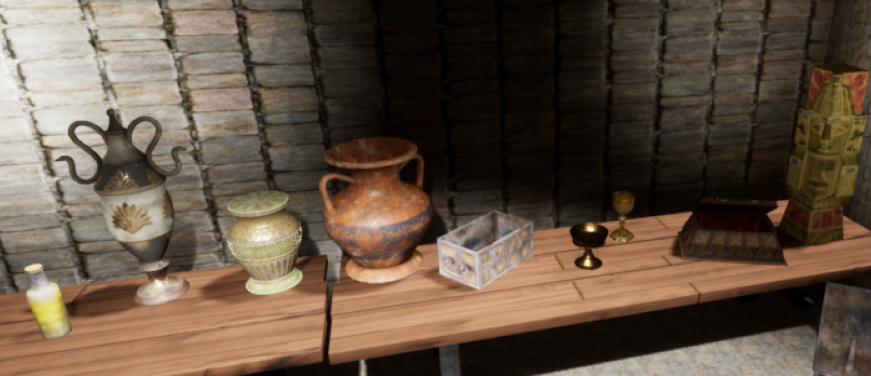
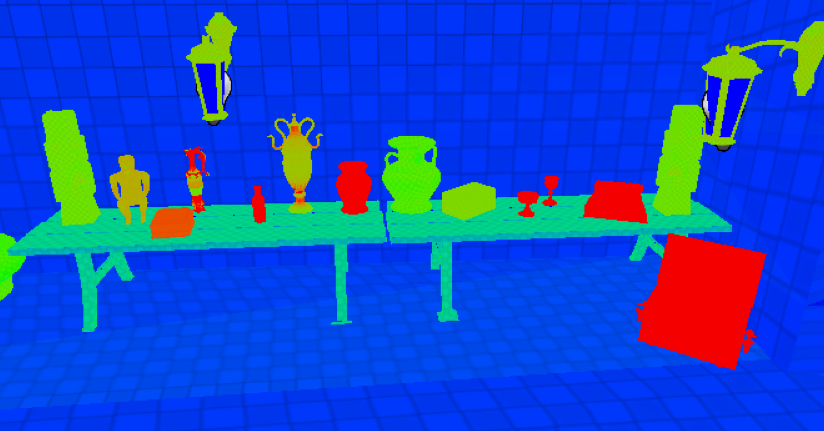
I’ve also downloaded another asset pack from the Epic Games store containing a bunch of ancient treasure that can also be used for some decoration.
From the outset, they look similar to some of the models from the Infinity asset pack but with some difference to them, including the totem pole on the at the end of the table and the different vases that come with this asset pack.
I’ve also included some posts and a birdbath outside of the castle to give the entrance some character, as shown here.
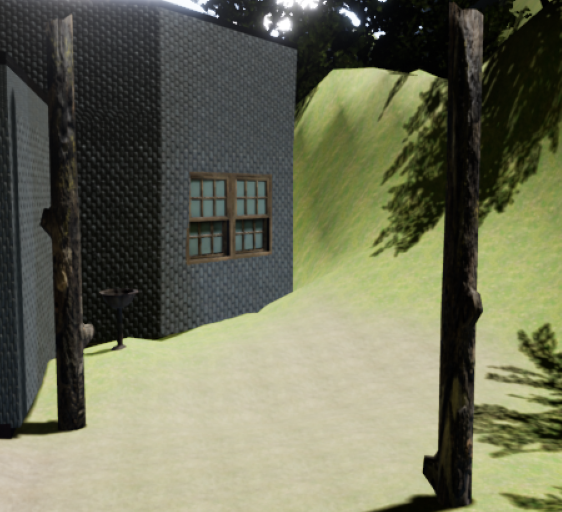
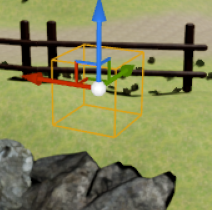
I repeated the complex collisions part for the posts so that the player can walk between them without getting blocked off.
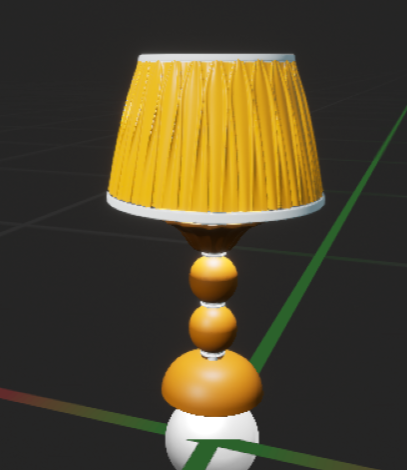
The last downloaded asset I want to put into my level is a simple lamp that has all of the modular components for me to put back together by combining all of the static meshes together
Here’s what it should look like in the static mesh editor when put back together again.
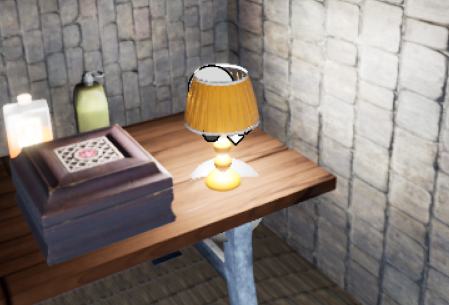
And I placed the asset on the same table where you pick up the key from.
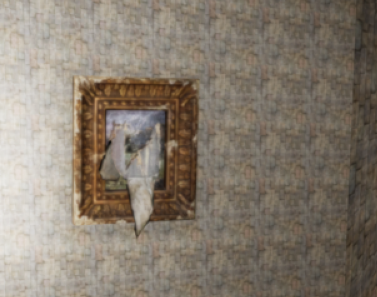
And I’ve also added a painting or two on the castle walls, as shown below.
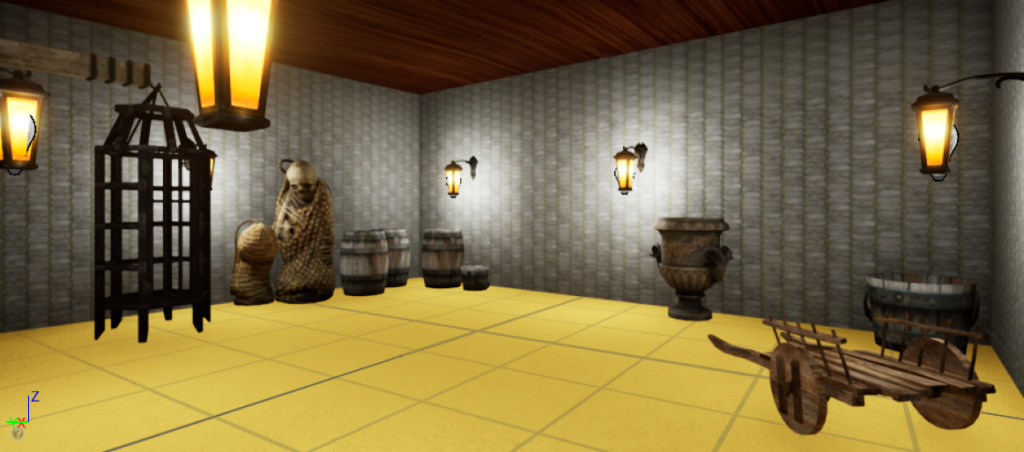
You can notice the progression and the enjoyment I am able to decorate the larger rooms with the Infinity assets to create some personality to them. Here is the large opening before the shortcut.
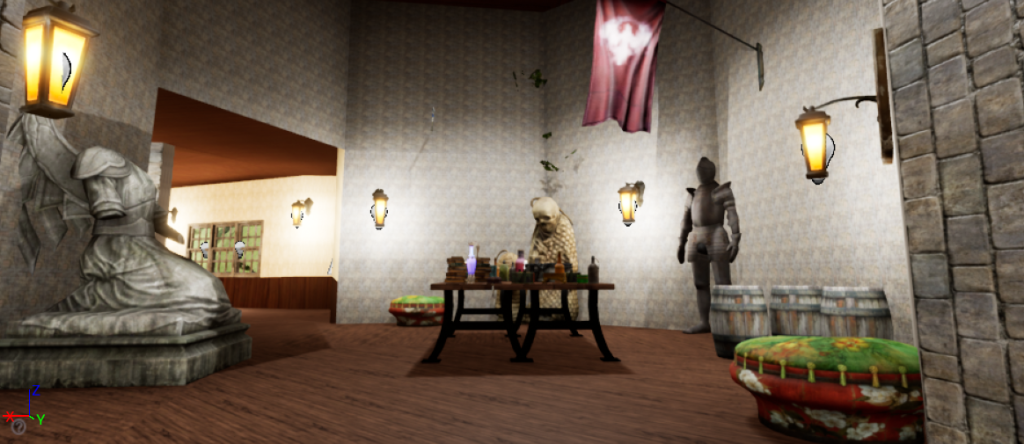
And here is the filled basement area where the door is, using both Infinity and Ancient Treasure assets as previously stated, the latter asset pack only used for the first room however.

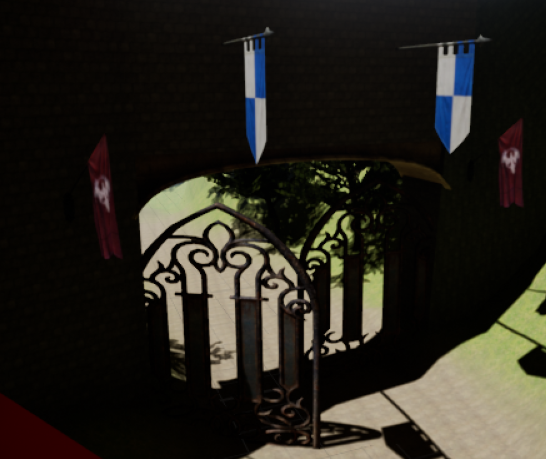
I’ve also decorated the castle gate with some flags to, with the ones found inside of the Infinity asset pack.
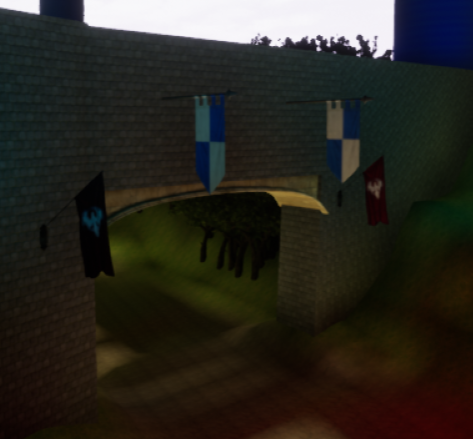
I’ve included some gates from the same asset pack and placed them under the crossbeams to finish off the look of the overall gate entrance
The key blueprint is fine, but I have added another blueprint that involves opening a door. This time, I have added a button that when pressed will open up the shortcut seen from my blockout. I set up a box collision and placed it on one side of the static meshes to stop the player from opening it on the other side.
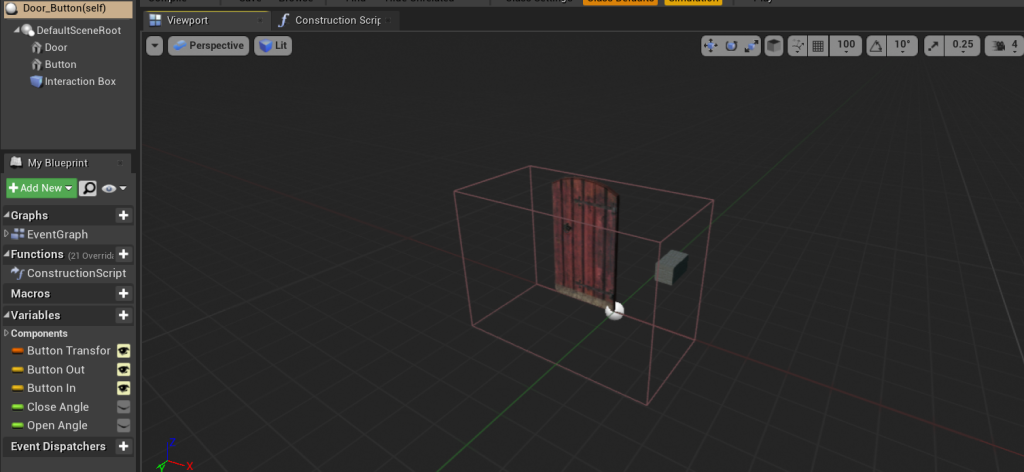
I’ve also included a reference to the Button Transform variable in the Construction Script along with the regular button. When the player interacts with the button, it simulates being pressed by moving slightly.
I’ve collapsed the graph and renamed it to when the player interacts with the button. Double clicking on the graph opens up the blueprint where I’ve set it up.
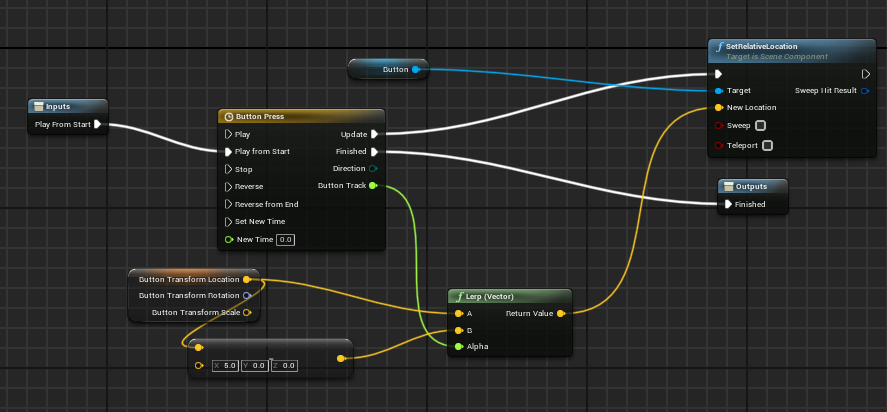
I’ve connected that graph to the overall blueprint allowing me to finish off setting up the door rotation. Now I had to place it in the level and ensured that the button and box collision were facing the way the player would go to open the shortcut.

You can immediately see how adding in more foliage from the Landscape asset pack not only decorates the level’s exterior, but it also acts as a boundary to the player. This is also evident in the steep terrain found next to the castle sometimes, as they can stop the player venturing anywhere but the path the level is laying out for them. Mike Barclay (2016) mentions that they “add to a levels sense of confinement and restrictiveness.”

I’ve also added more landscape (STF) foliage at the end of the level with the addition of some hard boundaries with the steep terrain and the trees. at the very end.
To cover up the staircase within the hallway, I had to add in some more Infinity rocks around the roof and exterior walls of the descended roof to make the level look nicer, and the fact that players can see them from outside the two windows next to the rocks. I’ve also done the same thing on the other side, albeit covering the boundary of the landscape. this time.

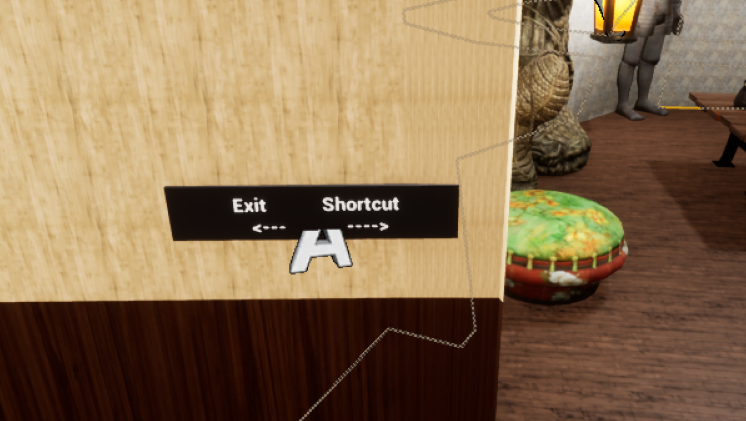
When playtesting through the level on her own, Elizabeth Midgely (3rd Year) pointed out that the player can sometimes get confused on where to go. Adding some soft gates or direction on where the player would need to go will benefit the level as it eliminates dis-orientation. I quickly put together some text and a pillar from the starter content and changed its colour to black, placing it below the window in the first fork inside the castle.
I’ve done the same thing further down the level outside of the hall where the shortcut is located. I’ve added arrows this time to direct the players in the fork in the road that is taking place there.
I’ve also used some BSP brushes to create a staircase railing and textured them in the brick material I had made.
And to finish it off, I’ve added in some exponential height fog to give the level some kind of an eerie feel to it.

I messed around with the fog settings, including lowering the height and how far the fog radius in terms of the player’s position in the level, and the density of the fog. I wanted to the player to see the faint mist and not get too lost navigating through the fog.
FMOD Audio
I think it’s time for me to add some audio into the level, as playing it through and hearing nothing made the whole level soulless and dead in a way. The great thing about using Unreal is that when you can modify audio as you work on it by using FMOD and integrating into the project and such. I created a new FMOD file and worked from there, integrating it to the castle level within Unreal.

And I went into my project settins and navigated to the FMOD plugin to validate the settings.
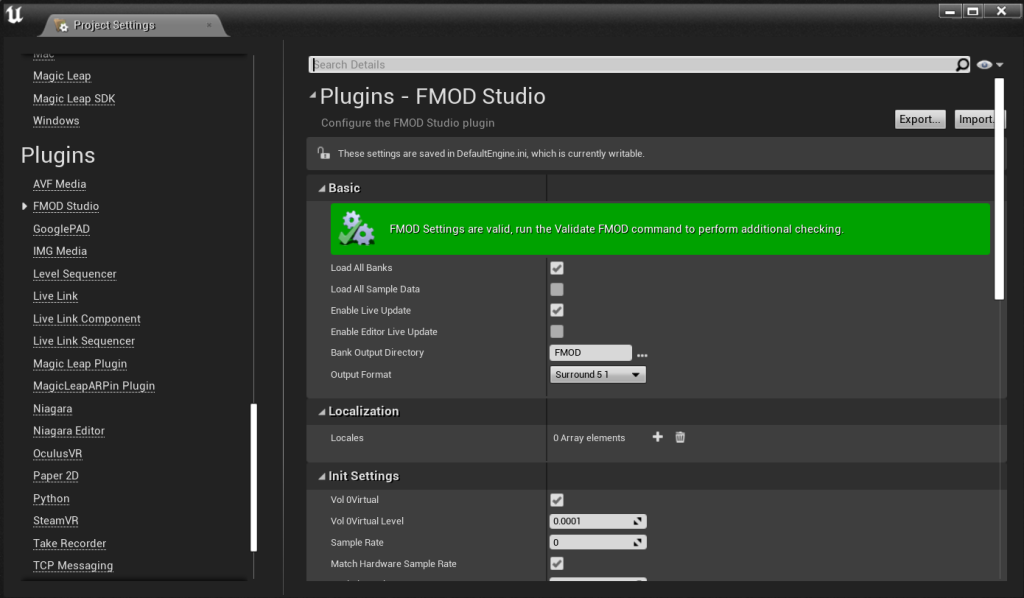
I had to create some banks for the engine to detect the FMOD validation so that it automatically places the audio folders inside.
It is also very important that this folder appears in my content browser since this is where the audio is stored.

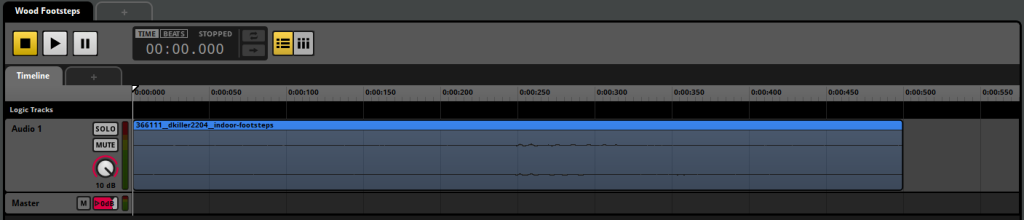
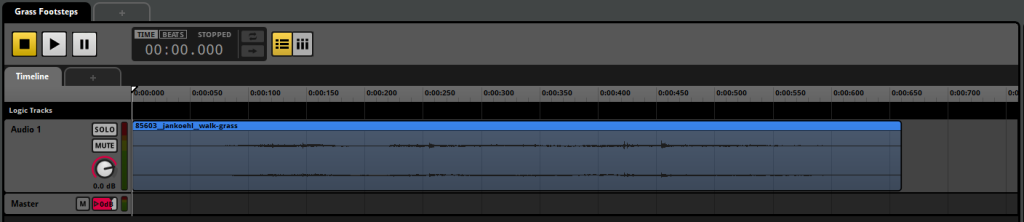
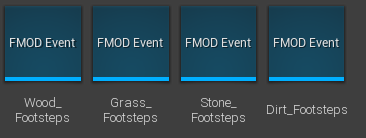
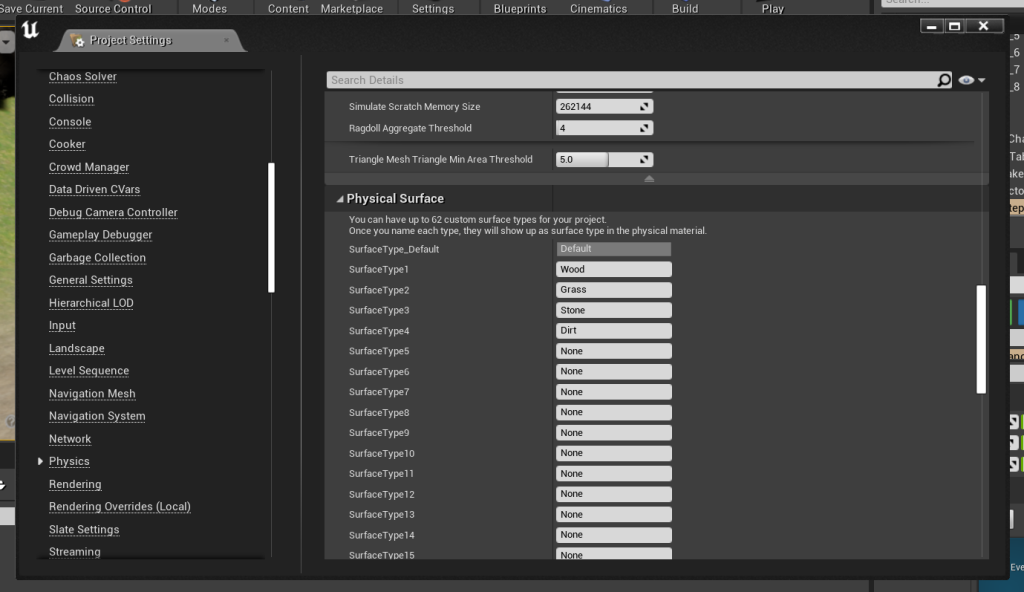
Now all I had to do was validate FMOD within Unreal and everything should be good to go. The first thing I did was download some audio tracks online. There are four surface types that the player will walk on throughout the level (Wood, Stone, Grass, Dirt), which I plan to loop whenever the player walks on that specific surface.

Specifically, the stone footsteps sound a lot of the footsteps you would hear in Luigi’s Mansion (Nintendo, 2001) when Luigi is walking on the floor of the mansion.

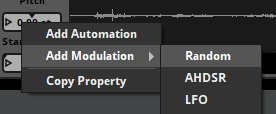
I’ve shortened each footsteps track down to a single step so that no other sound could be heard while the player is walking. I’ve also created a random modulation so the steps wouldn’t be in one pitch and get tedious. I did this process for all of the footsteps too.
When I play the sounds multiple times now, the pitch is randomized each time, which is good. I went ahead and assigned each sound to their banks and built them so that they appear in the Unreal FMOD Folder in Events.
The first thing I needed to achieve is how I was going to make is so that when the player walks on a surface, the sound corresponding to that surface will play. I opened up the project settings window and navigated to Physics panel, ensuring I name the four surface types that I have used in my level with the exact spelling so it will work.
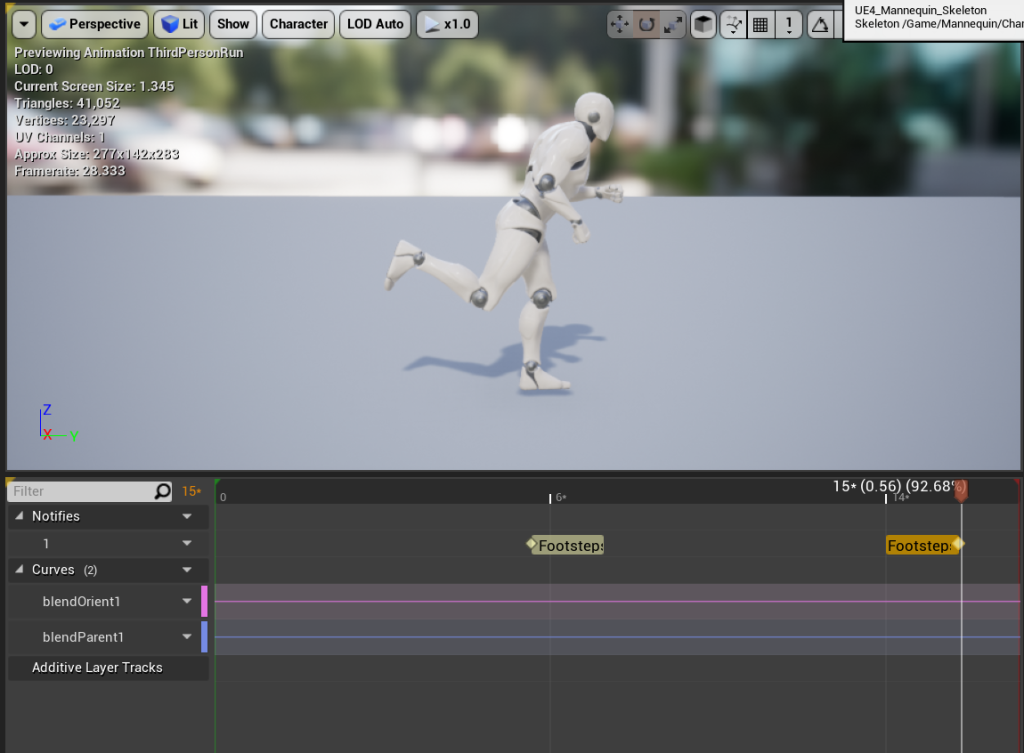
I’ve also jumped into the animation blueprint for the character and made sure to add a notify in its running animation when the character’s foot touches the ground. From there, I added one more for the other foot and saved it.
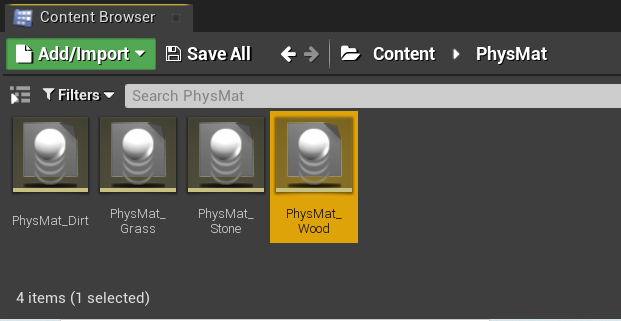
I’ve created a new Physical Material Folder and created four new PhysMat types for each sound.
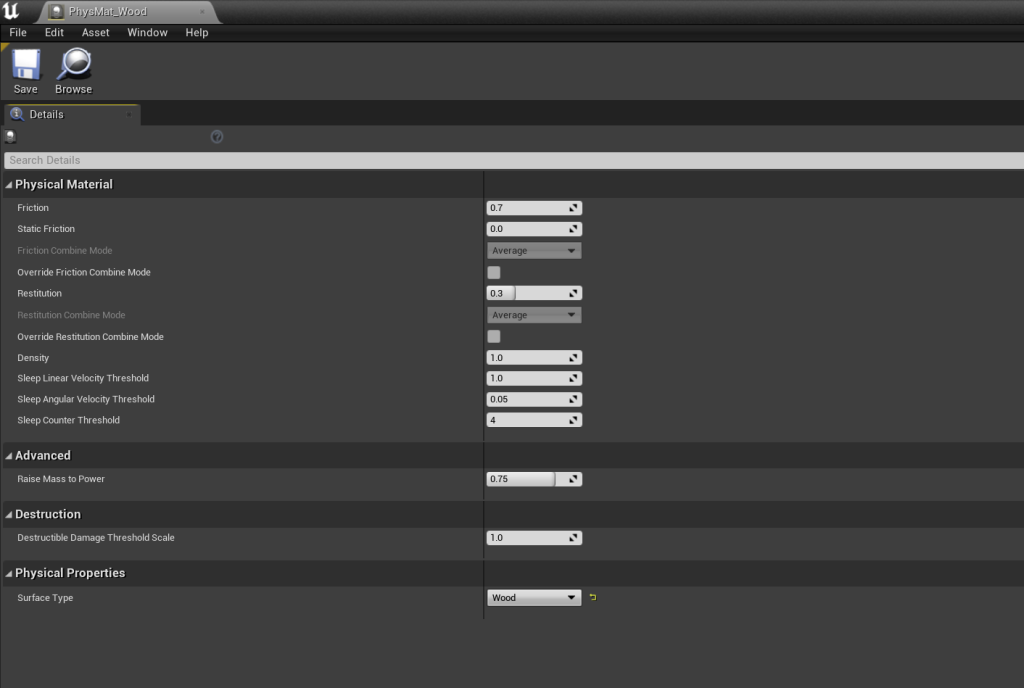
I opened up the PhysMat and selected the correct surface type at the bottom.
To get the notifiers working as intended, I created the blueprint which I followed through in a video. This is what the blueprint should look like.

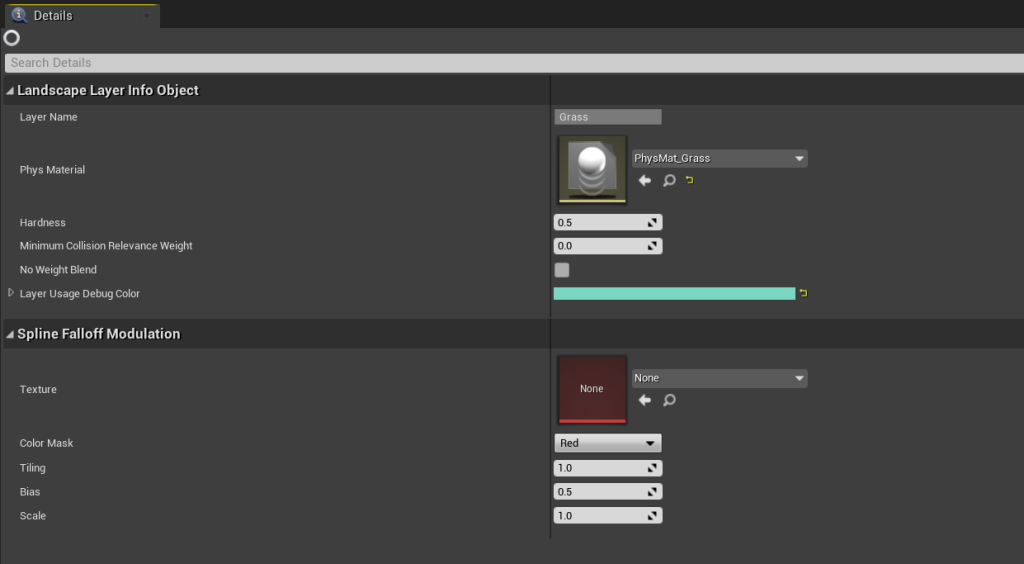
For the player to hear two different sounds on the same landscape, I had to go into the LayerInfo for both grass and dirt layers and select the corresponding physical material. That way, when the player walks on dirt, they will hear its audio track and when they walk on grass, it will switch over to the grass footsteps and vice versa.
With this out of the way, the player can now hear footsteps depending on which surface type they are walking on. The next step was to make the basement lights flicker along with adding a sound whenever they activate the flicker to add some immersion. Here is the light flicker audio track I have downloaded online.
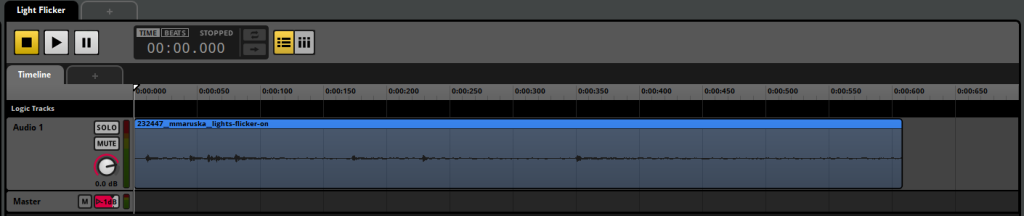
I’ve added a random modulation to the track like before and built it into Unreal. I had to add another blueprint material and added an Infinity hanging Lamp and a spot light to act as the flickering light. I made sure to adjust the attenuation and light density of the spotlight so that it’s suitable for a basement light.

I placed the blueprint at the start of the level so I wouldn’t have to traverse through the castle just to see if it worked or not.
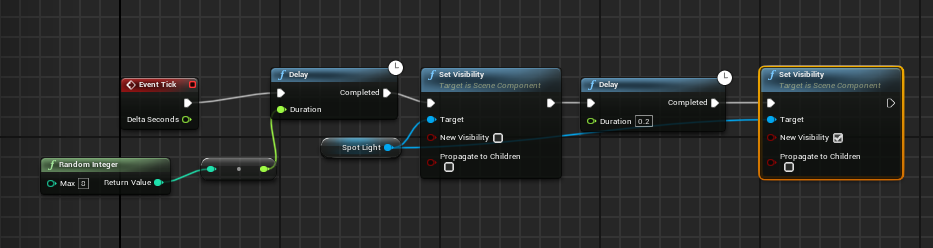
I have set up the blueprint for the flickering light in the image below.
I have also attached the FMOD sound to the blueprint whenever the light does flicker.
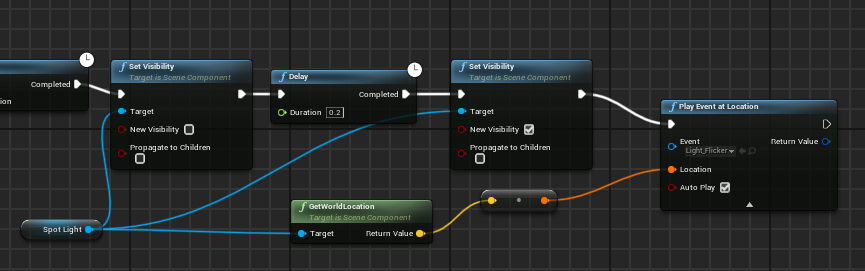
In order for me to attach that sound, I had to make this specific audio track a 3D sound, meaning it will play in one area and not the entire level.
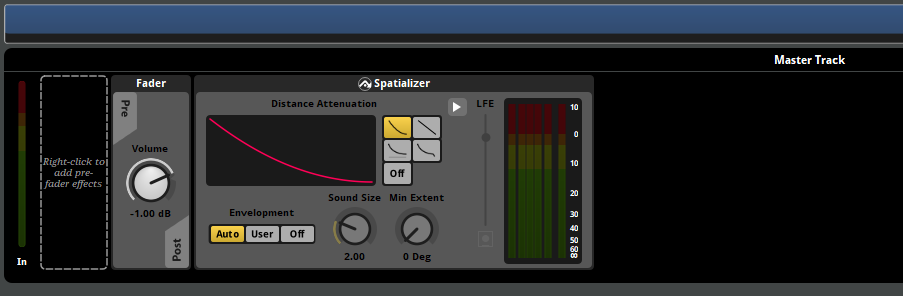
Now when I build the sound and drag it into the level, it has an attenuation radius around it, meaning that the sound can only be heard once the player is inside of it.
Once that was done, I began to place them on the ceiling of the basement area, choosing to duplicate the blueprint to add more lights that flicker.
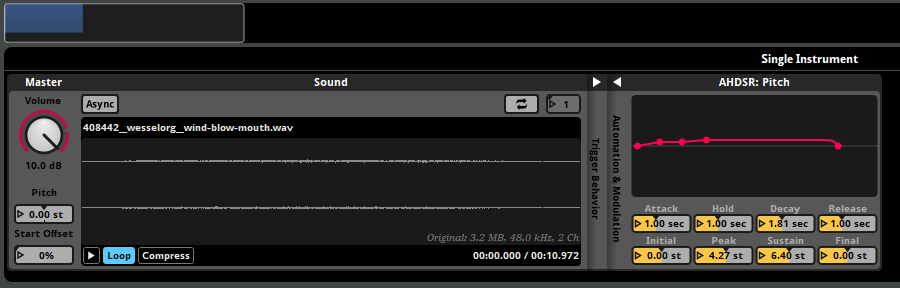
Next was another audio file that I’ve downloaded and I plan to make it so that when you walk along the hallway of the castle, you could hear a sudden rush of wind from outside.

I’ve also added an AHDSR Pitch to the sound so it doesn’t start abruptly. Instead, the sound gradually gets louder and then fades once it ends.
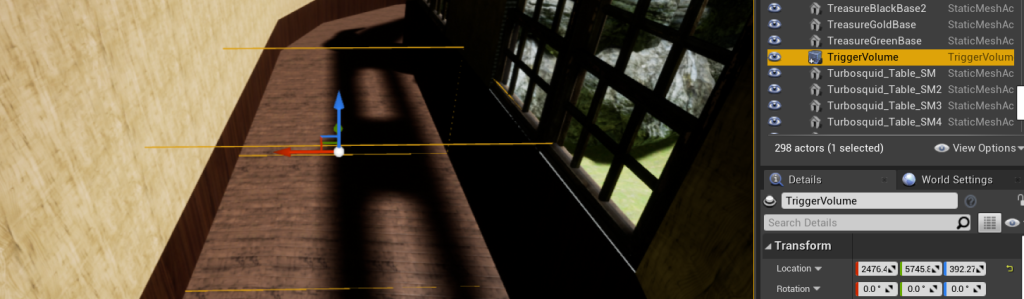
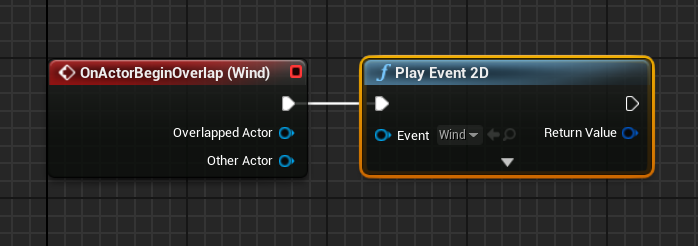
I had to create another trigger box where I want the sound to play, then I modified the blueprint and ensured that when the player collides with the box, the wind will start rushing.
I’ve downloaded a final audio track that will be triggered when the player is outside of the castle.
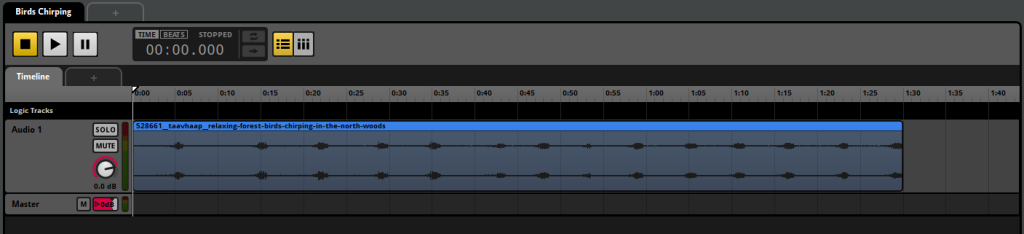
The plan is to have the birds chirping track play upon entering the level and when the player enters the castle, it stops playing and vice versa. To achieve this, I placed a trigger volume box at the entrance.

And I placed another trigger volume box at the exit too.

I also enclosed the entirety of the hut in a third trigger volume box so that the birds track stops as soon as the player enters it, and begin playing again once they are out.
I also set up the audio track inside of the blueprints so that it plays and stops as intended.
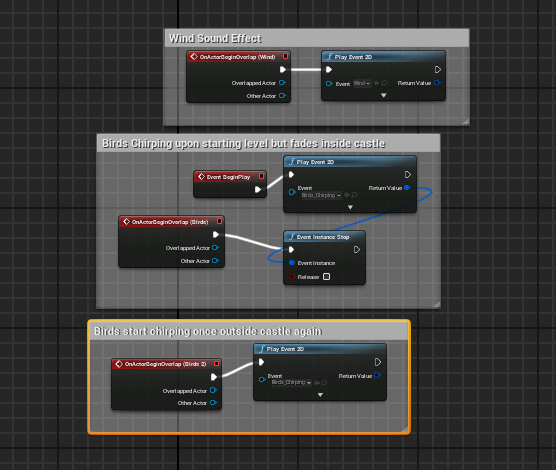
Now when the player enters the trigger box, the birds chirping sound effect will stop once inside of the castle and will start once outside.
Lighting
The last thing I need to do before post-processing the level is fix the lighting inside of the castle and hut specifically. Adam Bennet (3rd Year) playtested the level and he stated that the lighting needed fixing, so the first thing I needed to do was add some Infinity lamps and place some point lights inside of them so that they appear that they are switched on.
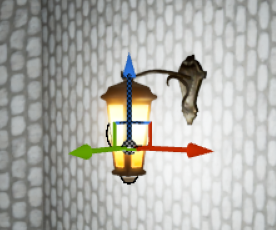
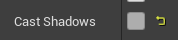
I disabled Cast Shadows to eliminate the shadows of the lamp illuminating on the wall.
I have placed these lamps throughout the level, acting as a light source for the player to navigate the castle through.
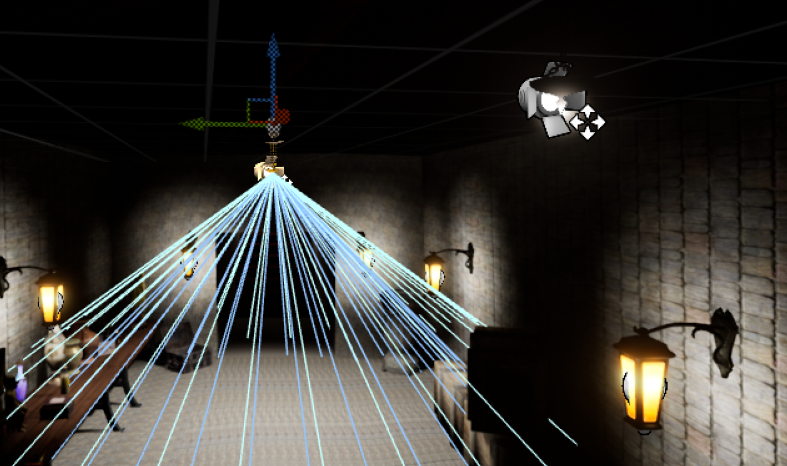
I also placed a rect light infront of the windows so that it looks like light is illuminating into the building.
I’ve added another hanging light, this time in the hallway before the shortcut to light up the area more in addition to the lamps around the room.
To check that my lighting build will be reduced, I navigated to Lit > Optimization Viewmodes > Lightmap Density and went around the level to change any red coloured assets to either green or blue. This is achieved by lowering the lightmass resolution in the meshes’ settings.
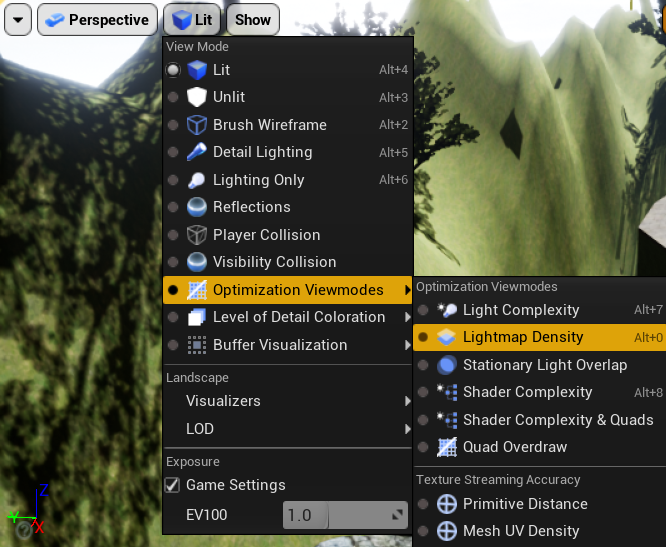
You can see the red colour from some of the Ancient Treasures assets here that I had to revert to a comfortable level so that not alot of light can interact with them so much so that my performance hinders.
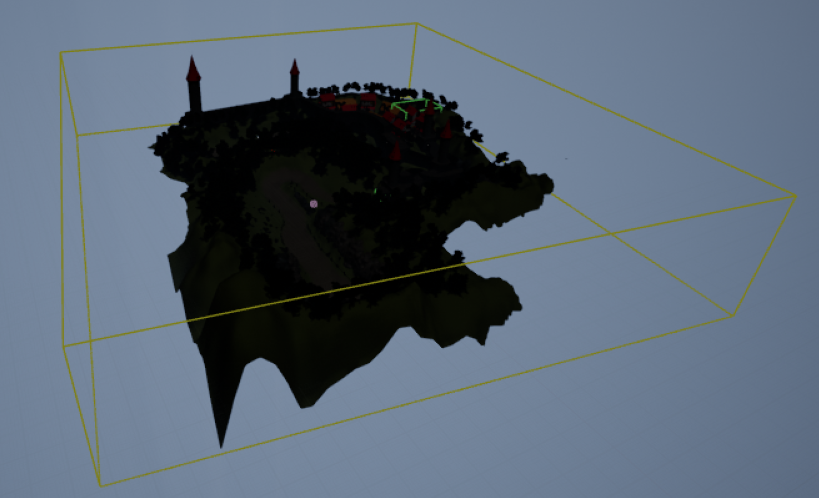
I’ve also dragged a Lightmass Importance Volume and made it so that it has the entire level encased in it. This will only bake the lighting that is needed, which is inside of the castle most of the time.
Post-Process
The last thing before building and packaging the game was to include a post-process volume to finalize the overall look of the level. I placed a post-processing volume into the scene and enabled the Infinite Extent option so that it affects the entire level and not just one area.

I decreased the exposure of the level a little bit to make the scene more dark and moody to give off a creepy vibe to the castle and its surroundings.
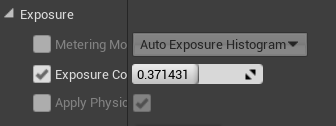
You can see the results here, though it is faint to see, but it’s there.

Packaging
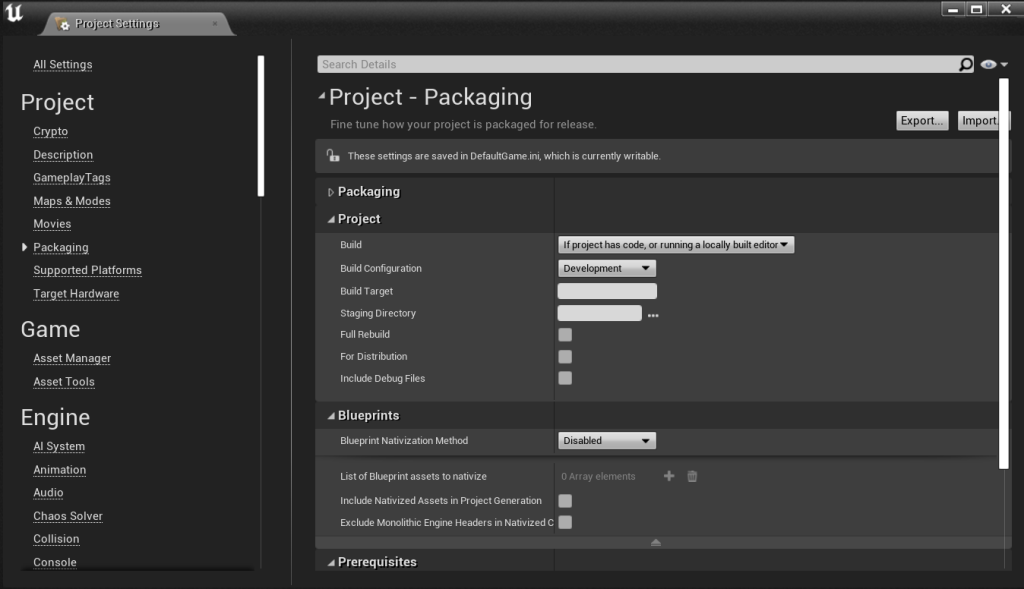
It was time for me to start building everything and package the game to a supported platform built within the engine. There were a number of things I needed to do in order to successfully package the game. I jumped into the packaging settings under project settings and ensured to select ‘If project has code, or running a locally built editor and set the build configuration to Shipping since it’s a finished game.
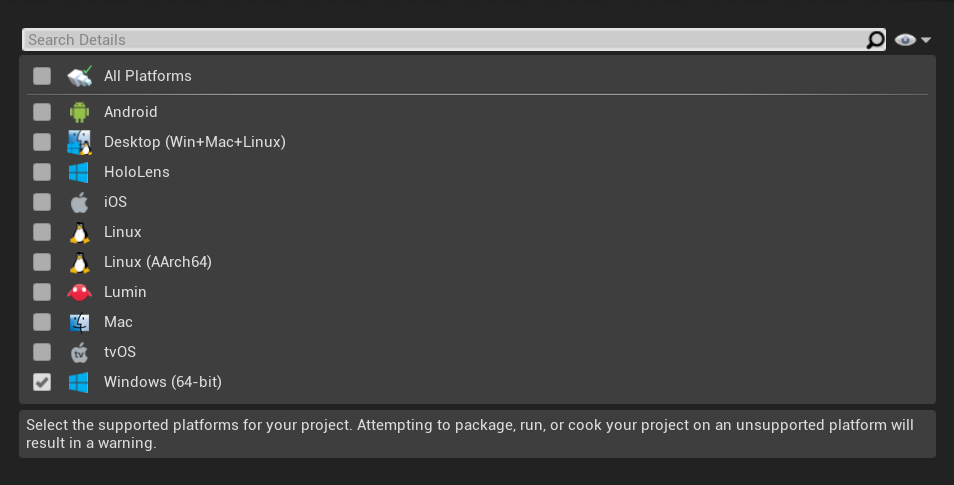
I also made sure that all platforms were checked. This image was made before I checked ‘All Platforms’, but I knew I wanted to run the level on Windows 64-bit.
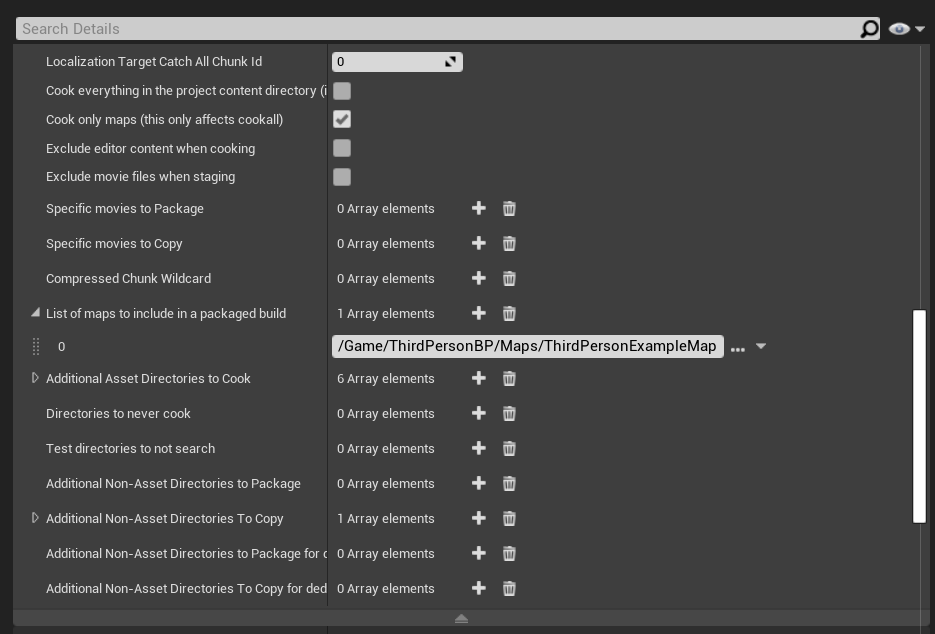
I reverted to the packaging settings and made sure Cook Only Maps was checked, and then I also made sure that the level map was to be the map that loads when the application is open. The same thing applied to the Maps & Modes tab too.
Once all of those settings were changed, I went ahead and built everything from the lighting to the textures. The whole process took me quite a while, which also included packaging the finished game.
Box Storage
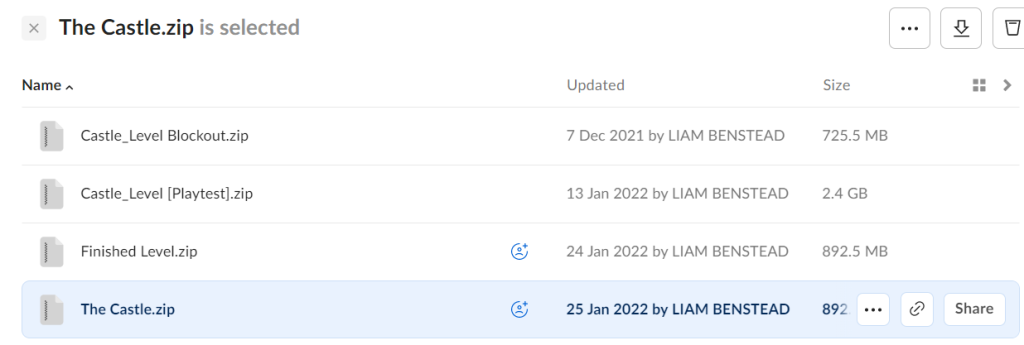
Since I was using one of the newer versions of Unreal Engine (4.27) that doesn’t have the built-in HTML5 support available, I had to package the game to Windows and upload it to Box for submission and share it to the lecturers plus any playtesters who contributed to the development of the level. The highlighted zip file is the finished game.
There is, however a caveat that is pretty easy to work around when doing this. Upon downloading the file and trying to play it, a message will pop up saying the the file is blocked.
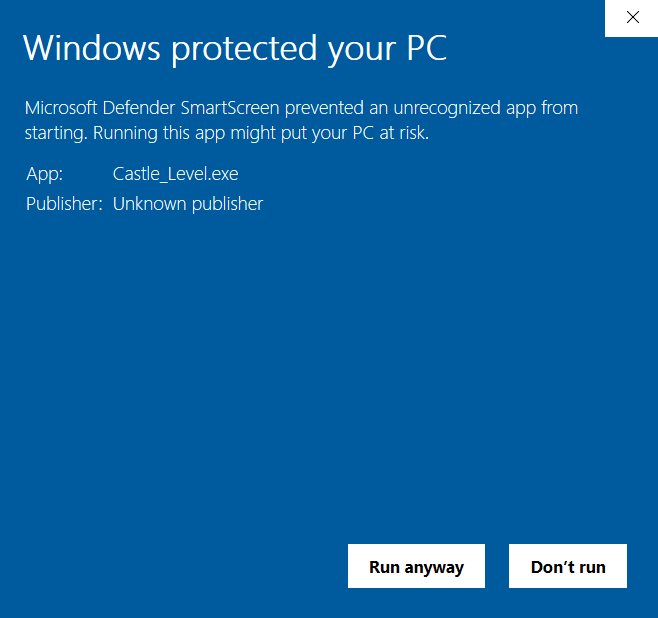
To get around this issue temporarily unless the zip file is extracted again, I right clicked on the game application and went into the Properties. From there, I scanned around the General tab until I found a unchecked box called ‘Unblock’. Checking that box will fix the issue.
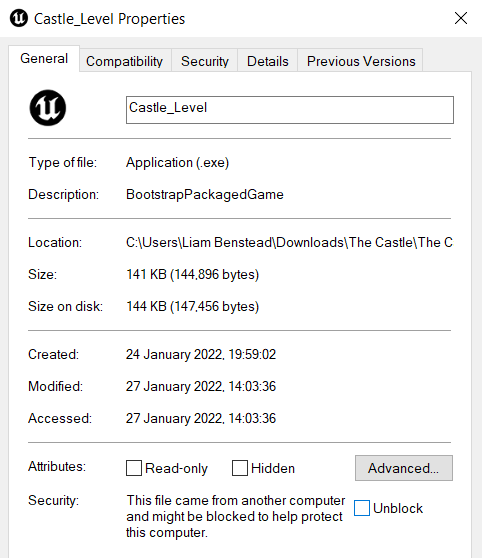
When I attempt to open the application again after doing this, the message will disappear and a separate window will open, containing the level.
Evaluation
Overall, I did a pretty good job at making this level. Some of the features worked, like the light flickering and the audio sounds. However, not everything went as planned, and if I had to chance to do it again, I would add some custom texture materials since all of them came from the starter content, and add in some more blueprints instead of the ones involving the doors and the light aforementioned light flicker. I would also try to smooth out the landscape a bit better. But aside from those glaring issues, the level was great for me to create.
References:
alegemaate (2014) Walk Dirt [Downloaded] Available online: https://freesound.org/people/alegemaate/sounds/231853/ [Accessed 13th January 2022]
Aspland, M. (2020a) Dynamic Footstep System | Different Sounds On Different Surfaces – Unreal Engine 4 Tutorial [Video] Available online: https://www.youtube.com/watch?v=1TTey8wUUvU [Accessed 13th January 2021]
Aspland, M. (2020b) How To Create A Randomly Flickering/Flashing Light (Horror) – Unreal Engine 4 Tutorial [Video] Available online: https://www.youtube.com/watch?v=EHYD2dWtWN0 [Accessed 17th January 2022]
Aspland, M. (2020c) How To Open A Door Using A Button – Unreal Engine 4 Tutorial [Video] Available online: https://www.youtube.com/watch?v=PvnSBaYPhyM&t=533s [Accessed 15th January 2022]
Aspland, M. (2020d) Packaging And Exporting Your Game – Unreal Engine 4 Tutorial [Video] Available online: https://www.youtube.com/watch?v=MatkFIvCKMY [Accessed 15th January 2022]
Aspland, M. (2021a) How To Open A Locked Door With A Key – Unreal Engine 4 Tutorial [Video] Available online: https://www.youtube.com/watch?v=29–ieorX7Q&t=407s [Accessed 14th January 2021]
Aspland, M. (2021b) Landscape Physics Materials | Multiple Physics Materials On A Landscape – Unreal Engine 4 Tutorial [Video] Available online: https://www.youtube.com/watch?v=ZlsjPPakXho [Accessed 13th January 2022]
Autodesk Inc (2022) Reverse polygon normals. Available online: https://knowledge.autodesk.com/support/maya/learn-explore/caas/CloudHelp/cloudhelp/2022/ENU/Maya-Modeling/files/GUID-17593923-D94D-4A8D-AE09-FA4E98FEA197-htm.html [Accessed 10th January 2022]
Barclay, M (2016). My Level Design Guidelines. Available online: http://www.mikebarclay.co.uk/my-level-design-guidelines/ [Accessed 25th January 2022]
Bethesda Softworks (2016) The Elder Scrolls V: Skyrim Special Edition [Video Game] Available online: https://store.steampowered.com/app/489830/The_Elder_Scrolls_V_Skyrim_Special_Edition/ [Accessed 21st January 2022]
Blizzard Entertainment (2016) Overwatch [Video Game] Blizzard Entertainment.
Calcorso (2015) How to: Apply multiple materials to a single object – UE4 – 3DS Max [Video] Available online: https://www.youtube.com/watch?v=0yZAQMMDR8A [Accessed 12th January 2022]
CodeLikeMe (2020) Unreal Static Mesh Collision Editing – UE4 Tutorials #364 [Video] Available online: https://www.youtube.com/watch?v=H0lrfhYrDAM [Accessed 10th January 2022]
coolwallpapers.me (2022) Image ID: 3095135 / alone, autumn mood forest, cold, countryside, dawn, early morning, environment, fall, fog, foggy, forest, forest path, frost, hike, landscape, light, man, mist, mood, morning, nature, nature photography, nature trail, 4k wallpaper. Available online: https://coolwallpapers.me/3095135-alone_autumn-mood-forest_cold_countryside_dawn_early-morning_environment_fall_fog_foggy_forest_fores.html [Accessed 20th January 2022]
Cox, L. (n.d) LOOK UP: STONE BARN ROOF. Farmland Museum and Denny Abbey. Available online: https://www.dennyfarmlandmuseum.org.uk/content/museum-blog/stone-barn-roof [Accessed 23rd January 2022]
Depositphotos, Inc (2022) Medieval castle dungeon with a prison cell and torture rack table. 3D illustration. — Photo. Available online: https://depositphotos.com/482374378/stock-photo-medieval-castle-dungeon-prison-cell.html [Accessed 26th January 2022]
dkiller2204 (2016) Indoor Footsteps.wav [Downloaded] Available online: https://freesound.org/people/dkiller2204/sounds/366111/ [Accessed 11th January 2022]
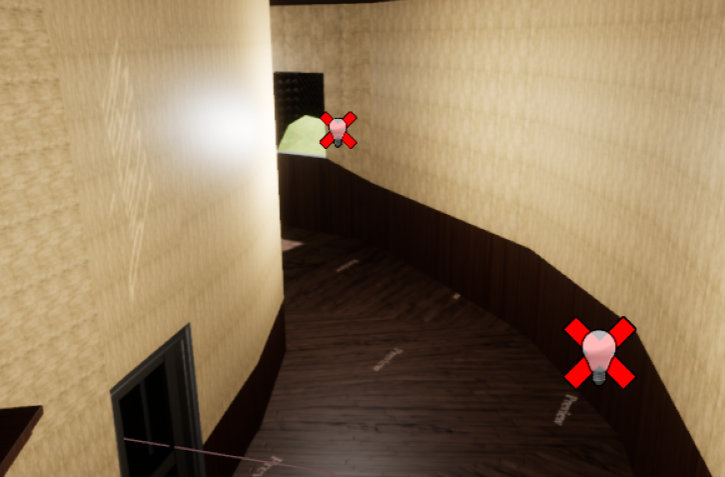
Dreamstime (2022) Long corridor with wooden floor at old castle. Available online: https://www.dreamstime.com/stock-photo-long-corridor-wooden-floor-old-castle-ancient-image51463900 [Accessed 12th January 2022]
Envato Pty Ltd. (2022) Medieval Castle Door. Available online: https://3docean.net/item/medieval-castle-door/25169668 [Accessed 13th January 2022]
Epic Games, Inc (2022a) Ancient Treasures [Asset Pack] Available online: https://www.unrealengine.com/marketplace/en-US/product/9efde82ef29746fcbb2cb0e45e714f43 [Accessed 1st January 2022]
Epic Games, Inc (2022b) Good Sky [Asset Pack] Available online: https://unrealengine.com/marketplace/en-US/product/good-sky [Accessed 17th January 2022]
Epic Games, Inc (2022c) Infinity Blade: Props [Asset Pack] Available online: https://unrealengine.com/marketplace/en-US/product/infinity-blade-props [Accessed 16th January 2022]
Epic Games, Inc (2022d) Landscape Pro 2.0 Auto-Generated Material [Asset Pack] Available online: https://www.unrealengine.com/marketplace/en-US/product/landscape-pro-auto-generated-material [Accessed 17th January 2022]
Epic Games, Inc (2022e) Lightmass Basics. Available online: https://docs.unrealengine.com/4.27/en-US/RenderingAndGraphics/Lightmass/Basics/ [Accessed 2oth January 2022]
Faucher, W. (2021a) Tips for Sky Atmosphere & Fog – Unreal Engine 5 (& UE4) [Video] Available online: https://www.youtube.com/watch?v=SbxO-Z5rzwk [Accessed 20th January 2022]
Faucher, W. (2021b) “Why are my lightmass builds so slow?” [Two Minute Tuesdays] [Video] Available online: https://www.youtube.com/watch?v=LfYghHUrtUw [Accessed 16th January 2022]
FMODTV (2012) FMOD Studio Tutorial 03 – Multitrack Introduction [Video] Available online: https://www.youtube.com/watch?v=JKW7Tzlh74w&t=183s [Accessed 13th January 2022]
FMODTV (2013) FMOD Studio Tutorial 05 – The 3D Panner [Video] Available online: https://www.youtube.com/watch?v=CJ3rpZGrHh0&t=373s [Accessed 26th January 2022]
Game Audio Guru (2018) UE4 + FMOD Switching Ambient Audio Using Trigger Volumes [Video] Available online: https://www.youtube.com/watch?v=uxCuh74oiCI [Accessed 17th January 2022]
Game Dev Academy (2017) #11 How to change the Color of Materials in Unreal Engine 4 | Unreal Engine 4 Tutorial for Beginners [Video] Available online: https://www.youtube.com/watch?v=JEazlsJFWb0 [Accessed 13th January 2022]
Hugefatman (2021) UE4: Permanently Change Pivots/Pivots in General #2 – Fast [Video] Available online: https://www.youtube.com/watch?v=5WfWAi1AliA&t=70s [Accessed 14th January 2022]
JanKoehl (2009) walk-grass.wav [Downloaded] Available online: https://freesound.org/people/JanKoehl/sounds/85603/ [Accessed 13th January 2022]
mmaruska (2014) Lights Flicker On.wav [Downloaded] Available online: https://freesound.org/people/mmaruska/sounds/232447/ [Accessed 17th January 2022]
Naivrat (2016) Light source inside a object? UE4AnswerHub. 6 January. Available online: https://answers.unrealengine.com/questions/355836/view.html [Accessed 18th January 2022]
Nintendo EAD (2001) Luigi’s Mansion [Video Game] Nintendo.
Nitrogen (2020) Post Processing in Unreal Engine 4 | UE4 Tutorial (2020) [Video] Available online: https://www.youtube.com/watch?v=kU6D-goGk-o&t=488s [Accessed 20th January 2022]
Noclip (n.d.) Available online: https://noclip.website/# [Accessed 24th January 2022]
Palaces&Castles from Romania (2018) Peles Castle – corridor [Photograph] Available online: https://www.flickr.com/photos/charadesparty/29975345817 [Accessed 13th January 2022]
QUANDINI ᑺєѕιgດѕ (2016) How To Make Holes In Terrain (terrain visibility Tool)┊Unreal Engine 4 [Video] Available online: https://www.youtube.com/watch?v=b0F6iEiokGg [Accessed 11th January 2022]
Rare (2002) Star Fox Adventures [Video Game] Nintendo.
Ryan Manning (2019) UE4 Lighting Types [Video] Available online: https://www.youtube.com/watch?v=2UowdJetXwA [Accessed 18th January 2022]
SadowickProduction (2020) FMOD Studio + Unreal Engine – Integration Guide [Video] Available online: https://www.youtube.com/watch?v=Co_b_dDsPPA&t=805s [Accessed 13th January 2022]
Sir_Fansi Gamedev (2021) How to change Sky in Unreal engine (in 4 minutes) [Video] Available online: https://www.youtube.com/watch?v=dL08XUunLKQ&t=159s [Accessed 11th January 2022]
Sketchfab (2022a) castle_tower_04 [3D Model] Available online: https://sketchfab.com/3d-models/castle-tower-04-5eda67ac2b1b4a728d658ef6fc0738cf [Accessed 18th January 2022]
Sketchfab (2022b) Wooden window_HP [3D Model] Available online: https://sketchfab.com/3d-models/wooden-window-hp-7471a59100e34e379c3c7be825b7fa8e [Accessed 15th January 2022]
Smith, K. (2018) Dark Palace Hallway with lit candles and moonlight shining through the windows, 3d render. stock photo [Photograph] Available online: https://www.istockphoto.com/photo/dark-palace-hallway-with-lit-candles-and-moonlight-shining-through-the-windows-3d-gm989972830-268350145 [Accessed 12th January 2022]
soundmary (2011) footsteps on stone patio 1.wav [Downloaded] Available online: https://freesound.org/people/soundmary/sounds/117628/ [Accessed 13th January 2022]
taavhaap (2020) Relaxing Forest Birds Chirping in the North Woods [Downloaded] Available online: https://freesound.org/people/taavhaap/sounds/528661/ [Accessed 19th January 2021]
Taylor, M. (2017) Unreal Engine 4 – Quick! How To: Scale Materials [Video] Available online: https://www.youtube.com/watch?v=DXK1pdvBUAM&t=81s [Accessed 12th January 2022]
The Windows Club (2022) Microsoft Defender SmartScreen prevented an unrecognized app from starting. Available online: https://www.thewindowsclub.com/microsoft-defender-smartscreen-prevented-an-unrecognized-app-from-starting [Accessed 26th January 2022]
Totten, C. W. (2014) An Architectural Approach to Level Design, 2nd Edition. Boca Raton: Taylor & Francis, CRC Press
Turbosquid (2022a) 3D Lowpoly Medieval Houses Pack model [Asset Pack] Available online: https://www.turbosquid.com/3d-models/3d-selection-medieval-houses-model-1217951 [Accessed 17th January 2022]
TurboSquid (2022b) 3D model Key and Keychain [3D Model] Available online: https://www.turbosquid.com/3d-models/3d-model-keys-keychain-1377555 [Accessed 12th January 2022]
TurboSquid (2022c) 3D Old Table model [3D Model] Available online: https://www.turbosquid.com/3d-models/3d-old-table-model-1720800 [Accessed 12th January 2022]
Turbosquid (2022d) Dream LG1 3D model [3D Model] Available online: https://www.turbosquid.com/3d-models/dream-lg1-3d-model-1834481# [Accessed 18th January 2022]
TurboSquid (2022e) Medieval Wooden Fence [3D Model] Available online: https://www.turbosquid.com/3d-models/medieval-wooden-fence-3ds-free/993091 [Accessed 12th January 2022]
TurboSquid (2022f) Lowpoly Medieval door 3D model [3D Model] Available online: https://www.turbosquid.com/3d-models/medieval-door-3d-model-1207184 [Accessed 14th January 2022]
Vart, G (2019) Unreal Engine | Combine Static Meshes [Video] Available online: https://www.youtube.com/watch?v=EJOhFhNqRTA [Accessed 10th January 2022]
Wesselorg (2017) Wind blow, mouth.wav [Downloaded] Available online: https://freesound.org/people/Wesselorg/sounds/408442/ [Accessed 17th January 2022]
WorldofLevelDesign (2016) Maya LT/Maya Beginner Tutorial 6/13: Snap to Grid, Edges, Vertices & Modify Pivot Points [Video] Available online: https://www.youtube.com/watch?v=WyYbYHdJAUk&t=132s [Accessed 9th Janurary 2022]